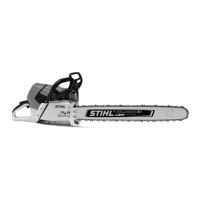

Do you have a question about the Stihl MS 661 C-M and is the answer not in the manual?
| Idle speed | - RPM |
|---|---|
| Motor type | 2-stroke motor |
| Chain pitch | 3/8 \ |
| Blade length | 800 mm |
| Product color | Black, Grey, Orange |
| Automatic oiling | Yes |
| Engine displacement | 91.1 cm³ |
| Power source | Gasoline |
| Sound power level | 118 dB |
| Vibration emission | 6.9 m/s² |
| Sound pressure level | 105 dB |
| Weight | 7400 g |
|---|
Provides an overview of the service manual and guidance on its use for repair and servicing procedures.
Details essential safety regulations and precautions for performing maintenance and repair work on the equipment.
Lists key engine specifications including displacement, bore, stroke, power output, and maximum permissible speed.
Specifies leakage test pressures and requirements for the fuel system components.
Details ignition system specifications like air gap, spark plug type, and electrode gap.
Outlines the chain lubrication system and specifies oil delivery rates at different RPMs.
Provides a list of fasteners with their specified torque values for various components.
Troubleshooting guide for common clutch issues such as stopping under load or chain running at idle.
Troubleshooting steps for issues related to the chain drive, chain brake, and chain tensioner.
Troubleshooting guide for problems with the chain oil supply system.
Troubleshooting common issues with the rewind starter rope, spring, and mechanism.
Troubleshooting guide for ignition system faults like rough running, misfires, or irregular spark.
Troubleshooting common carburetor problems, including flooding, poor acceleration, and stalling.
Troubleshooting guide for engine starting difficulties, power loss, erratic running, and overheating.
Instructions for removing, installing, and inspecting the clutch drum for signs of wear.
Detailed procedure for disassembling and assembling the clutch assembly, including spring removal.
Procedure for checking the chain brake's safety function and braking time.
Steps for removing and installing the chain brake band, including inspection for wear.
Procedure for removing and installing the brake lever mechanism and associated parts.
Details on removing, installing, checking, and replacing the cam lever.
Instructions for inspecting and replacing anchor and pivot pins, ensuring square driving.
Procedure for removing and installing the chain tensioner assembly.
Instructions for removing and installing bar mounting studs using special tools.
Procedure for replacing collar nuts on the sprocket cover using special tools.
Instructions for removing, inspecting, and installing the muffler assembly.
Procedure for performing vacuum and pressure tests to detect engine leaks.
Steps required to prepare the engine for performing leakage tests.
Detailed instructions for conducting the engine vacuum test.
Detailed instructions for conducting the engine pressure test.
General information on replacing engine oil seals without full disassembly.
Procedure for replacing the oil seal on the ignition side of the engine crankshaft.
Procedure for replacing the oil seal on the clutch side of the engine crankshaft.
Instructions for removing and installing the engine shroud.
Procedure for removing and installing the engine cylinder.
Procedure for removing and installing the crankshaft assembly, including bearings.
Information on replacing crankcase halves and associated bearings.
Procedure for removing and installing the engine piston.
Instructions for removing, cleaning grooves, and installing piston rings.
Procedure for removing, checking, and installing the decompression valve.
Notes on fixed ignition timing and its immutability during repair procedures.
Description of ignition module and control unit components and their basic testing.
Procedure for removing and installing the ignition module or control unit.
Instructions for testing the ignition module using a spark test.
Guidance on performing spark tests using ZAT 4 and ZAT 3 ignition testers.
Procedure for removing and installing the spark plug boot and ignition lead.
Instructions for removing, inspecting, and installing the flywheel.
Tests for checking wiring harness continuity and resistance between components.
Procedure for removing and installing the short circuit wire on non-M-Tronic models.
Procedure for removing and installing the short circuit wire on M-Tronic models.
Procedure for removing and installing the short circuit wire on M-Tronic models with heating.
Instructions for removing and installing the contact spring assembly.
Troubleshooting flowchart for diagnosing common ignition system faults.
Procedure for calibrating the M-Tronic control unit after replacement or speed issues.
Instructions for testing the M-Tronic system using the STIHL MDG 1 analyzer.
General procedures for testing the M-Tronic system components.
Information on the M-Tronic and short circuit wire harness.
Procedure for testing and replacing the switch unit.
Procedure for removing, installing, and calibrating the solenoid valve.
Troubleshooting flowchart for diagnosing M-Tronic system faults.
General notes on rewind starter operation, stiffness, and troubleshooting.
Procedure for removing and installing the rewind starter assembly.
Instructions for removing, installing, and checking the rewind starter pawls.
Procedure for relieving spring tension and working with the rope rotor.
Instructions for replacing the starter rope and grip.
Procedure for correctly tensioning the rewind spring.
Instructions for replacing the rewind spring.
Procedure for removing and installing the segment within the rewind starter.
Procedure for removing and installing the stop buffer on the clutch side.
Procedure for removing and installing antivibration elements on the oil tank and tank housing.
Instructions for removing and installing the AV element on the fuel tank.
Procedure for removing and installing AV elements on the handlebar.
Procedure for removing and installing the stop buffer on the ignition side.
Instructions for removing and installing the handlebar.
Procedure for disconnecting electrical wires for heating system on wrap-around handlebars.
Procedure for removing and installing the switch shaft.
Procedure for removing and installing the throttle trigger and lockout lever.
Instructions for removing and installing the throttle rod.
Procedure for removing and installing the choke rod.
Instructions for removing and installing the oil pickup body.
Procedure for removing and installing the oil suction hose.
Instructions for removing and installing the oil pump assembly.
Guidance on adjusting oil pumps for increased oil flow rates.
Procedure for removing and installing the internal tank pressure equalization valve.
Instructions for removing, checking, cleaning, and installing the air filter.
Procedure for removing and installing the baffle.
Instructions for removing and installing the filter base.
Procedure for removing and installing the carburetor.
Procedure for testing the carburetor for leaks using a pressure gauge.
General guidelines and steps for servicing the carburetor.
Steps for disassembling and cleaning the carburetor.
Instructions for assembling the carburetor after servicing.
Procedure for separating and checking the metering diaphragm and gasket.
Procedure for removing, checking, and installing the inlet needle.
Procedure for separating and checking the pump diaphragm and gasket.
Instructions for removing and installing the lever on the throttle shaft.
Procedure for removing and installing the lever on the choke shaft.
Instructions for removing and installing the lever and switch unit on M-Tronic models.
Notes on M-Tronic carburetor adjustment; manual adjustments are not necessary or possible.
Procedure for adjusting the carburetor on models without M-Tronic.
General guidance on carburetor adjustment procedures.
Procedure for performing the basic setting of the carburetor after replacement or cleaning.
Steps for adjusting engine speeds using a tachometer or analyzer.
Procedure for standard carburetor setting with and without limiter caps.
Instructions for removing and installing the intake manifold.
Procedure for removing and installing the impulse hose.
Procedure for testing and replacing the tank vent.
Information on fuel intake system components.
Instructions for removing and installing the fuel pickup body.
Procedure for removing and installing the fuel suction hose in the tank housing.
Instructions for removing and installing the fuel suction hose on the carburetor.
Procedure for removing and installing the fuel tank housing.
Information and testing procedures for the carburetor heating system.
Flowchart for troubleshooting carburetor heating system issues.
Troubleshooting information for handle and carburetor heating systems.
Procedure for removing, installing, and testing the heater switch.
Information and testing for the heating element in the rear handle.
Information and testing for the heating element in the handlebar.
Procedure for removing and installing the generator.
Table of test connections and expected values for heating system components.
Information on connecting wires for heating elements.
Procedure for connecting wires between rear handle and handlebar heating elements.
Procedure for connecting wires between rear handle and generator.