0458-600-8221-A
21
English
12 Assembling the Sprayer
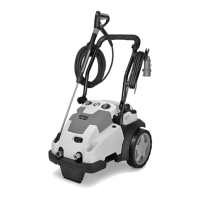
► Push the union nut (3) onto the hose (2).
► Push the hose onto the connector on the control
handle (1).
► Screw home the union nut by hand and tighten it down
firmly.
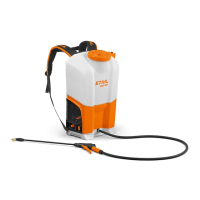
► Push the union nut (3) onto the lance (2).
► Push the lance into the spray gun (1).
► Screw home the union nut by hand and tighten it down
firmly.
12.1.2 Removing the Spray Gun and Lance
WARNING
To reduce the risk of severe injury from chemical contact,
always switch off the sprayer, remove the battery, relieve
any remaining system pressure and lock the trigger switch
before attempting to remove the spray gun or lance.
To remove the spray gun and lance:
► Switch off the sprayer, @ 14.2.
► Remove the battery, @ 13.2.
► Squeeze the trigger switch to relieve system pressure,
@ 16.2.
► Lock the trigger switch,@ 16.2.
► Unscrew the union nut.
► Pull the lance out of the spray gun.
To remove the spray gun:
► Unscrew the union nut.
► Pull the hose off the spray gun's connector.
To remove the lance:
► Unscrew the union nut.
► Pull the hose off the spray gun's connector.
12.2 Putting on and Adjusting the Sprayer
WARNING
The sprayer should be carried as a backpack with the straps
of the harness over both shoulders. To reduce the risk of
loss of control, never carry the unit with the strap(s) over one
shoulder.
WARNING
The operator must be able to remove the sprayer quickly in
the event of emergency. To reduce the risk of injury in an
emergency, remove the chest strap quickly before dropping
the sprayer to the ground.
1
2 3
0000095693_002
 Loading...