2. R emo v e wing n uts securing air cleaner co v er
to air cleaner and remo v e co v er . Clean co v er
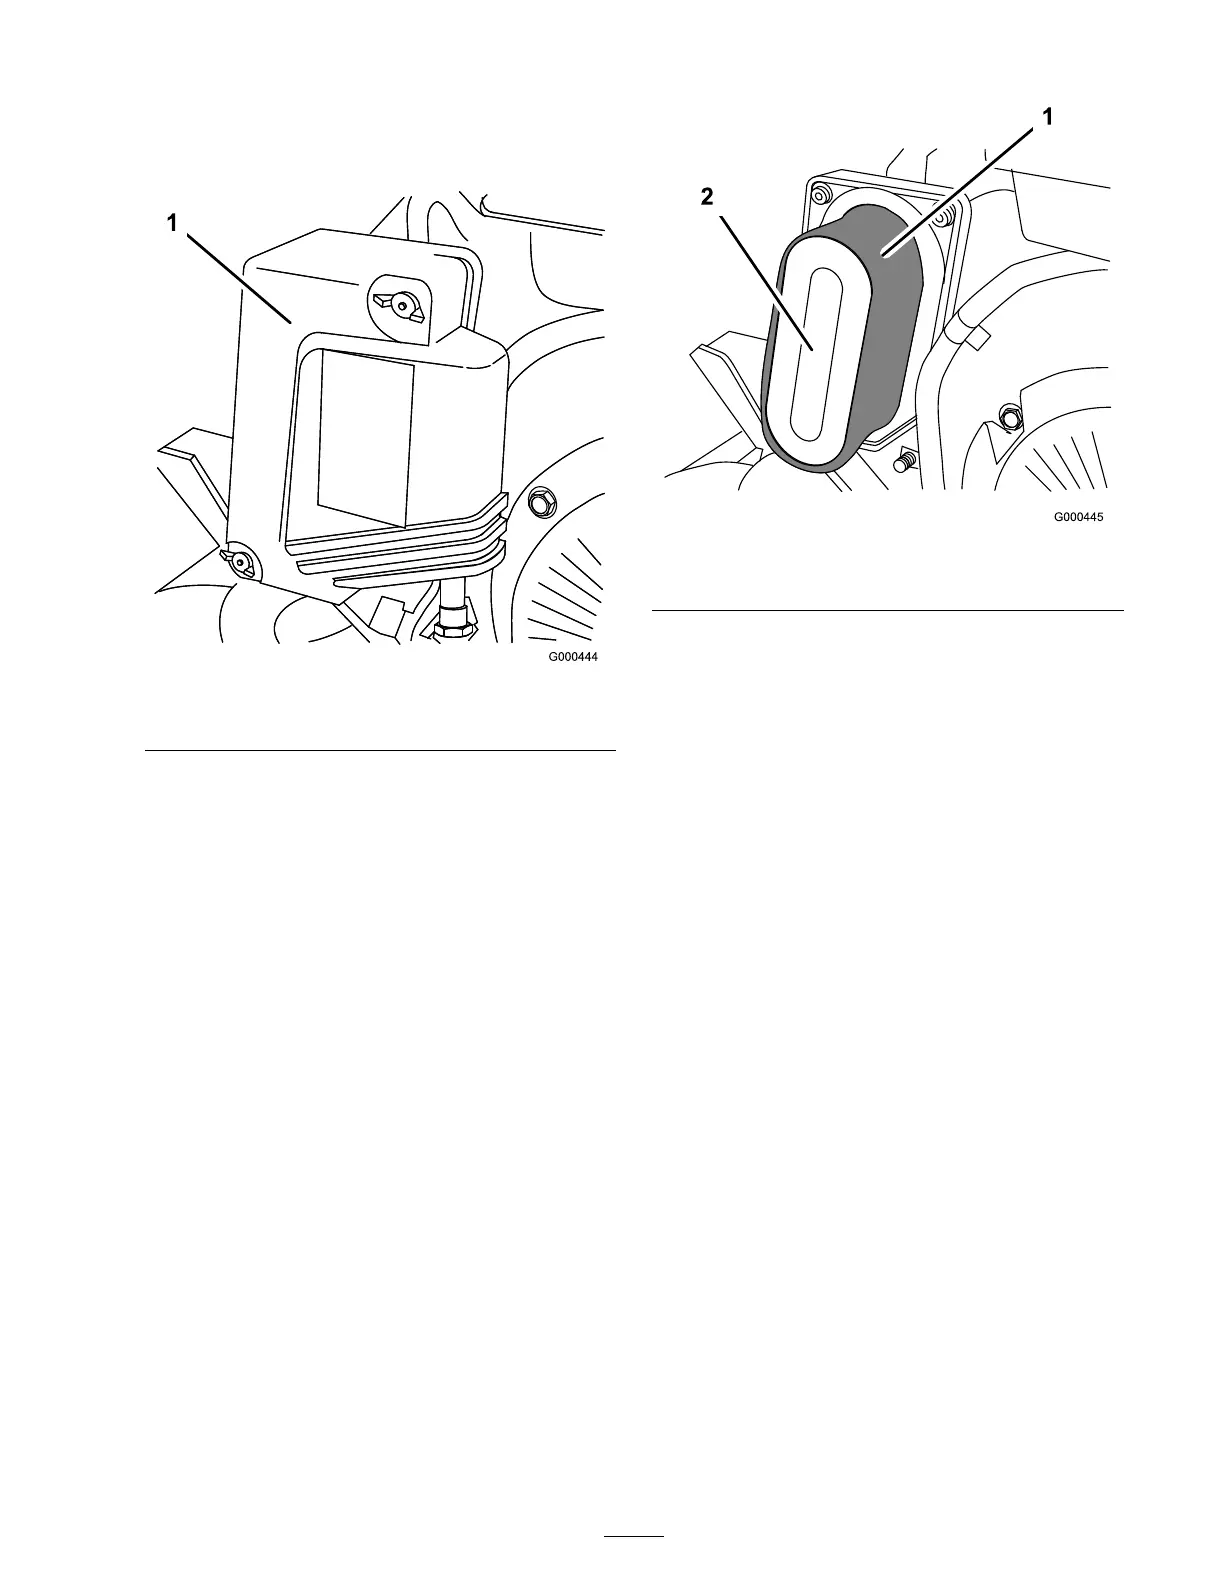
thoroughly ( Figure 23 ).
Figure 23
1. Air cleaner cover
3. If foam element is dir ty , remo v e it from paper
element ( Figure 24 ). Clean thoroughly .
A. W ash foam element in a solution of liquid
soap and w ar m w ater . Squeeze to remo v e
dir t, but do not twist because the foam ma y
tear .
B . Dr y b y wrapping in a clean rag . Squeeze
rag and foam element to dr y , but do not
twist because the foam ma y tear .
C . Saturate element with clean engine oil.
Squeeze element to remo v e ex cess oil and
to distribute oil thoroughly . An oil damp
element is desirable .
Figure 24
1. Foam element 2. Paper element
4. W hen ser vicing foam element, c hec k condition
of paper element. Clean or re place ev er y 100
hours or as required.
5. Install foam element, paper element, and air
cleaner co v er .
Important: Do not operate the engine
without the air cleaner element because
extr eme engine w ear and dama ge will
lik el y r esult.
Replacing the Spark Plug
Use an NGK BPR 5ES spark plug or equi v alent.
Cor rect air g ap is 0.028-0.032 inc h R emo v e plug
after ev er y 100 operating hours and c hec k its
condition.
1. Pull molded wire off spark plug ( Figure 25 ).
25

 Loading...


