DRIVE SYSTEM
4 - 6 Snow Commander Service Manual
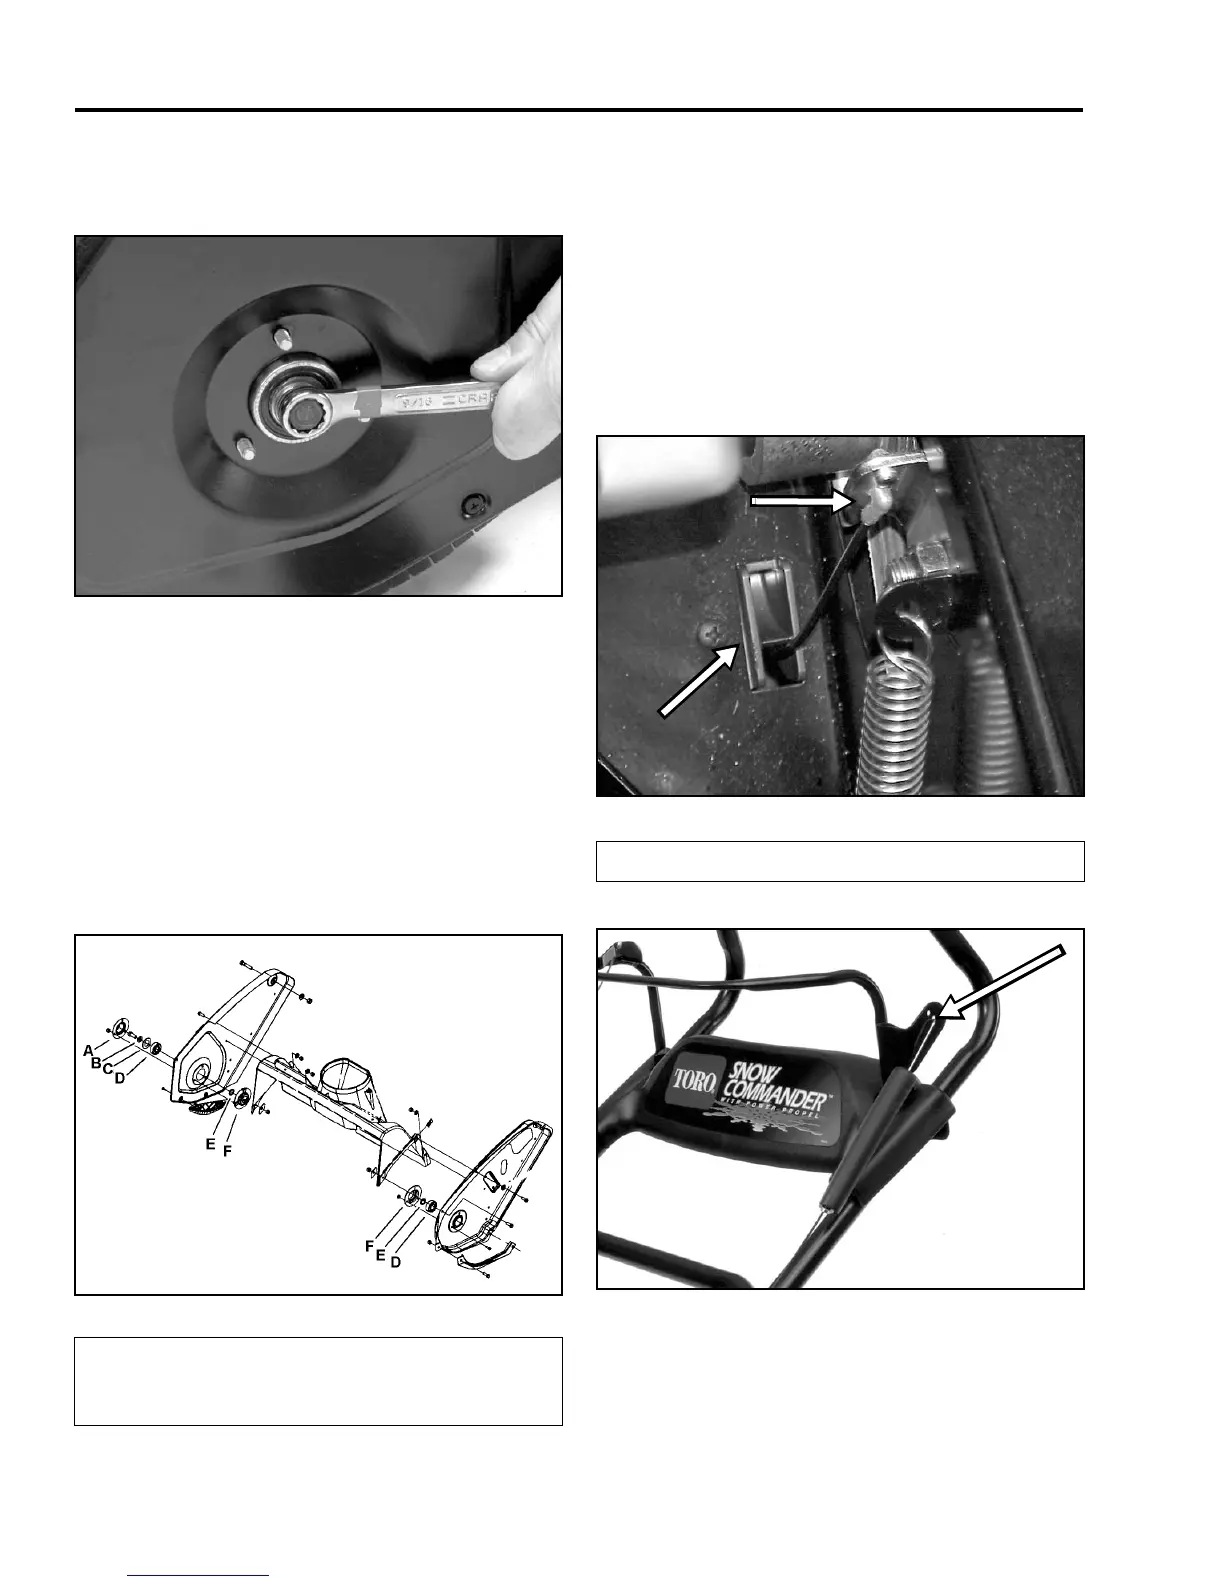
3. On the right side (opposite the belt) there is one
bolt that goes through the bearing and into the
rotor shaft. Remove this bolt (Figure 52).
Figure 52
3428-0275
4. You might now be able to work the rotor assembly
out of the chassis. It may be necessary to loosen
the bolts securing the right-hand side plate to
obtain more clearance.
5. The bearings will now slide off the rotor shaft.
Assembly
Assemble in reverse order. Note the locations of the
special thrust washers (Figure 53).
Figure 53
Rotor Cable Replacement
The first step is to remove the belt cover and upper
shroud. Unhook the end of the cable from the idler/
brake arm (Figure 54). Pull the cable down through the
opening in the side plate. Unhook the upper end from
the clutch cable adjuster (Figure 55). Reverse the
process to replace the cable. The ends of the cable are
interchangeable; there is no top or bottom end.
Replace the belt cover and adjust per the "Adjusting
the Rotor Control Cable" on page 7 - 2.
Figure 54
mvc-502
Figure 55 3428-0198
(A) Bearing Retainer
(B) Flat Washer
(C) Rubber Washer
(D) Ball Bearing
(E) Thrust Washer
(F) Bearing Flange
(A) Cable Z Bend (B) Opening
A
B
 Loading...