Issued: 01.04.11 Approved: Mod. No. 5060358 Sheet 47 of 64 Part No. 111-4431 (A)
REAR DEFLECTOR - PARTS LIST
ITEM NO. DESCRIPTION PART NO. QTY ITEM NOTE
1 DEFLECTOR ASSEMBLY - CAB KIT 111-0177 2
2 NUT M5 NYLOC 09430 8
3 WASHER PLAIN M5 09470 16
4 SETSCREW M5*16 ZDH1E016U 8
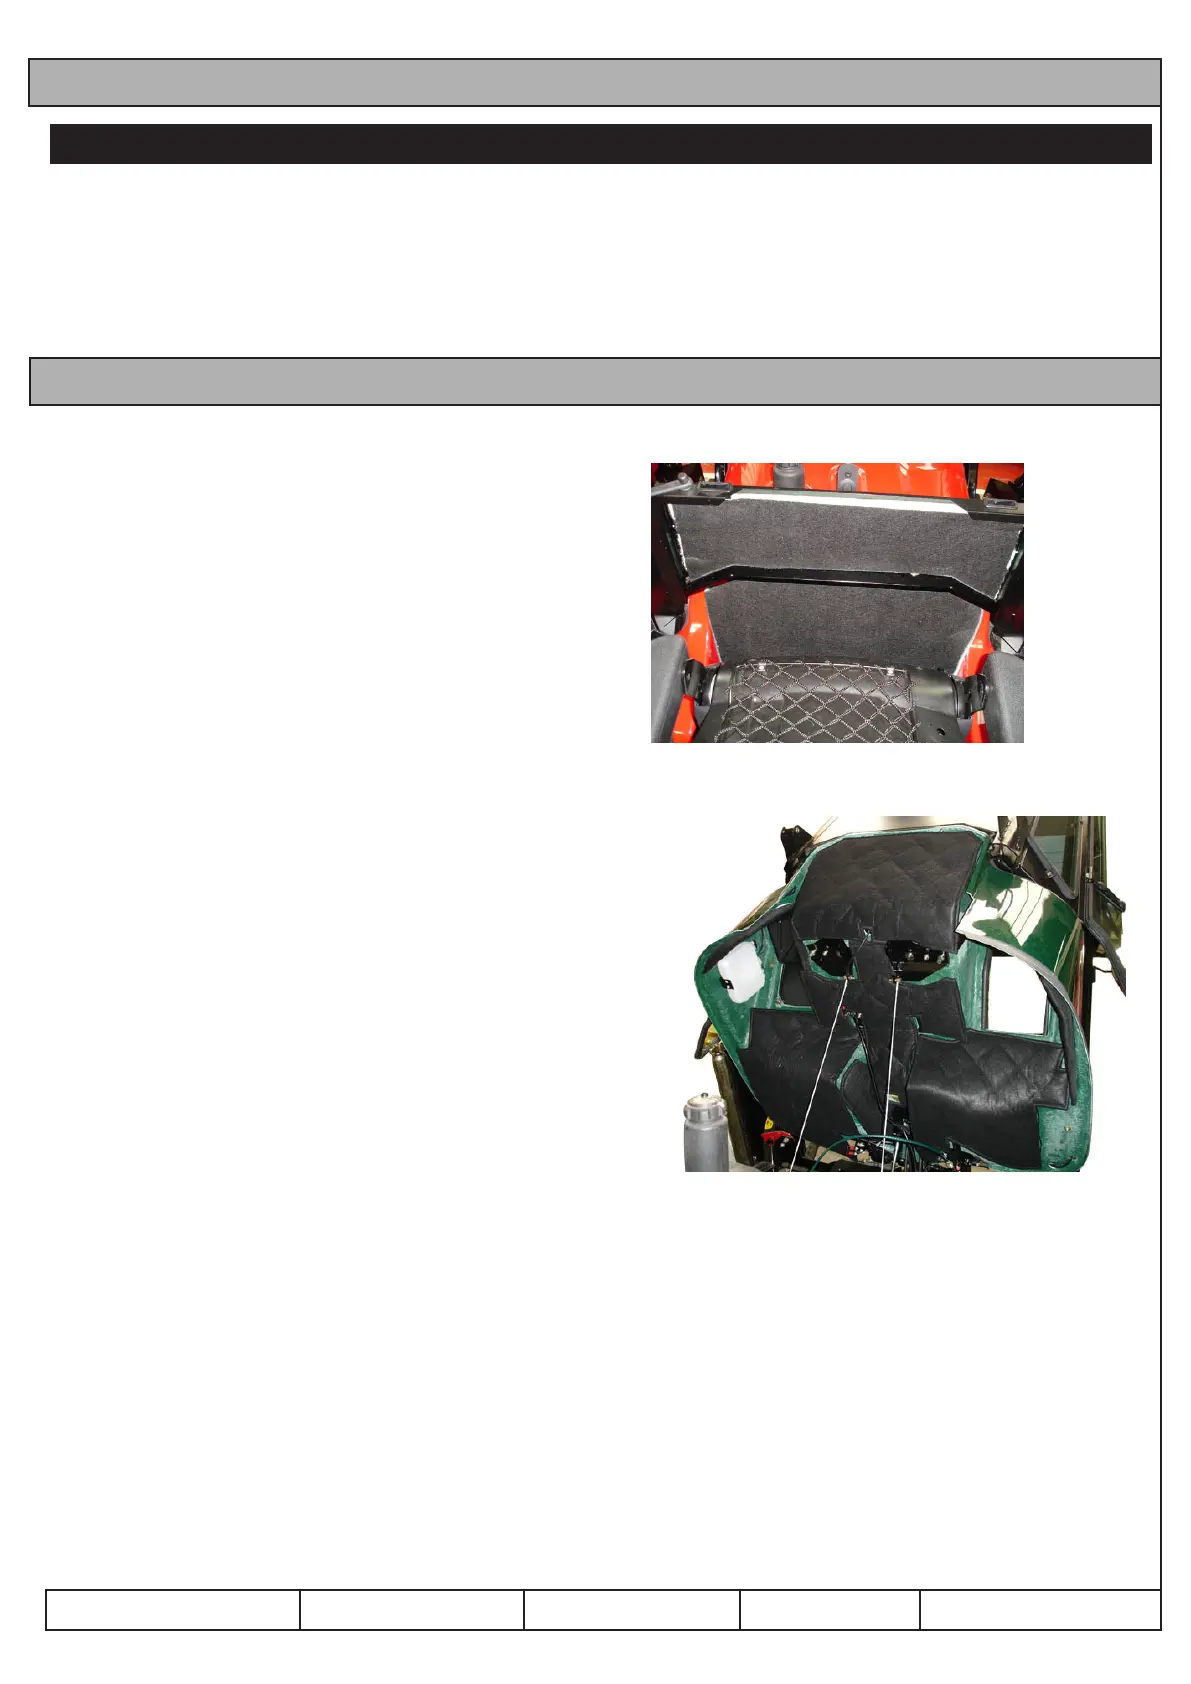
NOISE REDUCTION KIT - ASSEMBLY
Note: Before tting any of the noise reduction components,
ensure that the sticking surfaces are free from dirt and
grease by using a suitable cleaner.
1. Inside the cab, fold the seat-back down to gain access to the
rear of the cab. Loosen the two M8 bolts holding the cab to
the platform and t the plate (item 14). Refer to Fig 53.
Tighten bolts.
2. To t components inside the cab, refer to Fig 53. Identify
items 10, 11, 12 and 13. Visually conrm locations and
verify proper t before sticking. Remove backing from
components and x into the locations. Refer to Fig 53.
3. Use a roller where possible to help adhesion.
4. Remove the retaining pins in the rear cab support brackets.
Carefully raise the cab/platform.
5. To t components under the platform, refer to Fig 54.
Identify items 1 to 8. Visually conrm locations and verify
proper t before sticking. Remove backing from
components and x into the locations. Refer to Fig 54.
6. A roller should be used to press the components where
possible to help adhesion (as in step 3). Take special care
with making sure the edges are fully adhered. Full adhesion
takes up to 24 hours. Suitable additional adhesive should be
used where required.
7. Carefully lower cab/platform and ensure it closes correctly
and that all noise proong material is away from moving
parts.
8. Replace the retaining pins in the rear cab support brackets to
secure platform.
Fig 53 - Internal cab positions
13
11
10
14
12
Fig 54 - Under platform positions
5
2
3
1
4
8
9
6
7
 Loading...