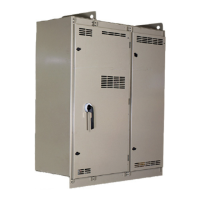
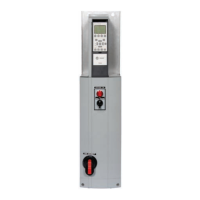
Table 9. Water-to-water heat exchanger connections
Attachment Point Fitting(s) Required
Pump outlet • 90° elbow, 3/4 NPTE x 3/4 male JIC
AFD panel outlet • 90° elbow, 3/4 NPTE x 3/4 male JIC
AFD panel inlet • 90° elbow, 3/4 NPTE x 3/4 male JIC
Heat exchanger inlet • 90° elbow, 3/4 NPTE x 3/4 male JIC
Heat Exchanger outlet
(top right of Heat Exchanger)
• Adapter, 3/4 NPTI x 3/4 male JIC
• Elbow, 45°, 3/4 female JIC x 3/4 male
JIC
Cont
rol valve inlet or HX inlet
(bottom right of bulkhead)
• Elbow, 45°, 3/4 NPTE x 3/4 male JIC
Evaporator or condense
r high
side
(assumes using 1/2-in. tapped
co
nnecti
on)
• Adapter, 3/4 FTG x 1/2 NPTE
• Ball valve, 3/4 copper to copper
• Adapter, 3/4 FTG x 3/4NPTE
• Strainer, 3/4 NPTI x 3/4 NPTI w/ 1/4
dr
ain.
• 45°
elbow, 3/4 NPTE x 3/4 male JIC
Evaporator or condenser low
si
de
(ass
umes using 1/2-in. tapped
co
nnecti
on)
• Adapter, 3/4 FTG x 1/2 NPTE
• Ball valve, 3/4 copper to copper
• Adapter, 3/4 FTG x 3/4 NPTI
• 45° elbow, 3/4 NPTE x 3/4 male JIC
Plumbing
30 AFDK-SVU01C-EN
4. Connect power leads to main disconnect (refer to
Figure 14, p. 29 for power connection location). Wiring
should
match power requirements on the assembly
nameplate in accordance with local codes (refer to
Table 10).
Table 10. Heat exchanger power requirements
Heat Exchanger FLA Volts/Phase/Hz
020600880100 10 A 115/1/60
020600890100 10 A 115/1/60
5. Wire the customer remote contact connection to the
pump control relay in the drive enclosure. This
connection gives the drive control of the cooling
assembly (refer to “Standard Control Wiring,” p. 38,
for AFDK term
ination location and requirements).
6. Fill the reservoir tank through the
manual fill port to a
level between the two black indicators on the sight
glass. The process fluid in the primary cooling loop
should be distilled water treated with an inhibitor
solution. The secondary water loop may be filled with
condenser water. For a more detailed description of
process fluids including addition of inhibitor solution,
refer to “Corrosion,” p. 33.
7. Turn the control switch to “on” position. The
ci
rculating pump should begin rotation.
8. Continue circulating pump for
five minutes to
allow air
in system to be vented.
9. Ensure all process fluid lines and shutoff valves are
open and the
system is able to flow freely. Re-check the
fluid level in the system before continuing with the
startup and note start-up pressure on fluid ports as a
baseline.

 Loading...


