16 ACC-SVN264B-EN
Installation - FIAECON203*
CAUTION
Heavy Object!
Failure to follow instructions below could result in
severe injury and equipment damage. Economizer
weighs over 50 pounds and should be installed by two
people.
WARNING
Hazardous Voltage w/Capacitors!
Failure to disconnect power and discharge capacitors
before servicing could result in death or serious injury.
Disconnect all electric power, including remote
disconnects and discharge all motor start/run
capacitors before servicing. Follow proper lockout/
tagout procedures to ensure the power cannot be
inadvertently energized. Verify with a CAT III or IV
voltmeter rated per NFPA 70E that all capacitors have
discharged.
Note: Ho
rizontal duct conversion kit is needed for this
installation and is not included in the low leak
economizer assembly.
1. Remove the unit end panel and both (front and rear) fresh
a
ir access panels from the unit and set them aside.
2. Remove carton containing ship with parts from the outdoor
air damper
assembly.
Refer to Figure 27 for the following assembly process.
3. Install the horizontal duct conversion kit per the instructions
i
ncluded with that kit.
4. Install the outdoor air damper assembly into the unit and
co
nnect the control harness to the actuator.
5. Connect the control harness
to the actuator on the
horizontal return air damper. Secure with wire ties and
install the horizontal return air damper into the unit. Do not
to trap or pinch the wire harness during damper
installation.
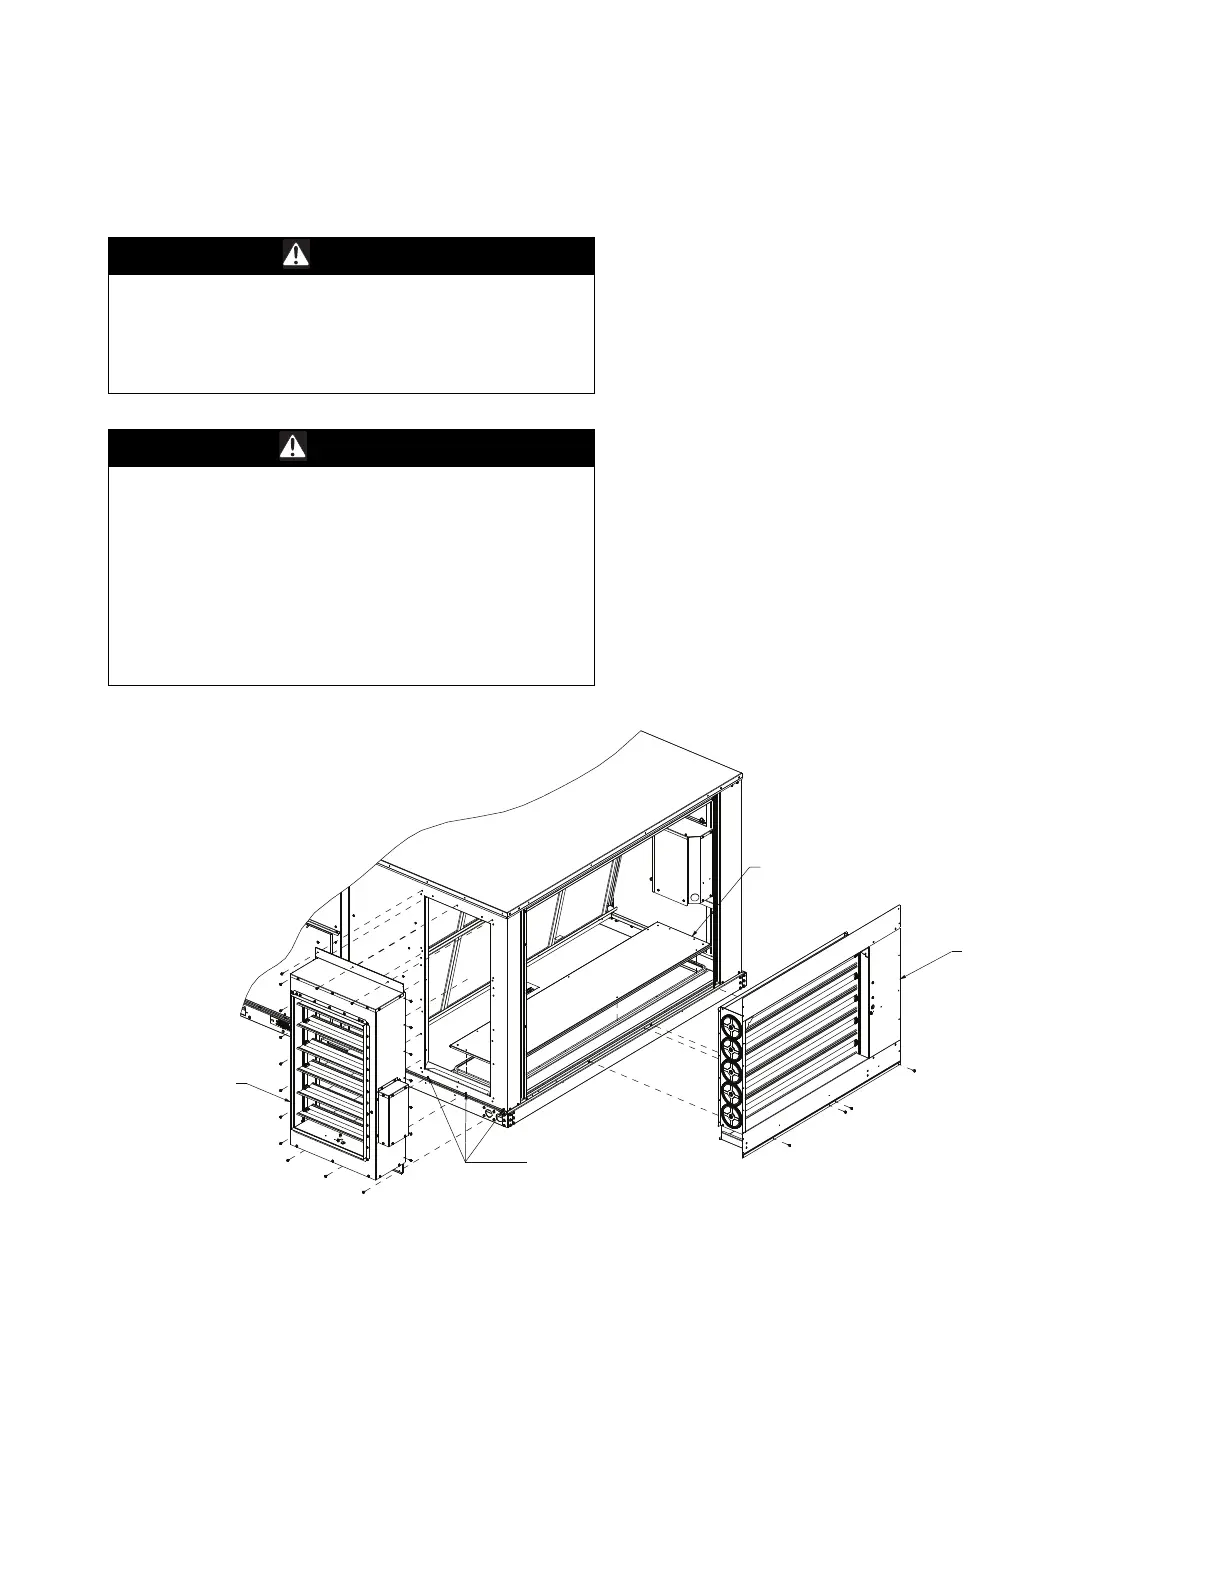
Figure 27. Installation of damper assemblies into unit
Return Duct Cover
(Hz Duct Conversion Kit)
Horizontal Outdoor
Air Damper
Horizontal Return
Air Damper
Remove Unit Screws
Prior to Damper Install
6. Route the controls harness from the actuators to the fresh
air options module located in the return enclosure using the
factory installed wire ties. Be sure the harness is away from
all moving parts of the damper assemblies. Connect
harness P11 to fresh air options module J11. Confirm the
harness has a secure connection.
Note: Wire
ties have a releasable feature to allow them to be
opened and closed.
 Loading...