6 ACC-SVN264B-EN
Installation - FIAECON102*
WARNING
Hazardous Voltage!
Failure to disconnect power before servicing could
result in death or serious injury. Disconnect all electric
power, including remote disconnects before servicing.
Follow proper lockout/tagout procedures to ensure the
power can not be inadvertently energized.
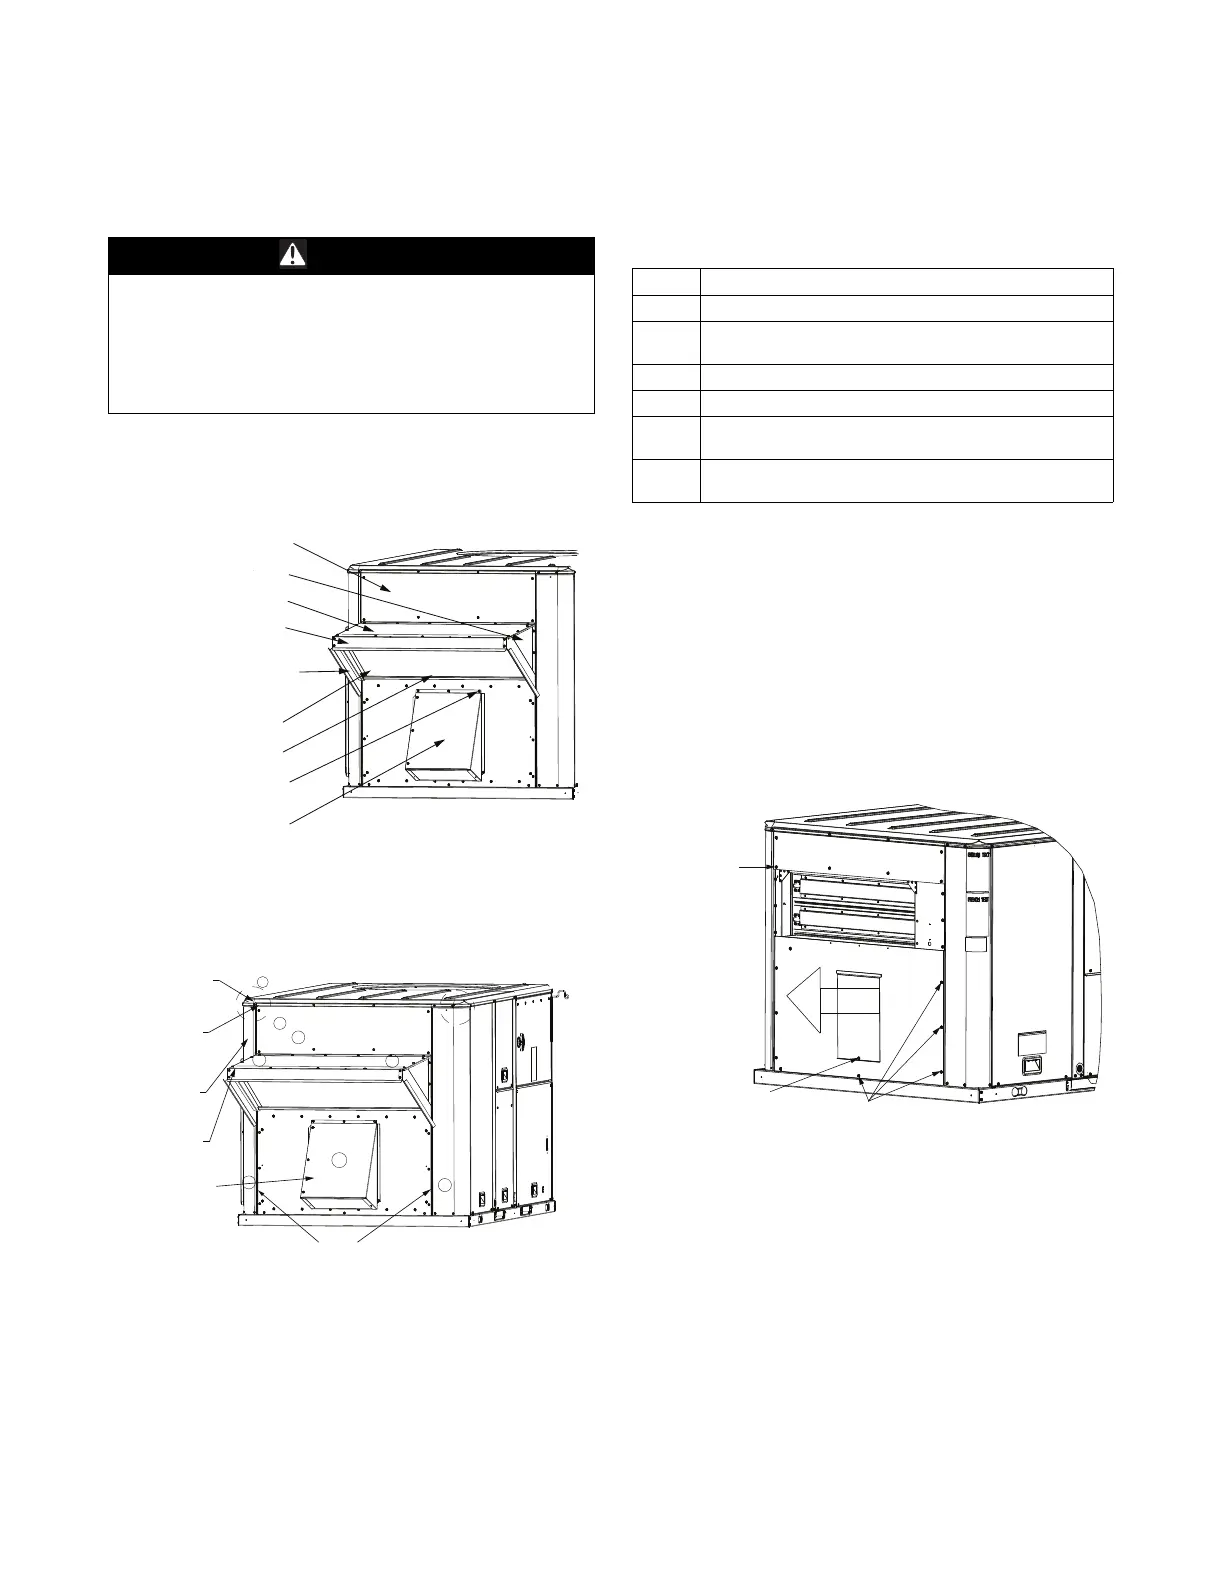
1. Remove the existing economizer hood end panel (factory
installed) from the unit and discard (see Figure 1).
Figure 1. Economizer
Hood Top
Filler Panel
Mist Eliminator
Dimples for Powered
Exhaust Screws
Hood Triangle
FA Hood Front
Support
FA Hood Mist Eliminator
Side Retainer (2 Places)
FA Hood Mist Eliminator
Rear Blockoff
Barometric Relief
Hood
2. Apply 1-inch gasket material to disassembled unit. See
Figure 2.
Figure 2. Gasket material position
Top of
Hood Triangle
Top of
Economizer
Top of Filler
Panel
Corners of RTJ
and Economizer
Barometric
Relief Hood
Seal between
Economizer and Unit
6
2
3
4
4
1
1
5
Table 2. Parts list
Item Description
1 Unit - seal between economizer and unit
2
Top of economizer - seal between e
conomizer and top of unit or
between economizer and top filler panel
3 Between top of filler panel and unit only if filler panel is required
4 Top of hood triangle - seal between hood and hood flange
5
Around barometric relief hood - seal between barometric relief hood
an
d unit
6
Apply 1-inch gasket in corners to seal area between RTU unit and
econo
mizer
3. Remove the hood top from the non-linkage side of the
economizer and set aside for Step 7.
4. Install economizer in the unit, shift left, and install single
scre
w into alignment holes.
Note: Screw wi
ll be removed later.
5. Use self-drilling screws through remaining large holes
a
round perimeter of economizer.
6. Remove alignment screw.
Figure 3. Pictorial layout of pr
evious steps
Insert economizer fully
then shift left all the way
Alignment
screw
Shift Left
Remove screw holding
barometric relief blade
Self-drilling screws
around perimeter
7. Assemble flange to hood top (removed in Step 3), then to
hood triangles and attach to economizer. See Figure 4,
p. 7.
8. Install mist eliminator into hood assembly and secure with
filter
clips provided on hood top.
9. Install filler panel above hood if necessary (does not apply
to all
models).
10. Remove shipping screw from aluminum barometric relief
b
lade.
11. If a powered exhaust will be installed go to “Powered
Exhaust,” p. 7.
12. Assemble and install barometric relief hood.
 Loading...