02:ZONES/DEVICES
ð
ADD NEW DEVICES.
6
MODIFY DEVICES
ð
ENROLL NOW or
ENTR ID:XXX-XXXX
ð
Z02:Shk+AX+CntG3
ID No.170-XXXX
ð
Step 5 Step 6 Step 7 Step 8
Configure Location and Zone Type
Parameters
Enter PARTITIONS.
See Note 2
Assign partitions to the detector by
pressing the , and
buttons
Select "Device Settings" and see
below to configure the (AUX)
button.
Z02.LOCATION
Z02.ZONE TYPE
ð
Z02.PARTITIONS
ð
Z02:P1n-- P2....P3n
ð
Z02:DEV SETTINGS
ð
ð means scroll ww and select OK
Notes:
[1] If the shock detector is already enrolled, you can configure the device parameter and assign partitions using the “Modify Devices" option.
[2] PARTITIONS appear only if PARTITIONING was previously enabled in a panel.
2.4. Configuring the Magnetic Contact Device Parameters
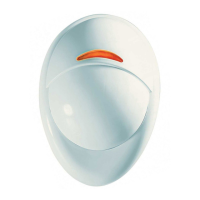
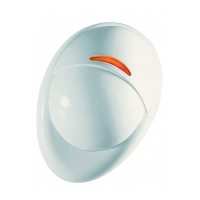
Enter the DEVICE SETTINGS menu and follow the configuration instructions for the SD-304C PG2 shock detector as described in the following table.
Option Configuration Instructions
Alarm LED
Determine whether or not the alarm LED indication will be activated.
Optional settings: ON (default) or OFF.
Reed Switch
Determine whether to enable or disable the internal reed switch.
Optional settings: Enabled or Disabled (default).
Magnetic AM
Define whether to enable or disable the detection of magnetic tampering.
Notes:
1. The selected option of this menu is functional only if the Reed Swtich menu was previously set to "Enabled".
2. Supported only by specific control panels.
Optional settings: Enabled or Disabled (default).
AUX input
Define the external input according to the installer's requirements.
Optional settings: Disabled (default), End of Line, Normally open, Normally close or Double EOL.
Sens. Threshold
Define the sensitivity threshold of the shock detector when configuring from the panel.
Optional settings: Sens. Thresh. 1 to Sens. Thresh. 19 (default setting is Sens. Thresh. 8).
Note: Configuration of this feature can be performed either from the panel or from the device on condition that the device
was already enrolled and there is synchronization between the panel and device. If an “E” appears on the device’s digital
display, this indicates no synchronization.
Accumulated
Define whether Accumulation mode, when configuring from the panel, is Enabled or Disabled.
Optional settings: Enabled or Disabled (default).
A gross attack is a large single shock caused by the impact on a protected material, for example the impact generated by a sledge hammer on a concrete
surface. For example, you can set the threshold by entering a value between 1 to 19, the threshold value you enter is treated as a gross attack. The
energy measured by the detector is classified to a number in this range. If the measured shock is higher than the threshold set, an alarm is generated.
Accumulated mode detects a series of low level shocks due to a number of impacts on a protected material over a certain time, for example the impact
generated by chiselling on a concrete surface.
Example: Assume a scenario where the gross attack level is set to 9. Accumulation mode is also enabled. A shock level 3 is detected; this level is not
enough to trigger an alarm. Since accumulation mode is enabled, the detector does not simply discard this shock event as would happen if accumulation
mode was disabled. In this case, the detector waits for a further 1 second for an additional shock. If one occurs but still does not accumulate to the gross
attack level, the sensor waits for another second and so on, up to 10 seconds in total. If during this time, the shock levels registered do not add to a level
9, the detector is reset.
2.5. Local Operating and Calibrating of the Shock Detector
The SD-304C PG2 can be calibrated locally only when the device is in Local Diagnostics mode that is the first 15 minutes after opening the cover. When
the device is not in this mode, but further calibration is required, the installer should reset the device by closing the tamper switch.
1. Press on the "Up" or "Down" button to turn on the digital display. The letter 'G' appears on the display for 3 seconds to indicate Gross Attack levels
(thresholds). Then, the menu appears on the display to enable you to select a number in the range of 1-19. If, instead of a number the letter "E"
D-304286 SD-304C PG2 Installation Instructions 3

 Loading...