4.4 Removing tyre from wheel
Caution
♦ Comply with the notes on safety and conditions
⇒ page 290
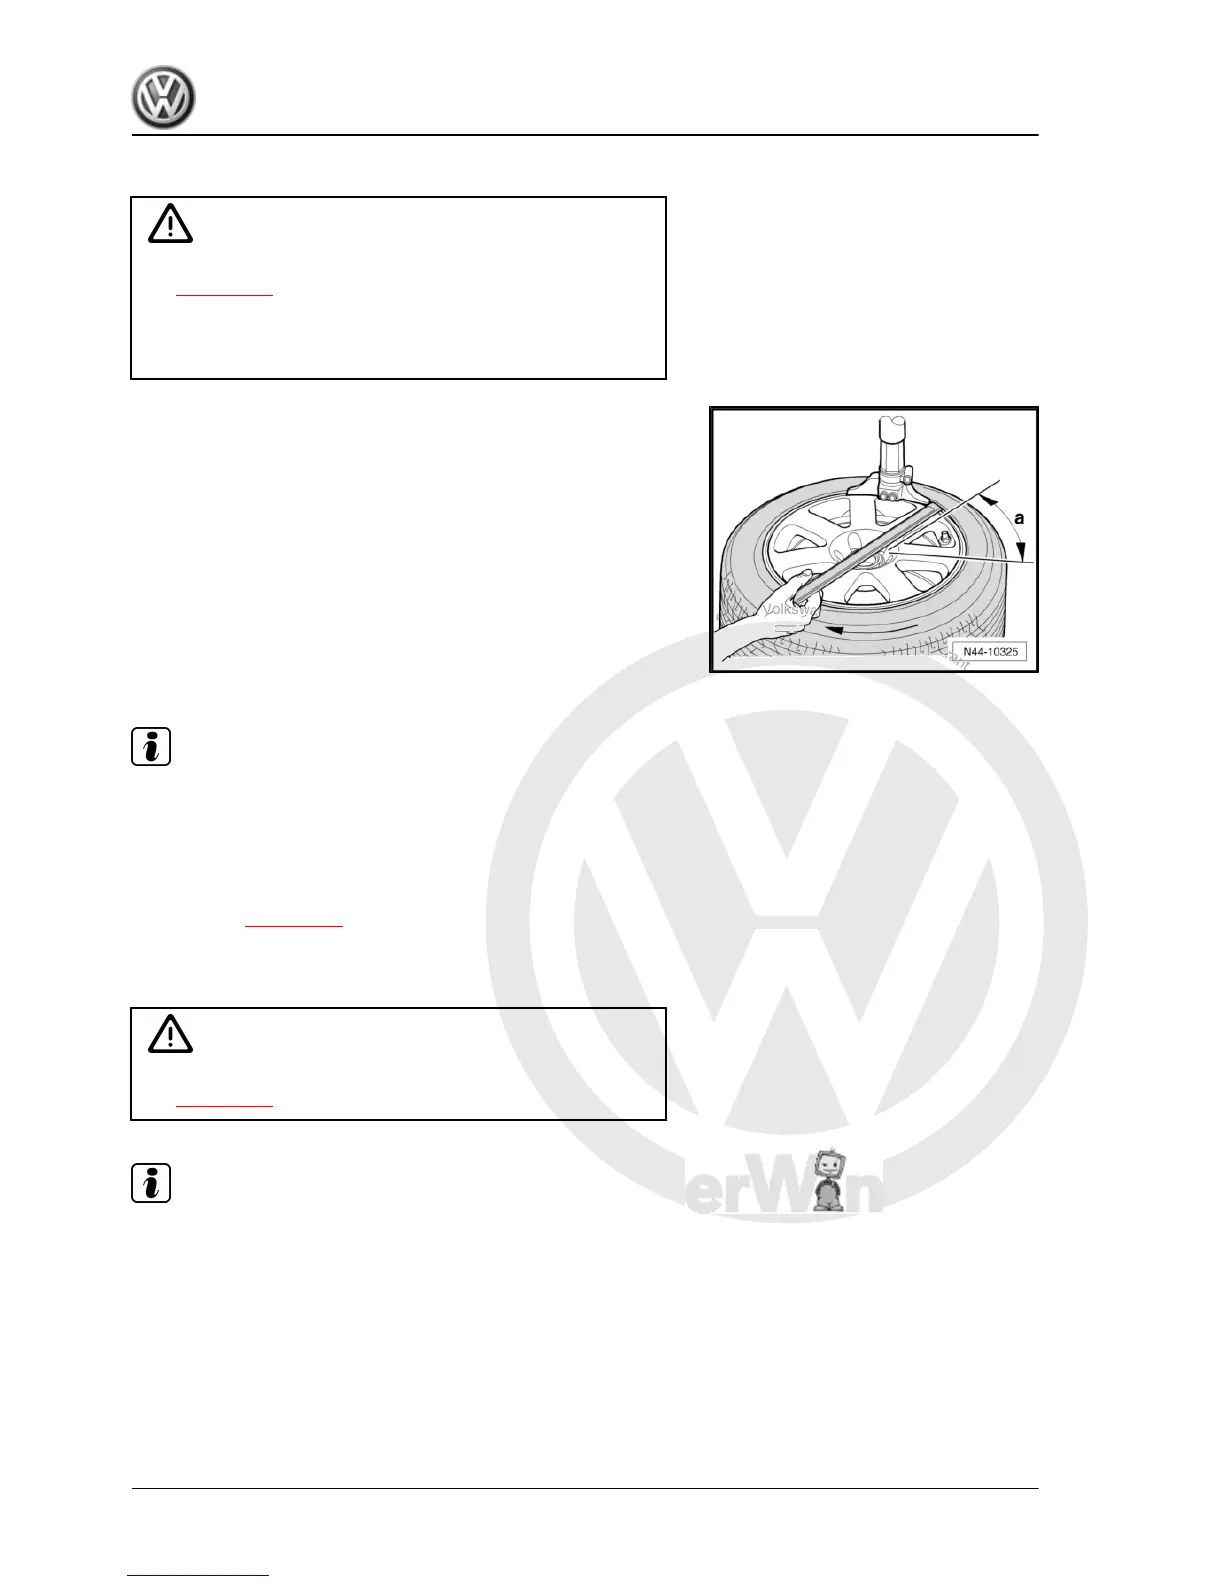
♦ The assembly head must never be within area -a- of tyre
valve/tyre pressure sensor, or the assembly head will
damage the tyre pressure sensor .
Fitting tyre
– Turn wheel on tyre fitting unit so that tyre valve/ tyre pressure
sensor is in front of the assembly head.
– Position assembly head near tyre valve/ tyre pressure sensor
so that an assembly lever can be inserted approx. 30° next to
the tyre valve/ tyre pressure sensor .
– Now lever tyre bead over assembly finger on assembly head
using assembly lever then remove assembly lever.
– Run tyre fitting machine clockwise until upper bead lies com‐
pletely above wheel rim flange.
– Turn wheel on tyre fitting unit so that tyre valve/ tyre pressure
sensor is in front of the assembly head.
Note
♦
Check that the tyre pressure sensor is not loose or damaged.
If the screwed connection is loose, replace the union nut, the
valve insert, the seal, the sealing washer and the valve cap
with new parts from the repair set ⇒ Electronic parts catalogue
“ETKA” .
♦
If the tyre pressure sensor is damaged, then replace the com‐
plete item ⇒ page 304 .
4.5 Fitting tyre to wheel rim
Caution
♦ Comply with the notes on safety and conditions
⇒ page 290
Note
When a tyre is changed, it is recommended also to change the
set of seals for the tyre pressure sensor.
– Coat wheel rim flanges, tyre beads and inside of upper tyre
bead generously with tyre assembly paste.
– First fit inner side of tyre.
Golf 2004 ➤ , Golf Plus 2005 ➤
Running gear, axles, steering - Edition 08.2009
292 Rep. Gr.44 - Wheels, tyres, vehicle geometry