Installation in a Cored Fiberglass
Hull
The core (wood or foam) must be cut and sealed careful-
ly. The core must be protected from water seepage, and
the hull must be reinforced to prevent it from crushing un-
der the hull nut allowing the housing to become loose.
WARNING! Always wear safety goggles and a dust
mask.
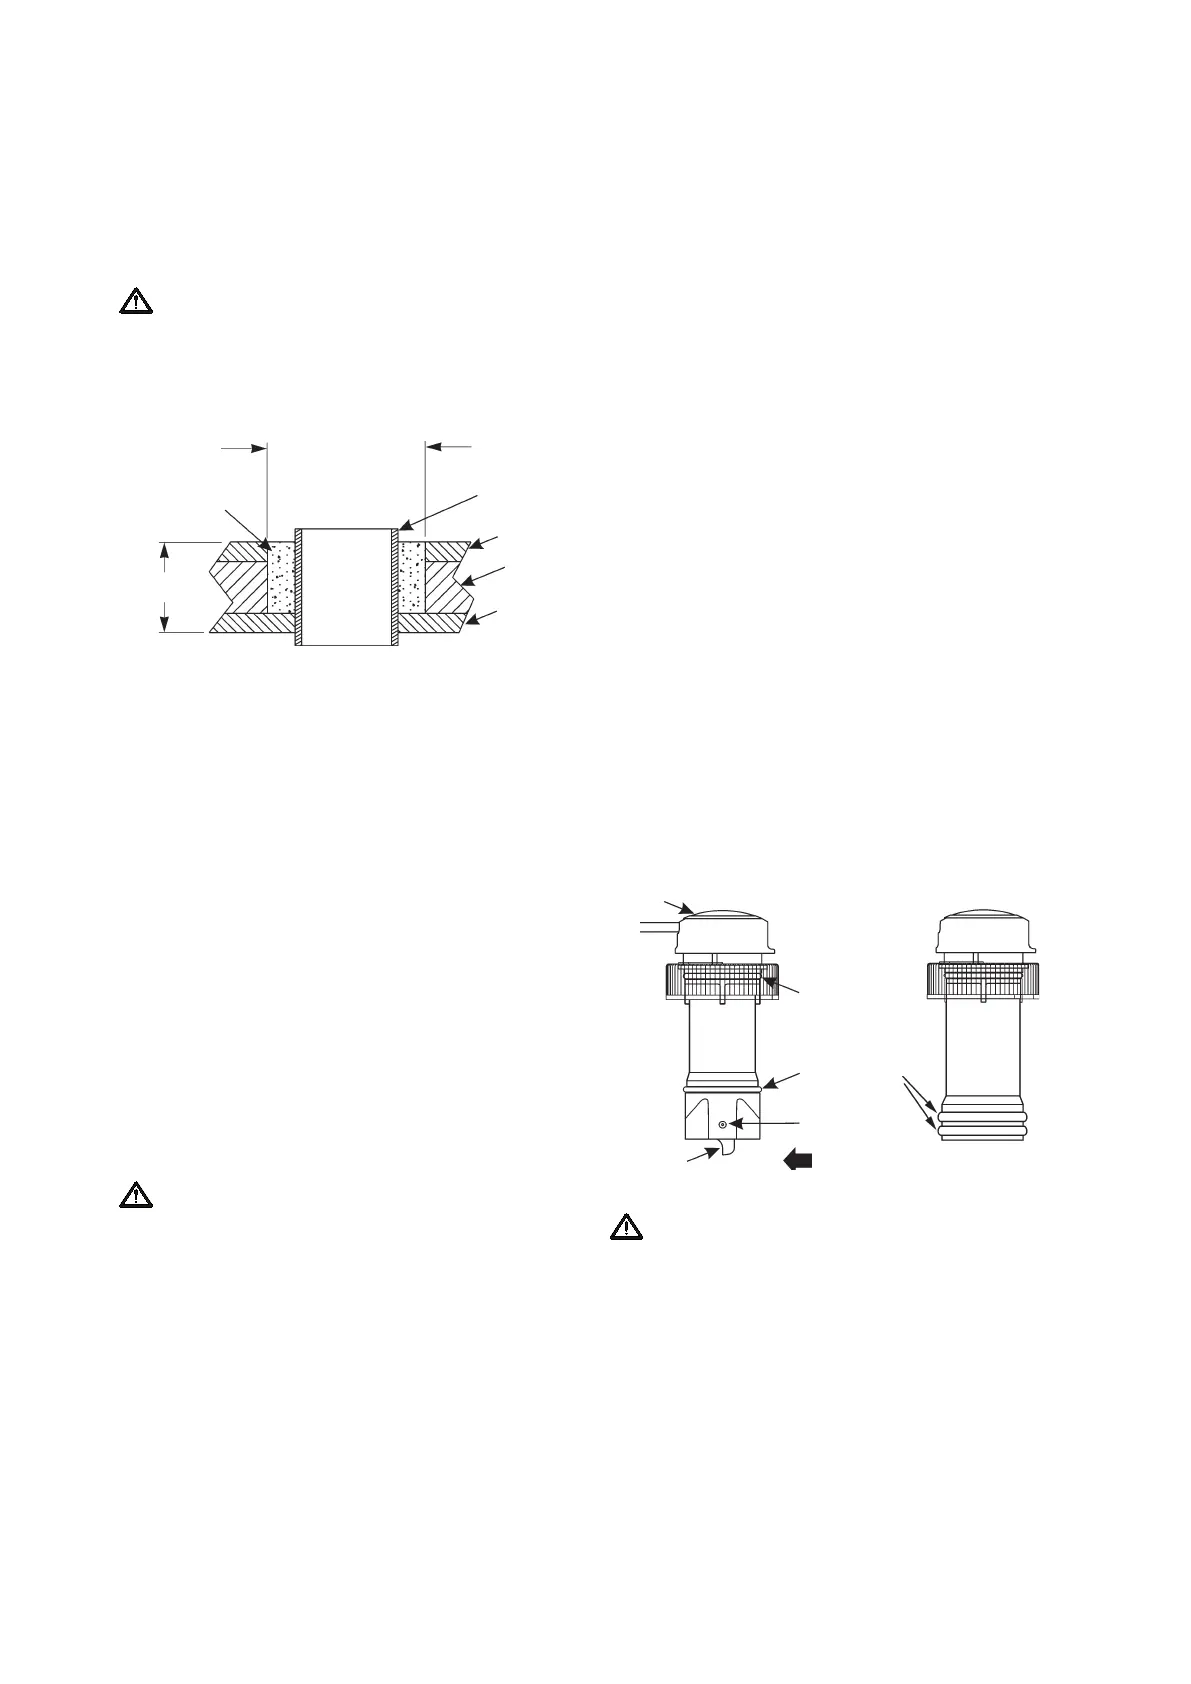
Fig. 4. Prepering a cored berglass hull
1.
Inner skin
Core
Solid or hol-
low cylinder
Outer skin
Hull thickness
Pour in casting
epoxy
9-12 mm (3/8-1/2”)
larger than the hole
through the hull’s
outer skin
Drill a 3 mm or 1/8” pilot hole from inside the hull. If
there is a rib, strut, or other hull irregularity near the selected
mounting location, drill from the outside. (If the hole is drilled
in the wrong location, drill a second hole in a better location.
Apply masking tape to the outside of the hull over the incor-
rect hole and ll it with epoxy.)
2.
Using a 51 mm or 2” hole saw, cut the hole
from outside the hull through the outer skin only (see Fig. 4).
3.
From inside the hull, use a 60 mm or 2-3/8”
hole saw to cut through the inner skin and most of the core.
The core material can be very soft. Apply only light pressure
to the hole saw after cutting through the inner skin to avoid
accidentally cutting the outer skin.
4.
Remove the plug of core material so the inside of
the outer skin and the inner core of the hull are fully exposed.
Sand and clean the inner skin, core, and the outer skin around
the hole.
WARNING! Completely seal the hull to prevent wa-
ter seepage into the core.
5.
If you are skilled with berglass, saturate a layer of
berglass cloth with a suitable resin and lay it inside the hole
to seal and strengthen the core. Add layers until the hole is
Large O-ring
BOW
Shaft
INSERT
Flat side of
blade faces
bow
Small O-ring
Arrow
BLANKING PLUG
the correct diameter.
Alternatively, a hollow or solid cylinder of the correct diame-
ter can be coated with wax and taped in place. Fill the gap
between the cylinder and hull with casting epoxy. After the
epoxy has set, remove the cylinder.
6.
Sand and clean the area around the hole, inside and
outside, to ensure that the sealant will adhere properly to the
hull. If there is any petroleum residue inside the hull, remove
it with either mild household detergent or a weak solvent (al-
cohol) before sanding.
7.
Proceed with “Bedding” and “Installing”.
Maintenance, Repair & Parts
Using the Blanking Plug
Fig. 5. Replacing the paddlewheel and O-rings
To protect the paddlewheel, use the blanking plug when the
boat will be kept in salt water for more than a week, the boat
will be removed from the water, or aquatic growth build-up
on the paddlewheel is suspected due to inaccurate readings
from the instrument.
WARNING! The O-rings must be intact and well
lubricated to make a watertight seal.
1.
Inspect the O-rings on the blanking plug (replace
if necessary) and lubricate them with the silicone lubricant
supplied or petroleum jelly (Vaseline®) (see Fig. 5).
 Loading...