76
EPG-SPRINT / EPG-SPRINT X
%
Tribo
Corona
5
4
3
2
1
120
100
80
60
40
30
20
15
10
5
μA
μA
0
10
20
30
40
50
60
70
80
90
100
Ø
12
10
11
9
8
m /h
5.0
4.0
3.0
2.0
6.0
3
5.5
4.5
3.5
2.5
2.2
kV
90
80
70
60
50
40
30
20
10
100
m /h
4.0
3.0
2.0
1.0
0.5
0.4
0.3
0.2
0.1
1.5
EPG
S
P
R
I
NT
2x
P_01291
24
19
16
15
2321
25
SERVICE MANUAL
VERSION 09/2017 ORDER NUMBER DOC2309350
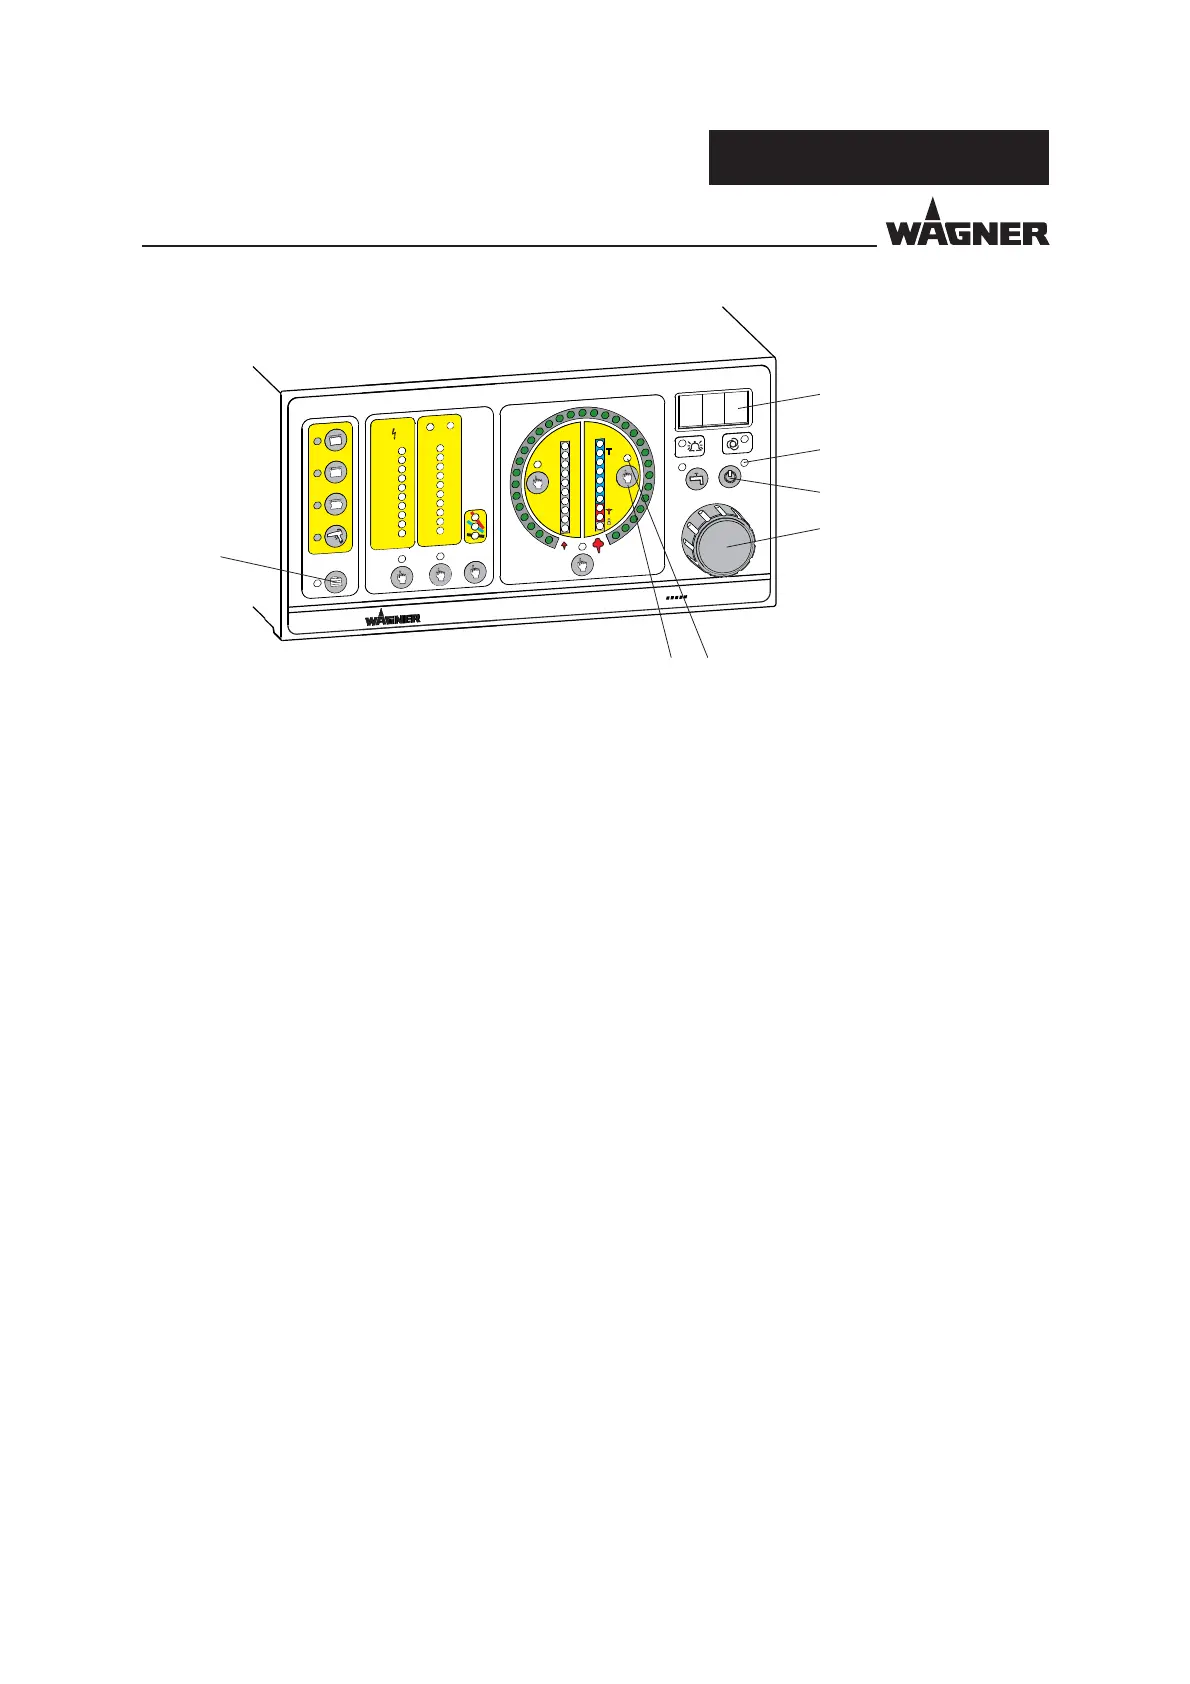
Procedure:
1. Insert the gun simulation (order No. 2312448).
2. Switch the unit on at the main power switch. An automatic gun is being recognized.
3. Plug adapter cable (order No. 2312065) onto diagnostics port and connect voltmeter
to measurement points.
4. Access parameter C44 (refer to Chapter 10.2).
5. Press the "Characteristic Slope" button 31. "no" is displayed on LED display 19.
6. Turn Universal rotary controller 24 one step clockwise; "HVA" is indicated in the LED
display 19.
7. Press "Additional Recipes" button 25 for 1 second. The "Atomizing Air" LED 23 ashes.
8. Press "Atomizing Air" button 21.
Step 1: "O set Spray Current" display
9. Press "Atomizing Air" button 21 again.
Step 2: "O set Coil Current" display
If a manual gun is used for the next step rather than gun simulation, the gun trigger
must be pressed.
10. Press "Atomizing Air" button 21.
Step 3: Correction value and +21V displayed on multimeter.
11. Use rotary controller 24 to set display to max. +21 V. One step below 21 V is OK. A new
correction is displayed.
12. Press "Atomizing Air" button 21.
Step 4: New correction is saved to the memory. "End" is displayed on LED display 19.
 Loading...