EasyManua.ls Logo

Xerox Versant 3100 User Manual

Xerox Versant 3100
44 pages
To Next Page IconTo Next Page
To Previous Page IconTo Previous Page
Page #8 background image
Name and Definition (if required)Symbol
Load Hole-punched Paper as Indicated
On
This symbol indicates the main power switch is
in the ON position.
Off
This symbol indicates the main power switch is
in the OFF position.
Standby
This symbol indicates the secondary power
switch is in the Standby position.
Do Not Dispose in Normal Household Waste
Stream
Application of this symbol is confirmation
that you should not dispose of items, such
as Customer Replaceable Units (CRUs), in
the normal household waste stream. You
must dispose of these items in compliance
with agreed national procedures.
This symbol often accompanies batteries
and indicates that used electrical and elec-
tronic products and batteries should not be
mixed with general household waste.
For more information about collection and
recycling, please contact your local municip-
ality, your waste disposal service, or the
point of sale where you purchased the
items.
Xerox
®
Versant
®
3100 Press1-4
Quick Start Guide
Product Symbols
Question and Answer IconNeed help?

Do you have a question about the Xerox Versant 3100 and is the answer not in the manual?

Xerox Versant 3100 Specifications

General IconGeneral
BrandXerox
ModelVersant 3100
CategoryPower Tool
LanguageEnglish

Summary

Product Symbols

Caution

Indicates a mandatory action to avoid damage to specific areas.

Warning

Alerts users to areas with risk of personal injury.

Hot Warning

Alerts users to hot surfaces that should not be touched.

Laser Warning

Indicates laser use and directs user to safety information.

Do Not Touch

Symbol indicating an item should not be touched.

Do Not Incinerate the Toner Cartridge

Prohibits disposal into flame or incineration; follow recycling guidelines.

Ground / Common / Earth Terminal

Symbol for a grounding or earth connection.

Keep Area Clear

Instruction to keep a specific area free of objects.

Do Not Use Folded, Creased, Curled, or Wrinkled Paper

Prohibits the use of damaged or creased paper.

Tray Guides Must Touch Media

Requirement for tray guides to contact the loaded media.

On

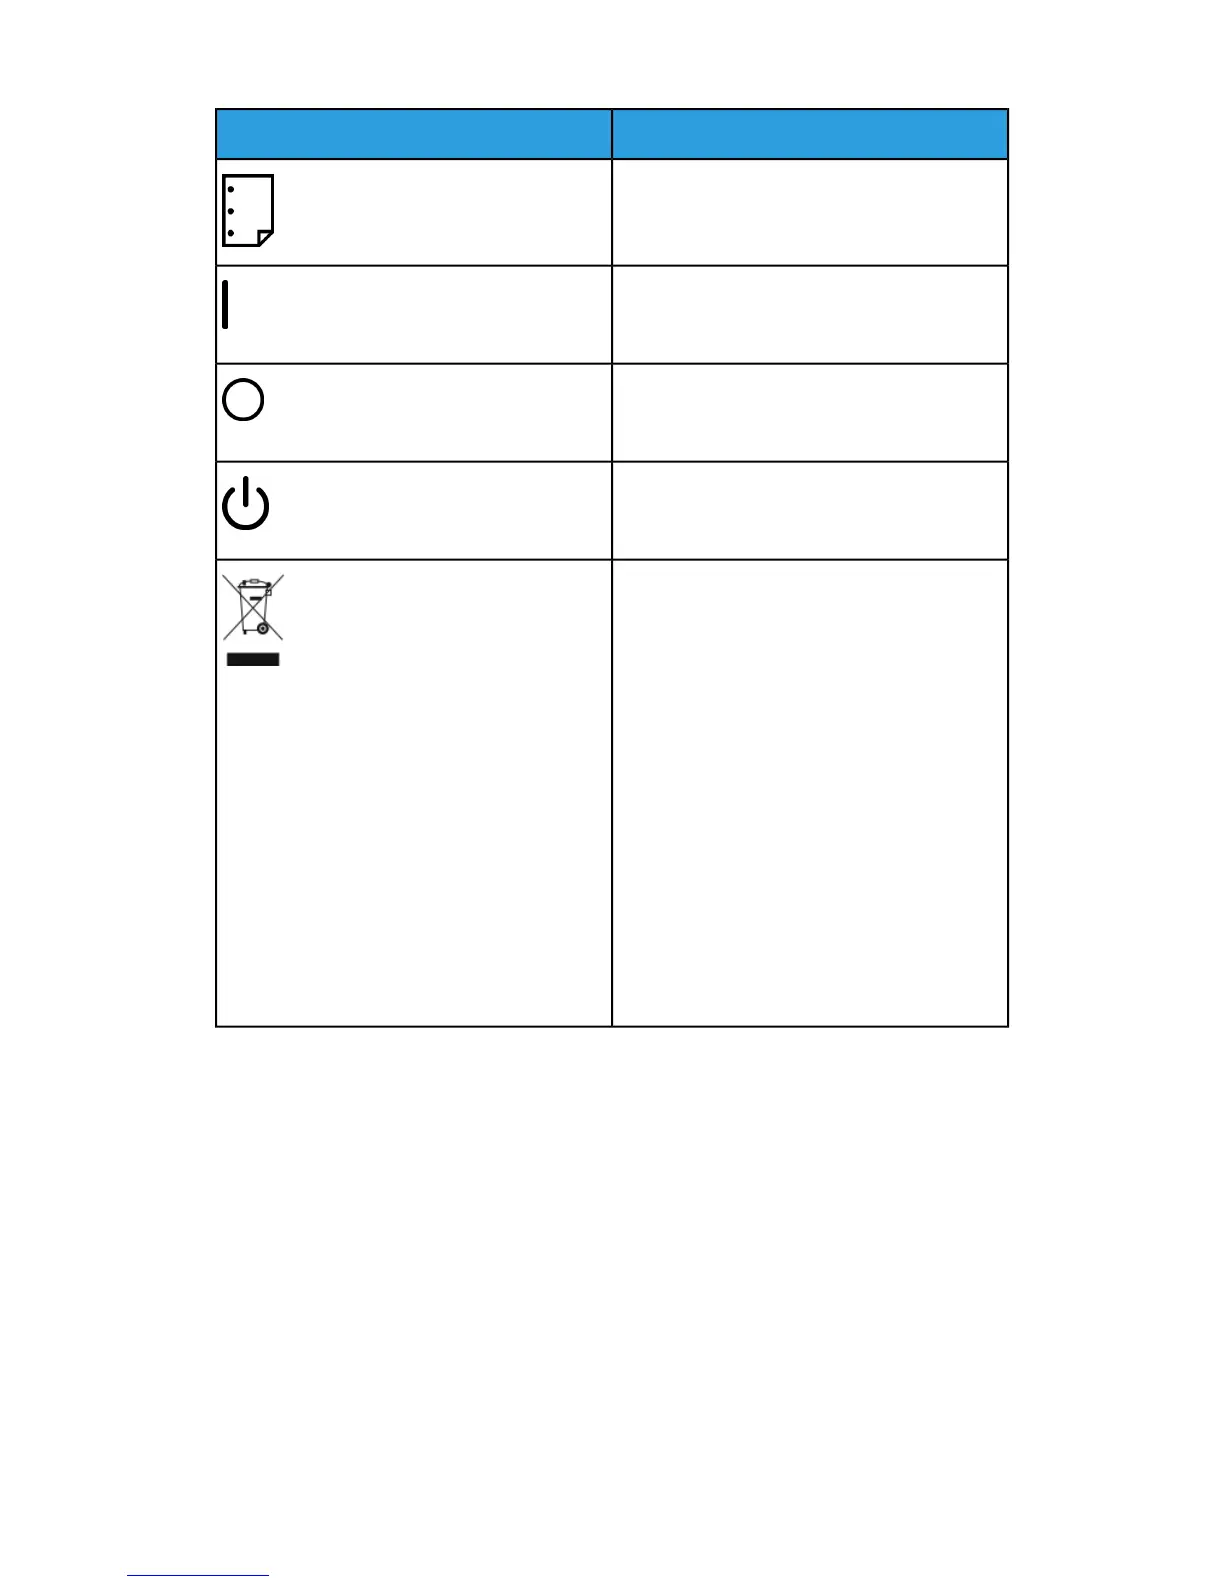
Indicates the main power switch is in the ON position.

Off

Indicates the main power switch is in the OFF position.

Do Not Dispose in Normal Household Waste Stream

Prohibits disposal of items in normal household waste.

Getting Started

Press Components

Identification of external parts of the press.

Internal Components

Identification of internal parts of the press.

Control Panel

Description of the press control panel and its buttons.

Power Saver Mode

Explanation of the press's power saving modes.

Exiting Power Saver Mode

How to exit the press's power saver mode.

Power On / Off

Instructions for powering the press on and off.

Paper and Media

Loading Paper in Trays 1, 2, and 3

Step-by-step guide for loading paper into specific trays.

Loading Paper in the Trays 6 and 7

Guide for loading paper into high capacity trays.

Matching the Tray and Stock Information

Ensures paper stock settings match loaded media.

Maintenance

Ordering Supplies

Information on how to order consumables and parts.

Checking the Status of Consumables

How to view remaining levels of ink, toner, and other supplies.

Replacing a Dry Ink / Toner Cartridge

Procedure for replacing dry ink or toner cartridges.

Replacing the Dry Ink / Toner Waste Bottle

Instructions for replacing the waste toner bottle.

Replacing the Suction Filter

Procedure for replacing the suction filter.

Replacing a Drum Cartridge

Steps for replacing the drum cartridges.

Troubleshooting

Clearing Jams in Area 2

Instructions for clearing paper jams in a specific press area.

Clearing Jams in Areas 3, 4 and 5

Steps to clear paper jams in multiple press areas.

Paper Jams in Trays 1-3

Procedure for clearing paper jams within trays 1-3.

Obtaining Fault Information from the Press Touch Screen

How to get information about press faults from the touch screen.

Related product manuals