EasyManuals Logo

Yamaha AW16G Recording 101 User Manual

Yamaha AW16G Recording 101
27 pages
To Next Page IconTo Next Page
To Previous Page IconTo Previous Page
Page #10 background imageLoading...
Page #10 background image
4. Cursor to OK and press the [ENTER] key.
The TITLE EDIT popup window will appear, allowing you to name your song.
5. Assign a name to your song using the cursor arrows and the jog wheel.
6. After naming the song cursor to OK and press the [ENTER] key.
Setting the Input Level
After creating a new song the next step is to set the input level for the
instrument or other sound source that you will be recording.
1. Raise the Stereo Fader (the red
fader) to the 0 position. This is all
of the way up.
If the Stereo Fader is already up,
first lower it and then raise it back up to
the 0 position. Since the faders are not
motorized, this ensures that the Stereo
Fader is actually at 0.
1. Press and hold the [INPUT SEL] key for the input that you are going to
record from.
7

Questions and Answers:

Question and Answer IconNeed help?

Do you have a question about the Yamaha AW16G Recording 101 and is the answer not in the manual?
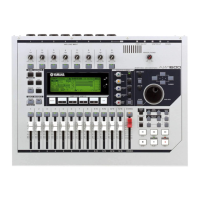
Yamaha AW16G Recording 101 Specifications

General IconGeneral
TypeDigital Audio Workstation
Number of Tracks16
Simultaneous Recording Tracks8
Simultaneous Playback Tracks16
Phantom PowerYes
Internal Hard Drive40GB
Sampling Rate44.1 kHz
Bit Depth24-bit
CD-RW DriveYes
Dynamic ProcessingCompressor, Gate
Digital I/OS/PDIF
USBYes
EffectsReverb, Delay, Chorus
Inputs8 x XLR/TRS combo jacks

Related product manuals