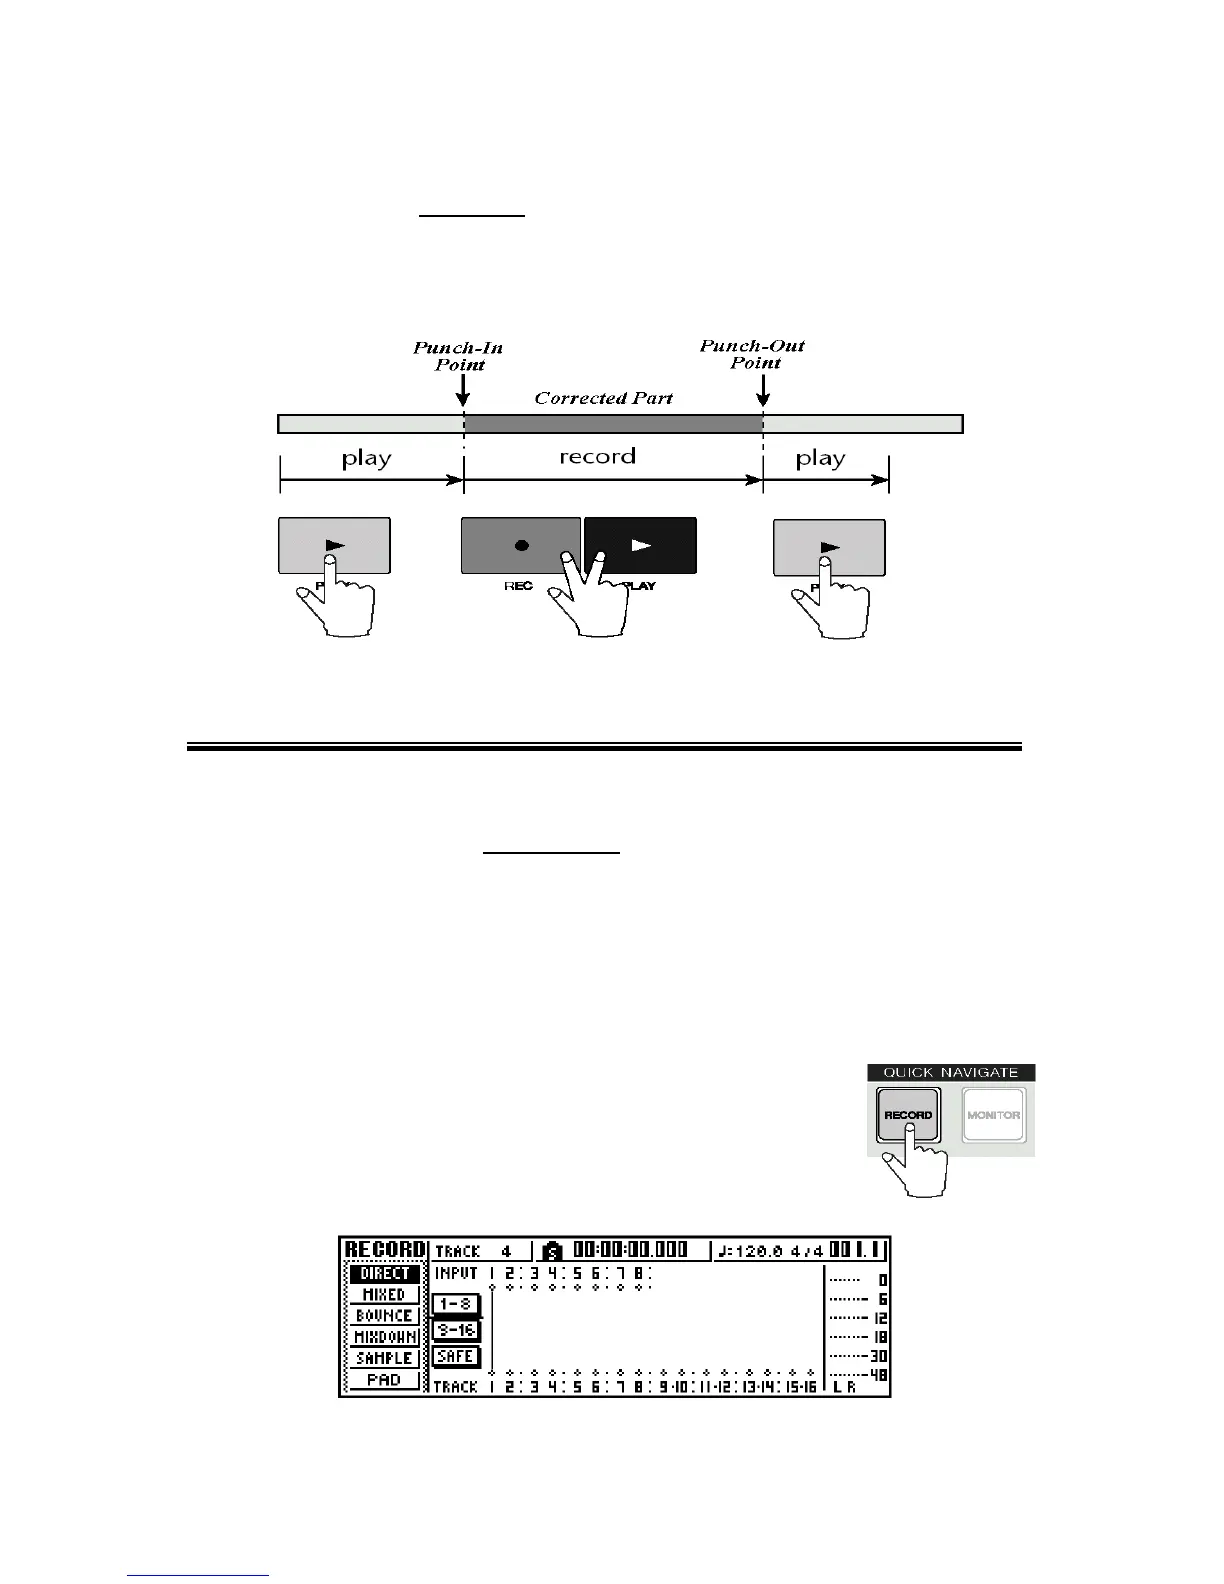
If the mistake is only a short one and you just need to fix the mistake and
not erase the rest of the track you can first punch-in at the point where the
mistake was and then punch-out
when you have fixed the mistake. To perform a
punch-out, first punch-in at the point where the mistake was made then press the
[PLAY] key by itself to ‘punch-out’ of recording after you have fixed the mistake.
Overdubbing
After you have successfully recorded the first track or tracks, you
can then record additional tracks while listening to your previously recorded
tracks. This is referred to as ‘overdubbing
' tracks.
Before you begin overdubbing you must disengage the previously
recorded tracks from being record-enabled. If you don't, you will erase the tracks
that you just recorded.
Disengaging a track from being record-enabled
1. In the Quick Navigate section press the [RECORD]
key until the DIRECT page of the RECORD screen is
displayed.
There will be a line connecting the input channel from which you recorded to the
to the track that was recorded.
10

 Loading...