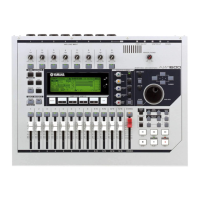
Setting up the AW16G
Before you begin recording it is necessary to connect the AW16G with the
equipment that it is to be used with.
Step 1: Connect the Monitoring System
If powered monitors are to be used with the AW16G, connect the Monitor
Outs of the AW16G to the inputs of the monitors using unbalanced
instrument
cable. The monitor outputs of the AW16G are unbalanced 1/ 4-inch jacks so it is
not necessary to use balanced cable. Do not use speaker cable to connect the
AW16G to powered monitors.
With Powered Monitors
If unpowered monitors are to be used with the AW16G, first connect the
Monitor Outs of the AW16G to the inputs of the power amp using unbalanced
instrument cable. Next, connect the speaker outputs of the power amp to the
inputs of the unpowered monitors using speaker cable. For best results 10-16
gauge speaker cable should be used to connect the power amp to the monitors.
The lower the gauge of speaker cable, the better the sound quality will be. For
shorter distances (less than 10-20 ft.), this will be less noticeable but it is still
important to use lower gauge quality speaker cables. Do not use speaker cable
to connect the AW16G to the power amp.
2

 Loading...