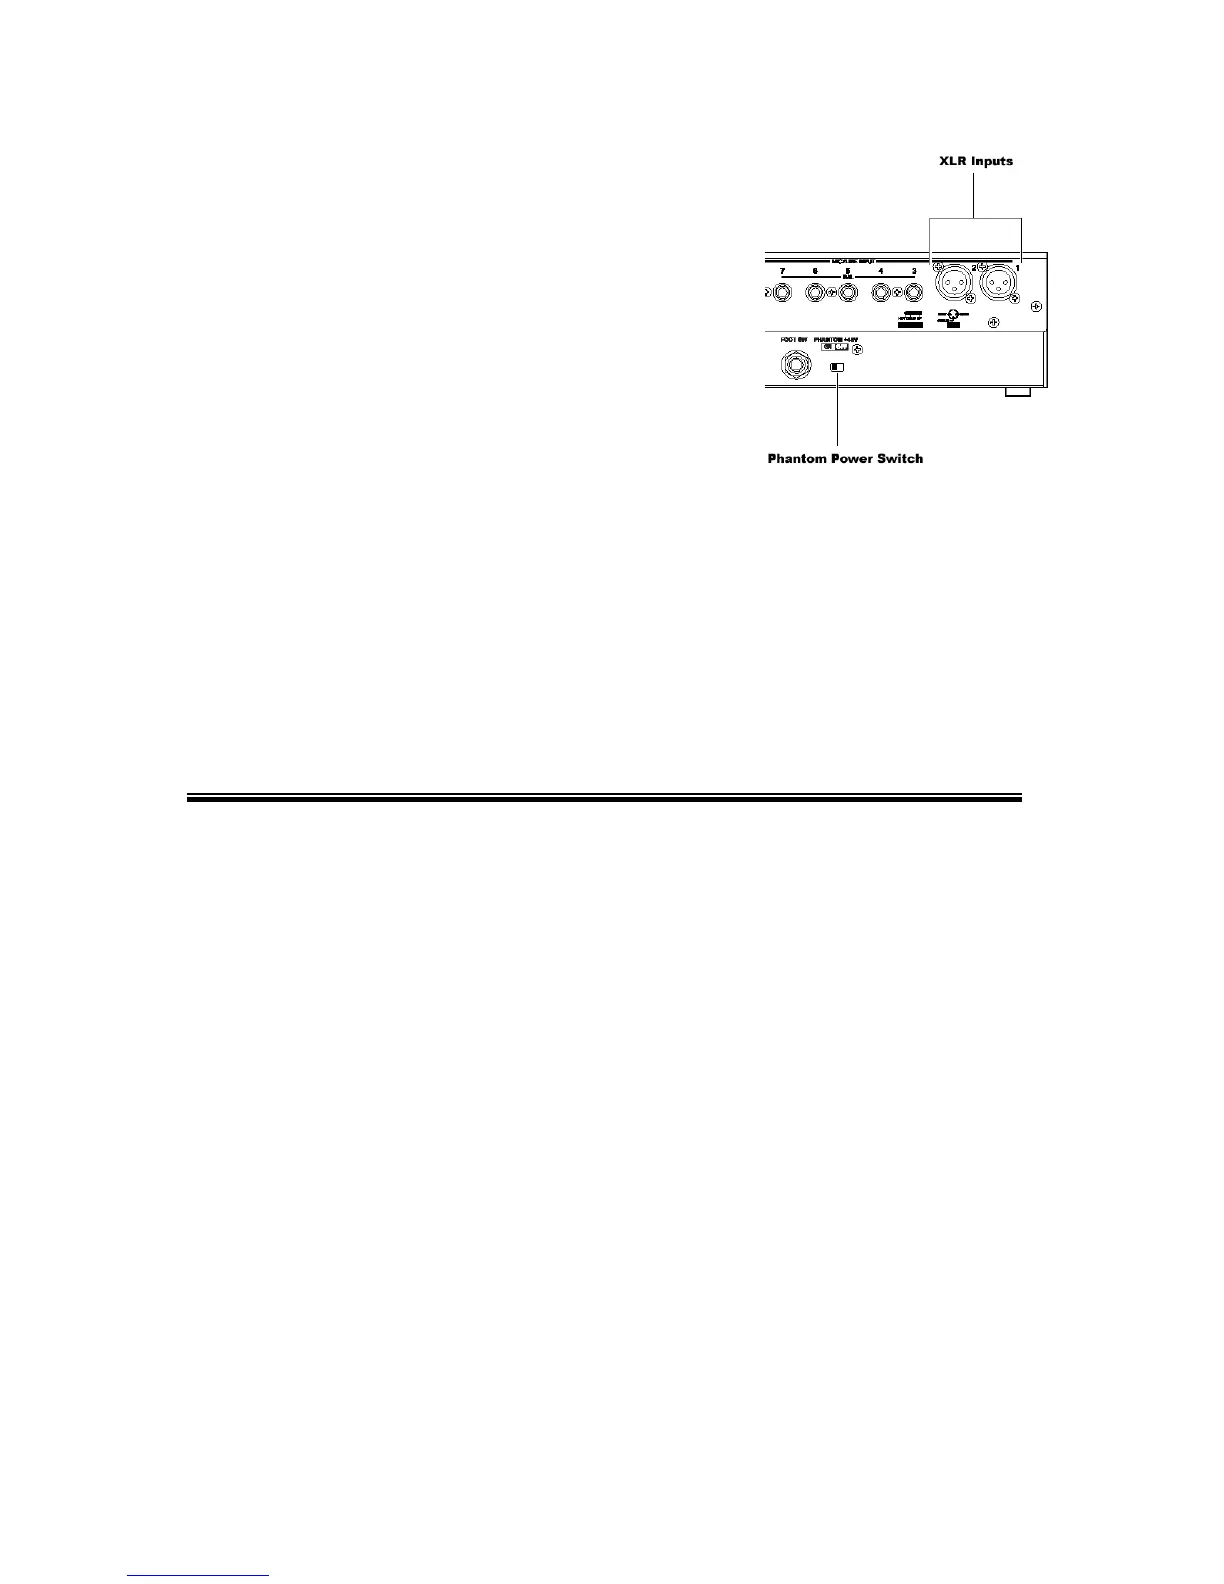
If a condenser microphone is to be connected
to either input 1 or 2, the phantom power must be
turned on.
If a condenser microphone is to be connected
to either input 1 or 2, the phantom power must be
turned on.
The Hi-Z input should be used to connect electric guitars or basses with
passive electronics to the AW16G. If the guitar or bass has active electronics, or
is going through an effects device before being connected to the AW16G, then
one of the regular 1/4-inch TRS inputs should be used.
The Hi-Z input should be used to connect electric guitars or basses with
passive electronics to the AW16G. If the guitar or bass has active electronics, or
is going through an effects device before being connected to the AW16G, then
one of the regular 1/4-inch TRS inputs should be used.
Step 3: Turn the Equipment on. Step 3: Turn the Equipment on.
The final step before you can begin recording is to turn all of the
equipment on. When turning the equipment on the following order should be
used:
The final step before you can begin recording is to turn all of the
equipment on. When turning the equipment on the following order should be
used:
1. Turn on external devices such as audio sources and effects processors
connected to the AW16G.
1. Turn on external devices such as audio sources and effects processors
connected to the AW16G.
2. Turn on the AW16G. 2. Turn on the AW16G.
3. Turn on the monitoring system connected to the AW16Gs Monitor
Outputs.
3. Turn on the monitoring system connected to the AW16Gs Monitor
Outputs.
This will prevent damage to the speakers. If the monitoring system is
turned on first, then when the AW16G and the other equipment is turned on a loud
‘pop’ will be produced which may damage the speakers.
This will prevent damage to the speakers. If the monitoring system is
turned on first, then when the AW16G and the other equipment is turned on a loud
‘pop’ will be produced which may damage the speakers.
When turning the equipment off the reverse order should be used: When turning the equipment off the reverse order should be used:
1. Turn off the monitoring system connected to the AW16Gs Monitor
Outputs.
1. Turn off the monitoring system connected to the AW16Gs Monitor
Outputs.
2. Turn off the AW16G. To access the AW16Gs shutdown screen press the
[SONG] key until the SONG SHUTDOWN screen appears then cursor to
SHUTDOWN and press the [ENTER] key.
2. Turn off the AW16G. To access the AW16Gs shutdown screen press the
[SONG] key until the SONG SHUTDOWN screen appears then cursor to
SHUTDOWN and press the [ENTER] key.
3. Turn off external devices such as audio sources and effects processors
connected to the AW16G.
3. Turn off external devices such as audio sources and effects processors
connected to the AW16G.
5
5

 Loading...