13
P-115B/P-115WH/P-45B
A-8 .■ PN2■Circuit■Board■
(Time■required:■Abou t■14■minutes)
A-8-1. Remove the lower case assembly.
(See procedure A-1.)
A-8-2. Remove the keyboard assembly. (See procedure A-6.)
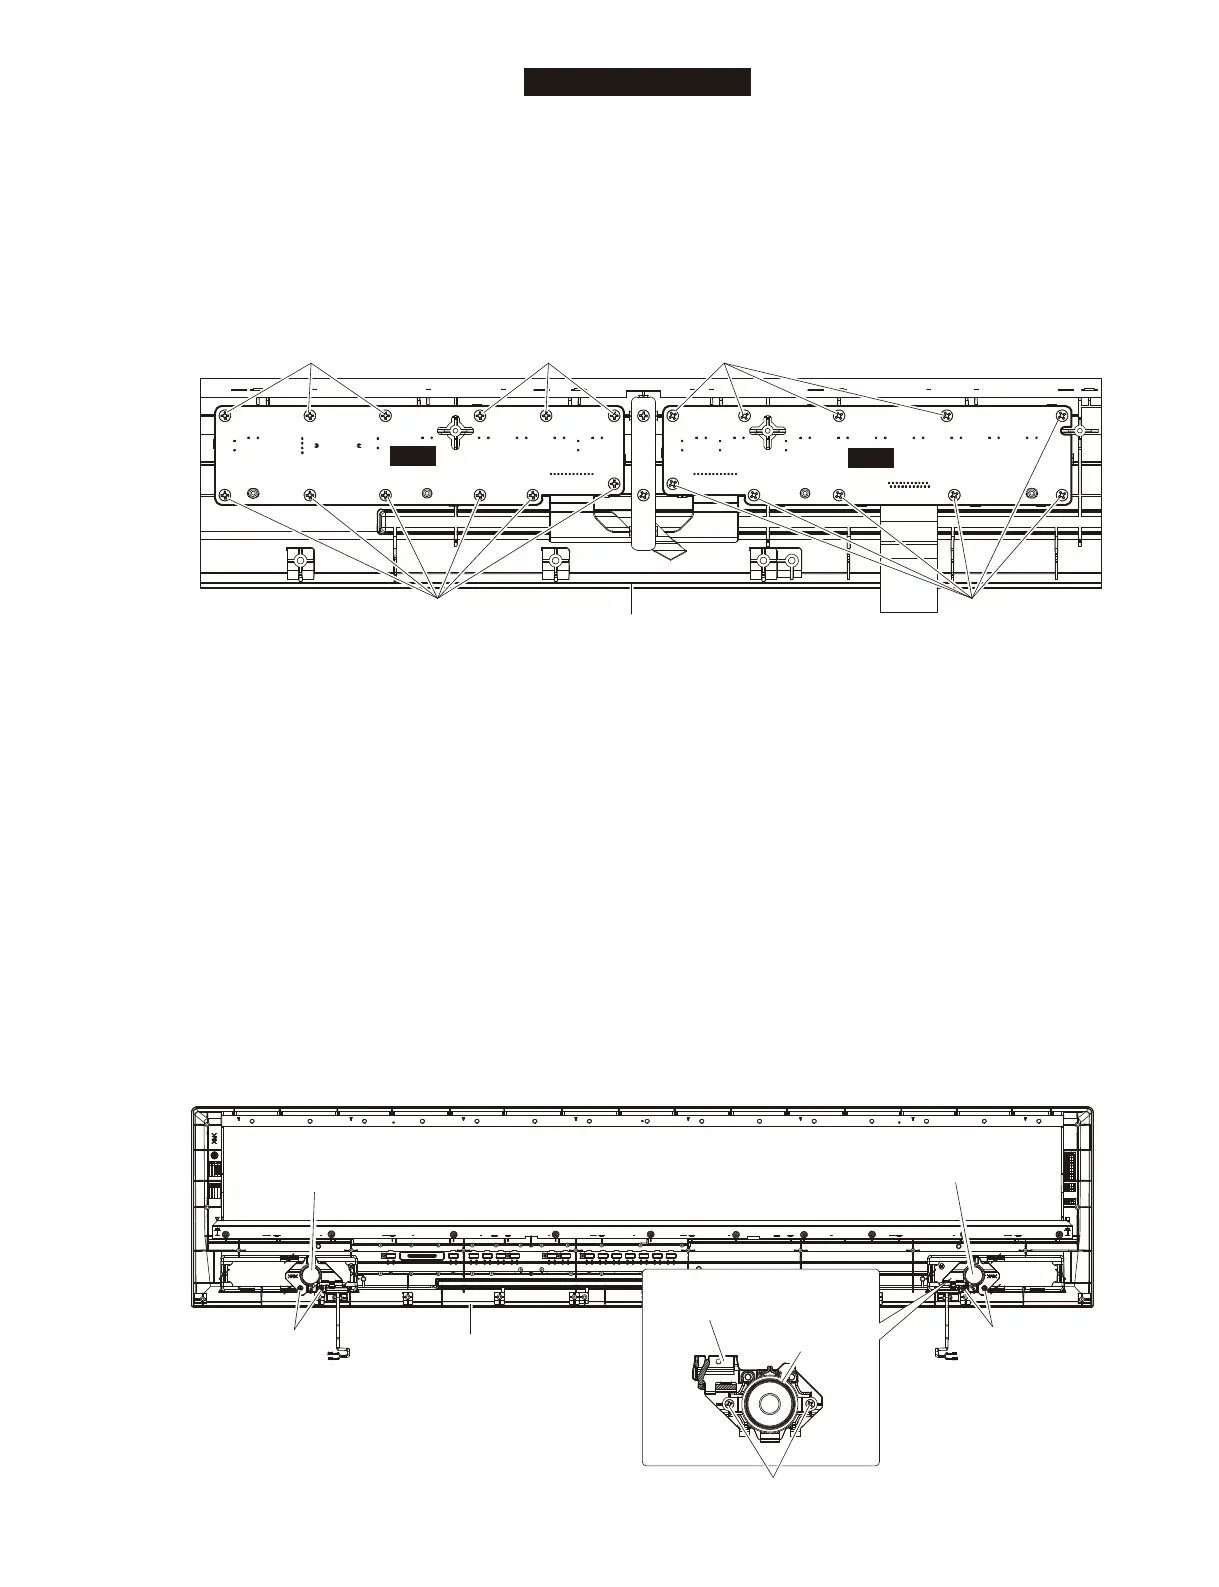
A-8-3. Remove the ten (10) screws marked [S10E]. The PN2
circuit board can then be removed. (Fig. A-6)
A-8. PN2 シート
(所要時間:約 14 分)
A-8-1. 下ケース Ass’y を外します。(A-1 項参照)
A-8-2. 鍵盤 Ass’y を外します。(A-6 項参照)
A-8-3.[S10E]のネジ 10 本を外し、PN2 シートを外します。
(図 A-6)
Fig.■A-6
(図 A-6)
Fig.■A-7
(図 A-7)
A-9.■ Tweeter■
(Time■required:■Abou t■14■minutes)
A-9-1. Remove the lower case assembly.
(See procedure A-1.)
A-9-2. Remove the keyboard assembly. (See procedure A-6.)
A-9-3. Remove the two (2) screws marked [S10F]. The TW
assembly can then be removed. (Fig. A-7)
A-9-4. Remove the two (2) screws. The tweeter can then be
removed. (Fig. A-7)
TW assembly L: [TS10]
TW assembly R: [WS10]
* The right and left tweeters can be removed in the same
way.
A-9. ツイーター
(所要時間:約 14 分)
A-9-1. 下ケース Ass’y を外します。(A-1 項参照)
A-9-2. 鍵盤 Ass’y を外します。(A-6 項参照)
A-9-3.[S10F]のネジ 2 本を外し、TWAss’y を外します。
(図 A-7)
A-9-4. ネジ 2 本を外し、ツイーターを外します。(図 A-7)
TWAss’yL:[TS10]
TWAss’yR:[WS10]
※ 左右のツイーターは、それぞれ同じ方法で外すことがで
きます。
<Bottom view>
PN1
[S10D] [S10D]
[S10D]
PN2
[S10E]
[S10E]
UPPER CASE ASSEMBLY
(上ケース Assy)
P-115B/P-115WH
<Bottom view>
[S10F]
[S10F]
TW ASSEMBLY R
(TWAssyR)
TW ASSEMBLY L
(TWAssyL)
UPPER CASE ASSEMBLY
(上ケース Assy)
TWEETER
(ツイーター )
[WS10]
TW ASSEMBLY R
(TWAssyR)
 Loading...