EasyManuals Logo
Home>Yealink>Conference System>VC400

Yealink VC400 User Manual

Yealink VC400
171 pages
To Next Page IconTo Next Page
To Previous Page IconTo Previous Page
Page #37 background imageLoading...
Page #37 background image
Getting Started
25
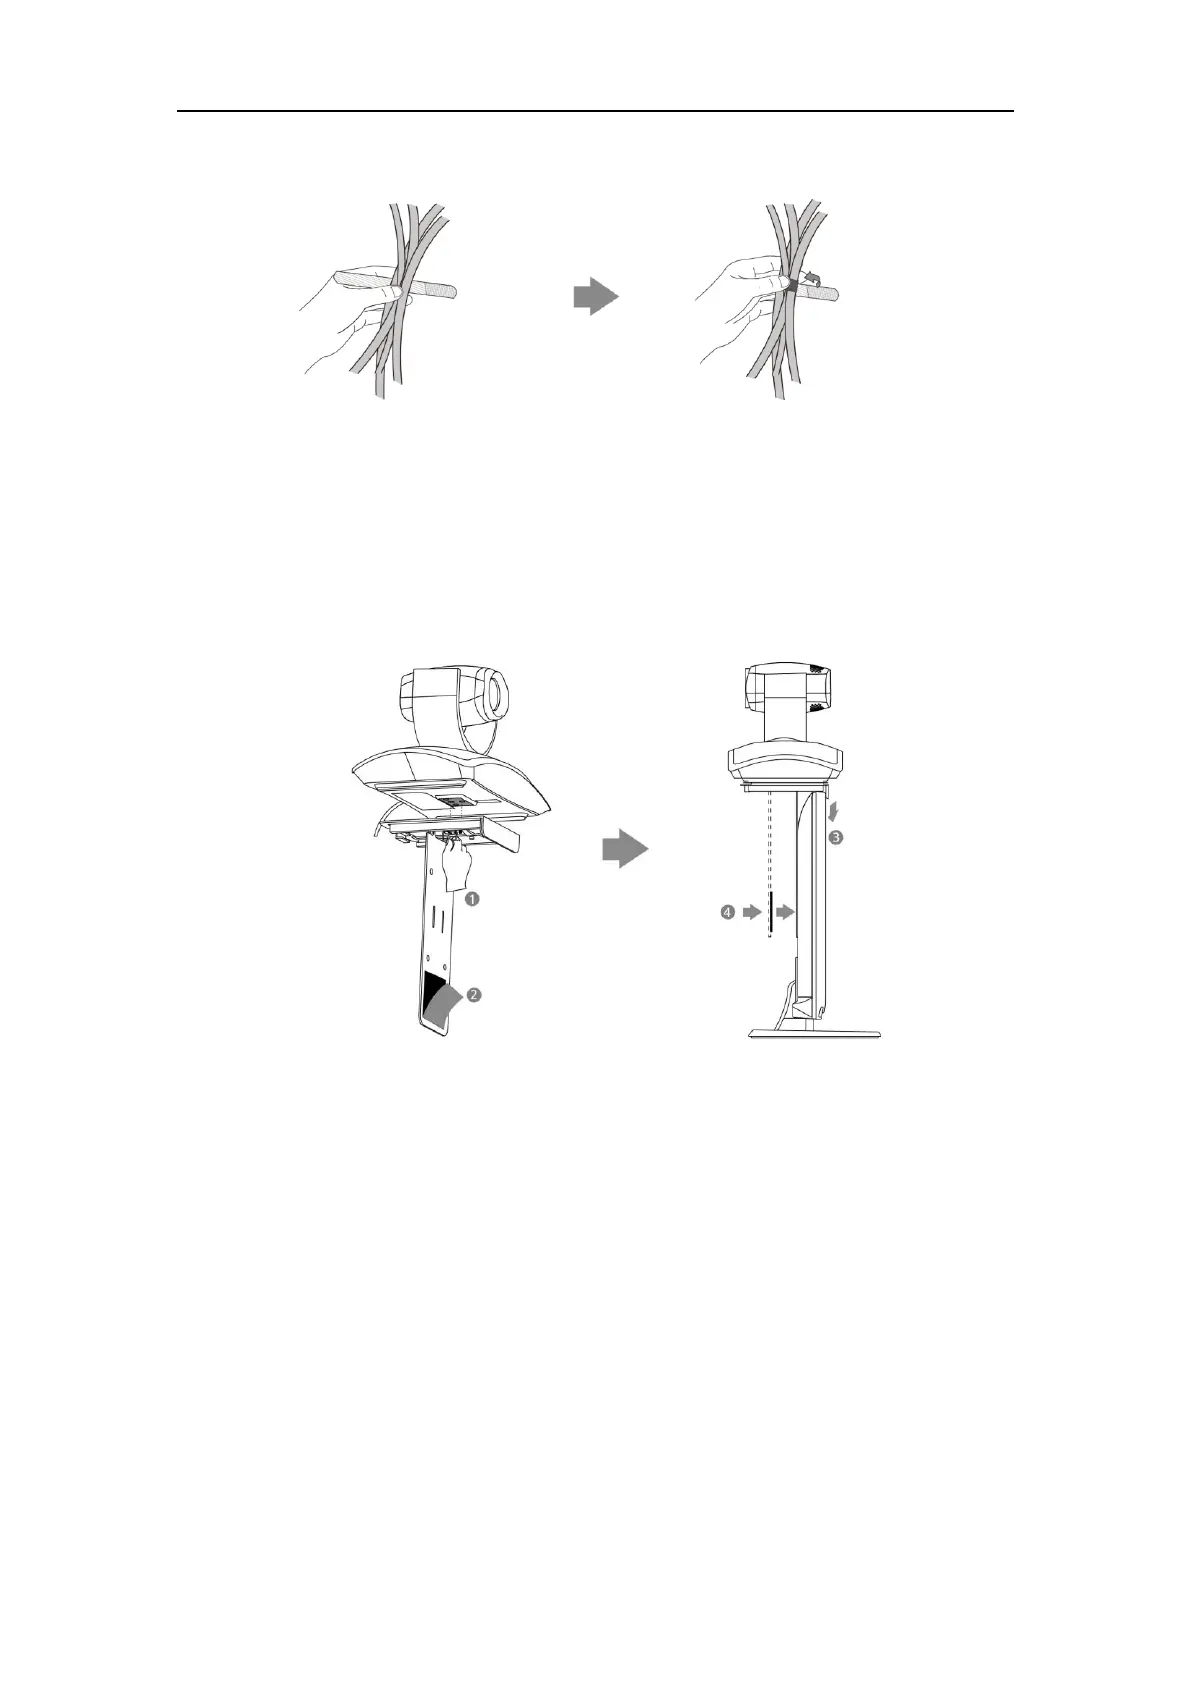
You can fasten all cables with cable ties after all devices are connected.
Installing the Camera
You can choose to mount the camera on your TV or a wall, depending on your actual needs.
a) Mounting the camera on a TV
When the thickness of your TV is between 35-120 mm, you can mount the camera on your TV.
Do the following:
1. Lock the camera to the L-bracket.
2. Remove the protection of the Velcro.
3. Put the L-bracket on the top of the TV.
4. Make sure the back of the TV is clean, and then adjust the bracket to ensure close adhesion
to the back of the TV with Velcro.
b) Mounting the camera on a wall
You can also decide to mount the camera on the wall. The recommended height for camera
positioning is 1.5m-1.8m above the ground.

Table of Contents

Other manuals for Yealink VC400

Questions and Answers:

Question and Answer IconNeed help?

Do you have a question about the Yealink VC400 and is the answer not in the manual?

Yealink VC400 Specifications

General IconGeneral
Optical zoom18 x
White balanceAuto, Indoor, Outdoor
Focus adjustmentAuto
Video codecsH.264, H.264, H.263
Supported video modes1080p
Supported graphics resolutions352 x 288, 704 x 576, 1280 x 720 (HD 720), 1920 x 1080 (HD 1080)
Voice codecsG.711, G.711a, G.722
Line-inYes
USB 2.0 ports quantityUSB 2.0 ports have a data transmission speed of 480 Mbps, and are backwards compatible with USB 1.1 ports. You can connect all kinds of peripheral devices to them.
ITU-supported standardsH.323
Ethernet LAN data rates10, 100, 1000 Mbit/s
AC input voltage100-240 V
Power consumption (max)30 W
Weight and Dimensions IconWeight and Dimensions
Depth183 mm
Width330 mm
Height40 mm

Related product manuals