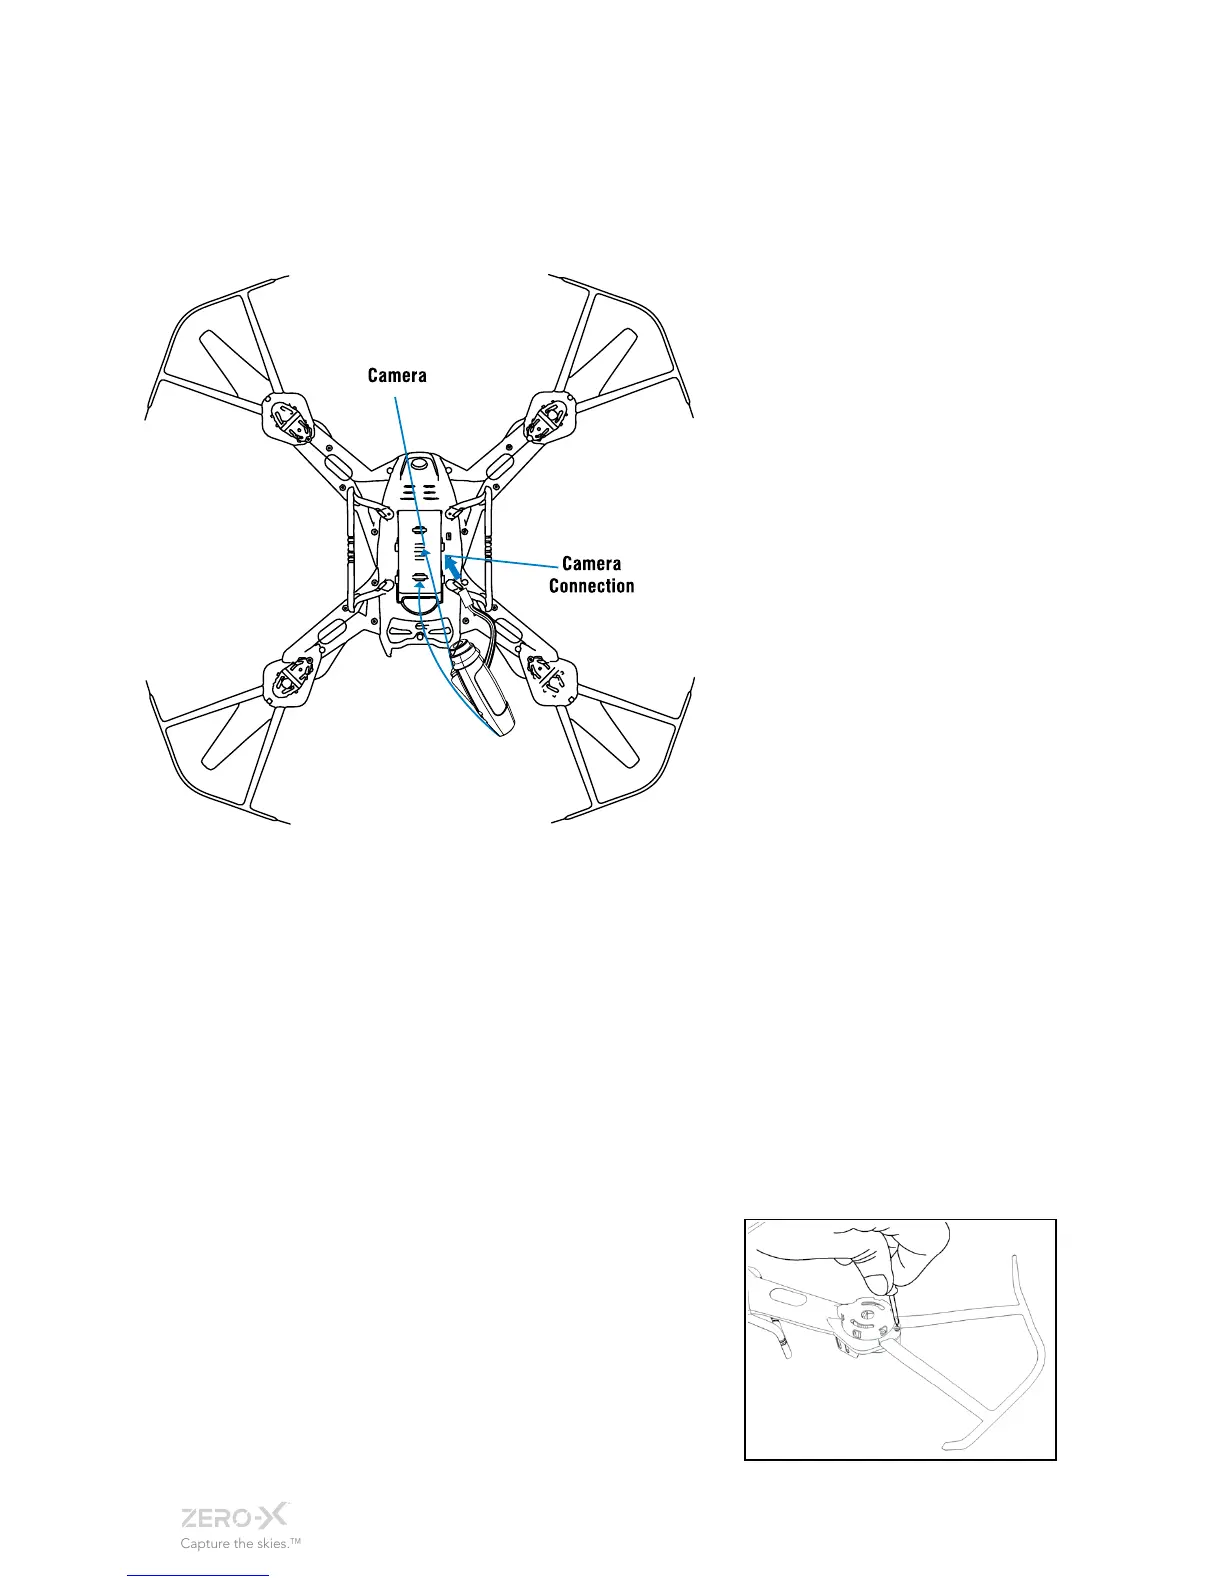
3.3 CAMERA CONNECTION GUIDE
1. Connect the camera connection wire to the socket on the under side
of the Scout. Be sure to connect the cable in the correct orientation,
connecting the cable the wrong way can cause damage to the
connection.
Avoid pulling or twisting the
cable and ensure that the plug
is in the correct orientation.
Twisting the cable or inserting
the plug in the incorrect
orientation may damage the
camera connection on your
Scout.
2. Hook the connection pegs
on the camera on to the
loops on the battery flap on
the scout drone and slide
the camera forward until the
camera clips into position.
3.4 INSTALLING A MICRO SD CARD
With the Scout upside down and facing away from you insert the Micro
SD card into the rear of the camera ensuring that the text side of the
Micro SD Card is face down and the notched side of the card is on the
left side.
Gently press the card in until you hear the lock click into place.
(*Micro SD Card not included)
3.5 INSTALLING/REMOVING ROTOR GUARDS
Rotor Guards are an optional fitting on the Scout, however for safety
reasons we strongly advise you to attach them. Whether Rotor Guards
are attached or not, please be very careful when handling the drone. To
avoid injury, do not touch the drone while
the blades are turning or the remote
control is powered on.
• Line up the guide pegs on the Rotor
Guards with the holes on the arms
of the Scout so that the screw in the
Rotor Guard matches up with the screw
hole in the Scout.
 Loading...