4.1 FLYING YOUR SCOUT
1. After installing a fully charged
battery and installing 4 x AA
batteries (AA batteries not
included) into the remote control
and conducting a complete check
of your surroundings, turn the
Power Switch on the Scout to the
ON position.
2. Once on, the LED lights on the arms
of the Scout should flash signalling a
connection to the Remote Control.
Place the Scout on the ground
facing away from you and move back three metres.
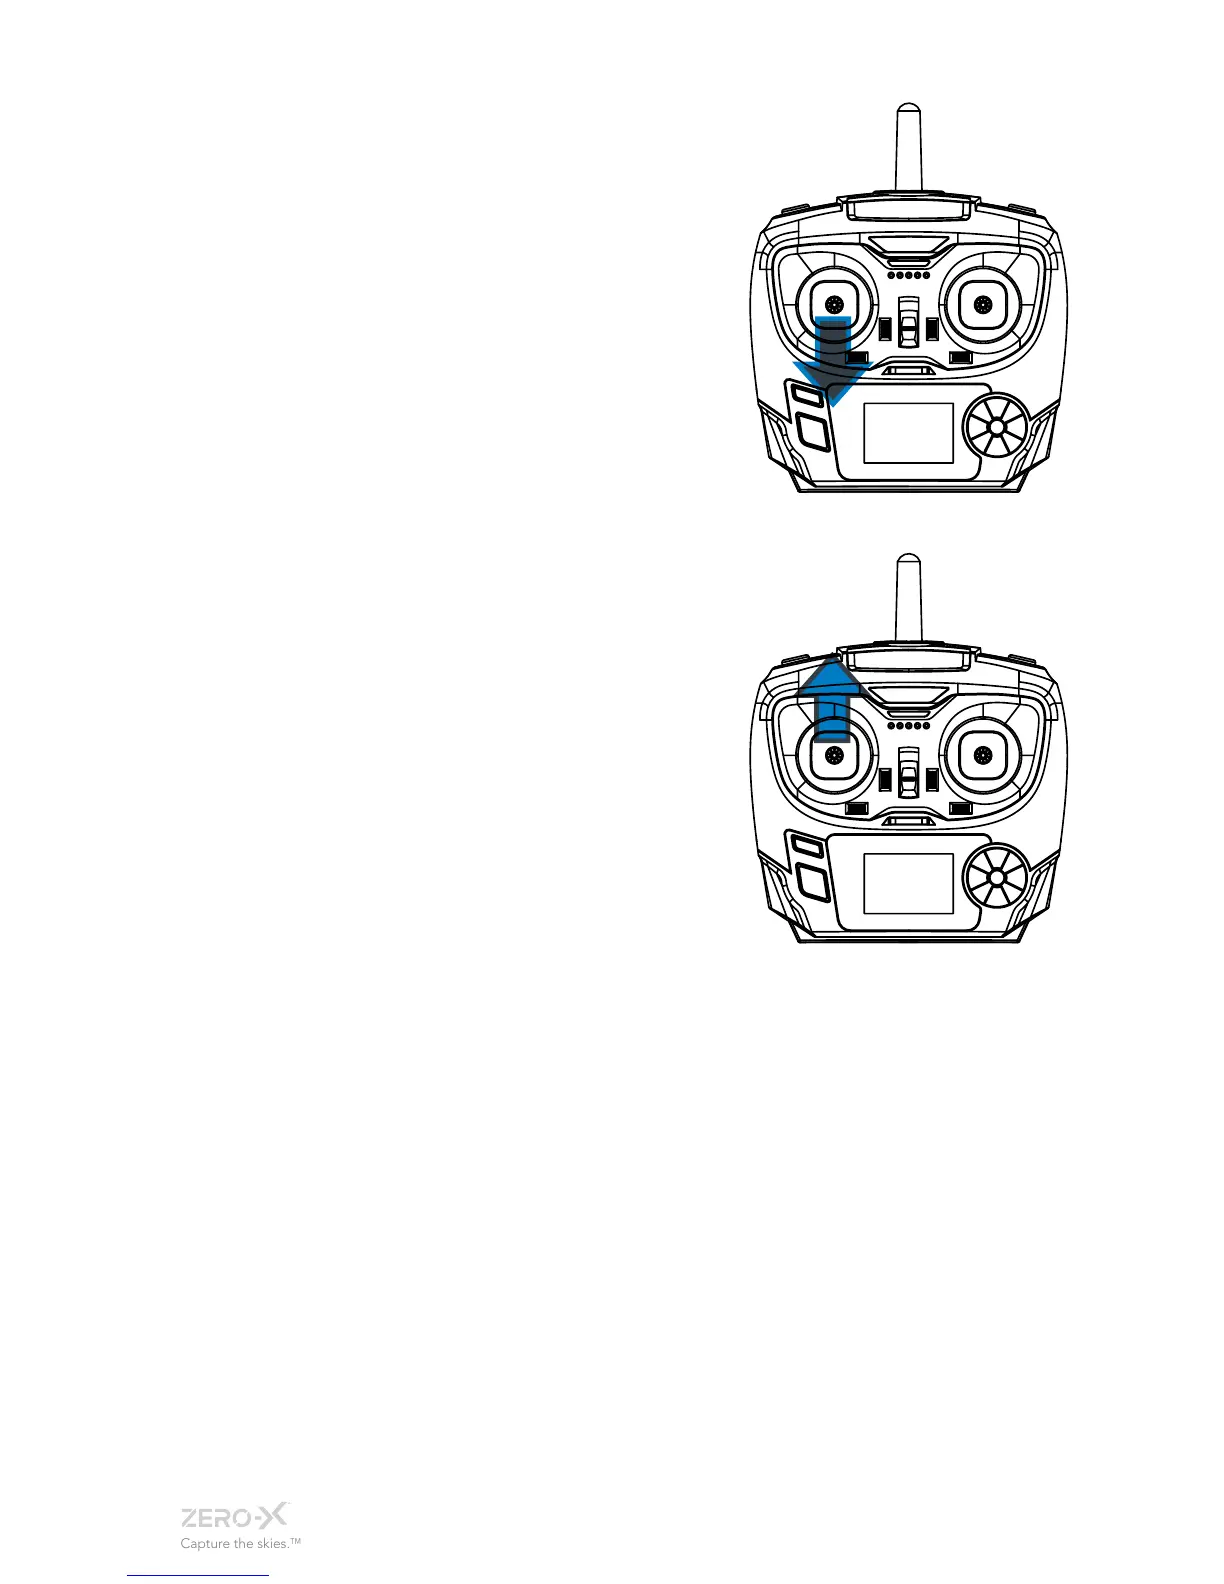
3. With the Left Thumbstick
(Acceleration/Yaw) in the lowest
(down) position power on the
remote control. The remote should
beep once to indicate power up has
been successful.
4. To activate the connection between
the remote and the Scout, move
the Left Thumbstick (Acceleration/
Yaw) on the Remote Control to the
highest (up) position. Hold for one
second and then return the Left
Thumbstick (Acceleration/Yaw) to
the lowest (down) position.
4.2 TROUBLE SHOOTING
Do not approach the drone again until the remote has been powered
off. If for any reason the Scout does not work after following the
above steps please check the following.
a) The Scout battery is fully charged, correctly connected and not
damaged.
b) The batteries in the Remote Control are the same brand, have an
equal amount of charge and have enough charge to power the
remote control correctly (using an assortment of batteries will affect
the performance of the Remote Control).
c) The connection between the Remote Control and the Scout
drone may not have been completed correctly. Ensure that when
activating the connection, the Left Thumbstick is moved all the
way to the top and then all the way to the bottom. If this is not
completed the connection will not activate.
Once these elements have been checked, turn both the Scout and
the Remote Control off and start the launching process again.
 Loading...