34980A Getting Started Guide 11
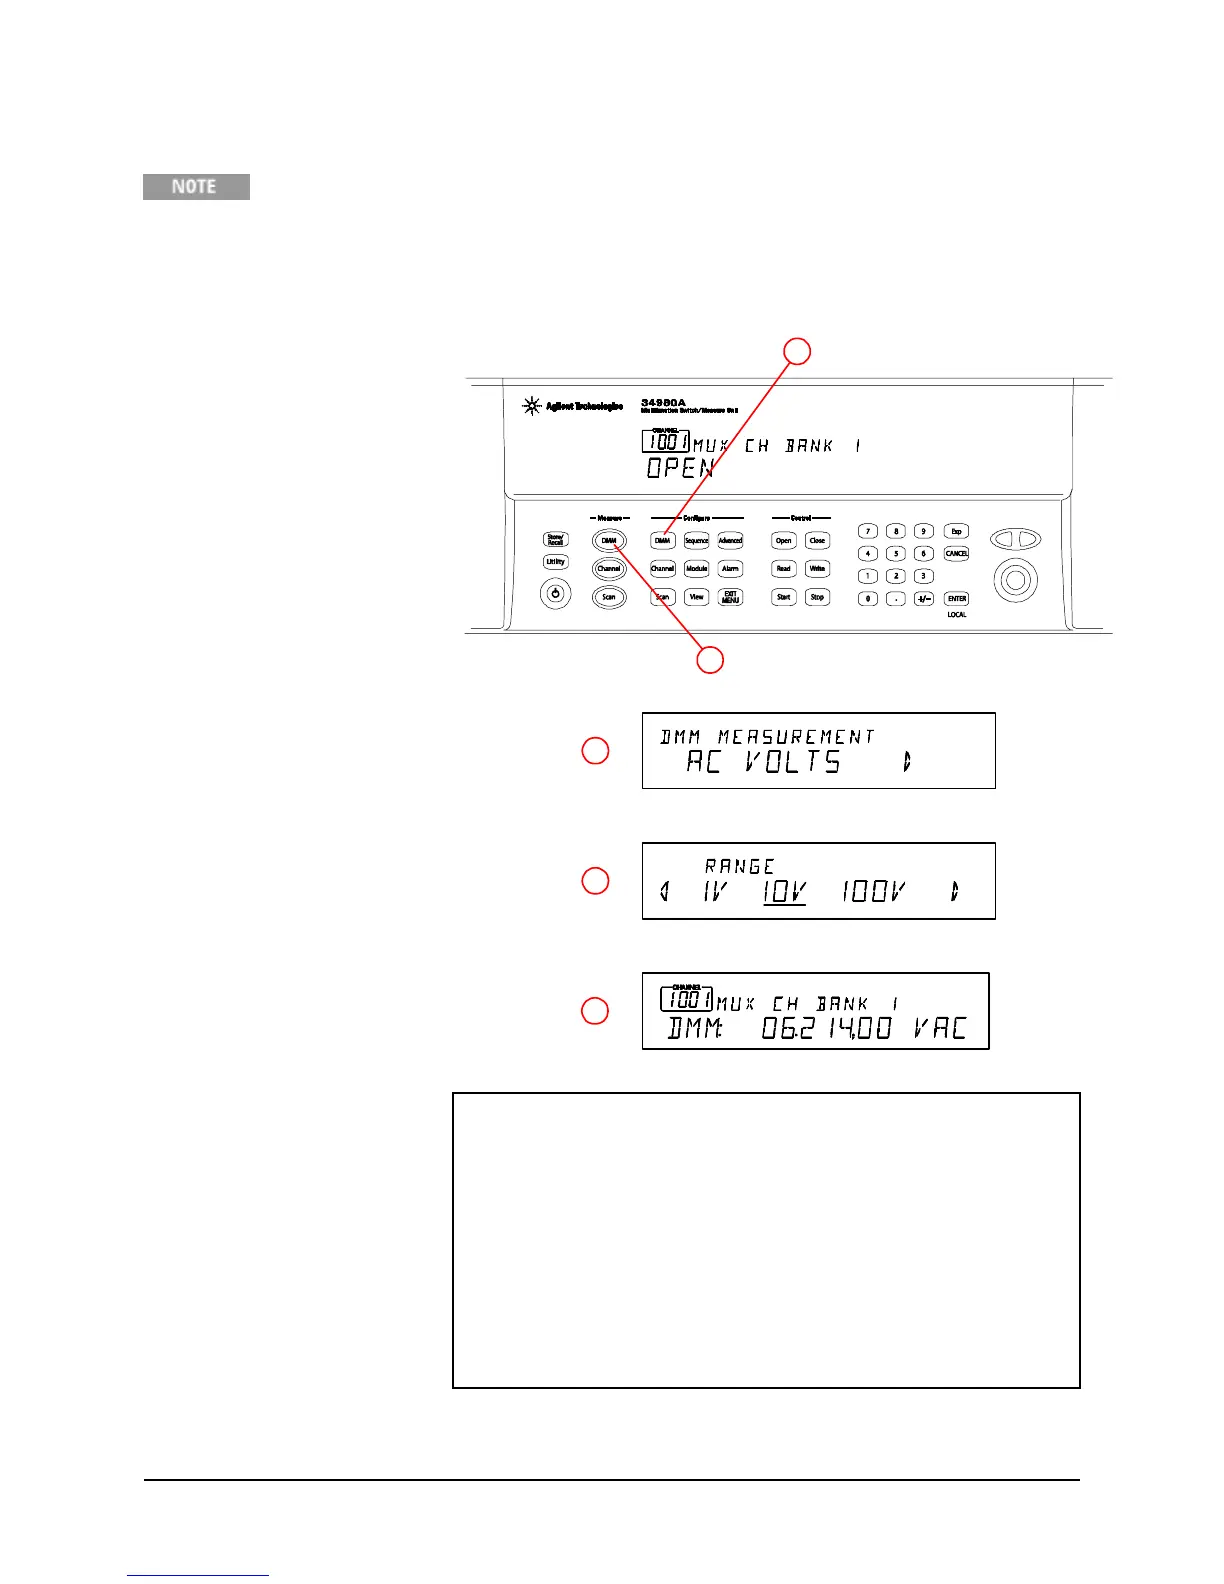
Menu Example: Configuring the Internal DMM for a Measurement
This example uses the internal DMM for a measurement. If you have disabled your
internal DMM, or don’t have one installed in your 34980A, skip this example.
Use the following instructions for any of the multiplexer modules (34921A, 34922A, 34923A, 34924A,
or 34925A).
1. Make sure you have a
multiplexer module installed
in slot 1. Select any channel
on this module (the channel
number is shown in green
channel field on display).
2. Within the
Configure
key
group, press the DMM key
to set the measurement
parameters for the internal
DMM. Note that the DMM
key lights.
3. Using the knob to navigate
through the menu choices,
select the AC VOLTS
function.
4. Press the lighted DMM
menu key to accept the
ac voltage function.
5. Using the knob, select 10V,
which indicates the range
parameter for ac voltage.
6. Press the EXIT MENU key
to save your selections
(ac voltage, 10 volt range)
and immediately exit the
menu. All unmodified
parameters within the menu
remain unchanged.
7. Within the
Measure
key
group, press the DMM key.
Note that the key lights and
continuous ac voltage
measurements are made
using the internal DMM.
8. To stop the measurements,
press the DMM key (in the
Measure
key group).
7
2
3
5
7
In This Example:
• You configured the internal DMM for ac voltage measurements.
• You started measurements, viewed continuous measurement
results, and stopped the measurements.
Since you didn’t open or close any channels, no module or Analog
Bus relays were exercised in this example. The internal DMM
acted as a stand-alone instrument and measured whatever
ac voltages happened to be present on the Analog Buses.
Pressing the DMM key (in
Measure
key group) also allowed you
to continuously monitor measurements on the front panel.
 Loading...