EasyManuals Logo

Asus RT-AC1900 Dual Band User Manual

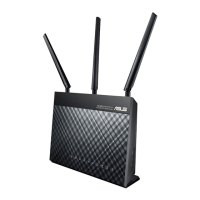
Asus RT-AC1900 Dual Band
129 pages
To Next Page IconTo Next Page
To Previous Page IconTo Previous Page
Page #87 background imageLoading...
Page #87 background image
87
3. Set a static IP on your computer and use the following to set up
your TCP/IP settings:
IP address: 192.168.1.x
Subnet mask: 255.255.255.0
4. From your computers desktop, click
Start > All Programs > ASUS Utility RT-AC1900 Wireless
Router > Firmware Restoration.
5. Specify a firmware file, then click Upload.
NOTE: This is not a firmware upgrade utility and cannot be used on
a working ASUS Wireless Router. Normal firmware upgrades must be
done through the web interface. Refer to Chapter 4: Configuring the
Advanced Settings for more details.
5.3 Setting up your printer server
5.3.1 ASUS EZ Printer Sharing
ASUS EZ Printing Sharing utility allows you to connect a USB
printer to your wireless router’s USB port and set up the print
server. This allows your network clients to print and scan files
wirelessly.

Table of Contents

Questions and Answers:

Question and Answer IconNeed help?

Do you have a question about the Asus RT-AC1900 Dual Band and is the answer not in the manual?

Asus RT-AC1900 Dual Band Specifications

General IconGeneral
Maximum Data Rate1900 Mbps (600 Mbps on 2.4 GHz + 1300 Mbps on 5 GHz)
Antenna3x external antennas
RAM256 MB
Flash Memory128 MB
SecurityWPA2-PSK, WPA-PSK, WPA-Enterprise, WPA2-Enterprise, WPS support
Wireless StandardsIEEE 802.11a/b/g/n/ac
Frequency Bands2.4 GHz, 5 GHz
Ports1 x Gigabit WAN, 4 x Gigabit LAN, 1 x USB 3.0, 1 x USB 2.0
FeaturesAiProtection, Parental Controls, Guest Network
Weight750 g
Wi-Fi Technology802.11ac Dual Band

Related product manuals