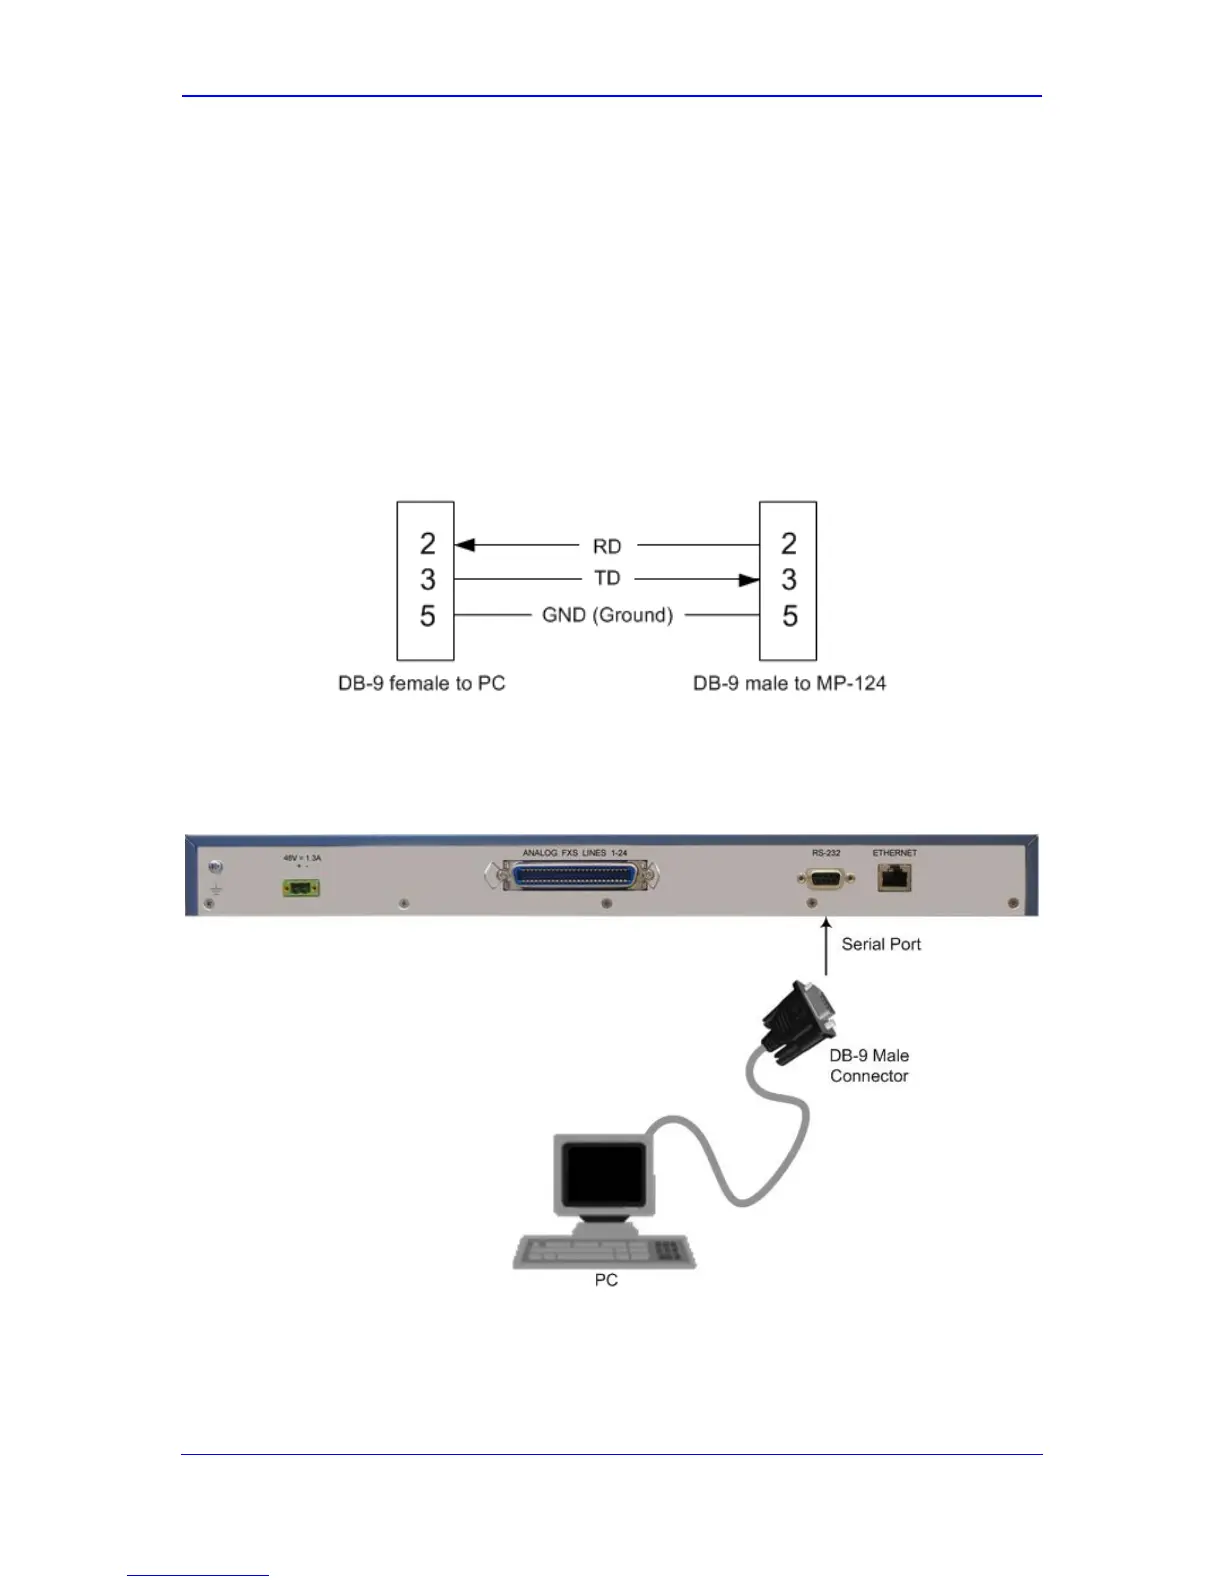
5.4 Connecting to a PC for Serial Communication
The procedure below describes how to connect the device to a computer for serial RS-232
communication. The method depends on the MP-124 model.
5.4.1 MP-124 Rev. D
MP-124 Rev. E provides serial interface through the DB-9 port located on the rear panel:
Connector pinouts:
Figure 5-25: DB-9 Connector Pinouts for Serial Interface
To connect MP-124 Rev. D to a computer for serial communication:
1. Connect the DB-9 connector on one end of the cable to the device's RS-232 port
(labeled RS-232).
Figure 5-26: Connecting MP-124 Rev. D for Serial Communication
2. Connect the DB-9 connector at the other end of the cable to the COM RS-232
communication port on your computer.
Once you power-up the device, the Ready and LAN LEDs on the front panel light up green
(after a self-testing period of about a minute). Any malfunction in the startup procedure
changes the Ready LED to red.
 Loading...