Version 5.6 27 November 2008
Installation Manual 2. Installing the Device
2.2.4.4 Connecting MP-124 RS-232 Port to a PC
Follow the procedure below to connect the MP-124 serial (RS-232) interface to a PC using
a standard, straight-through cable with DB-9 connectors on either end.
¾ To connect MP-124 to a PC, take these 2 steps:
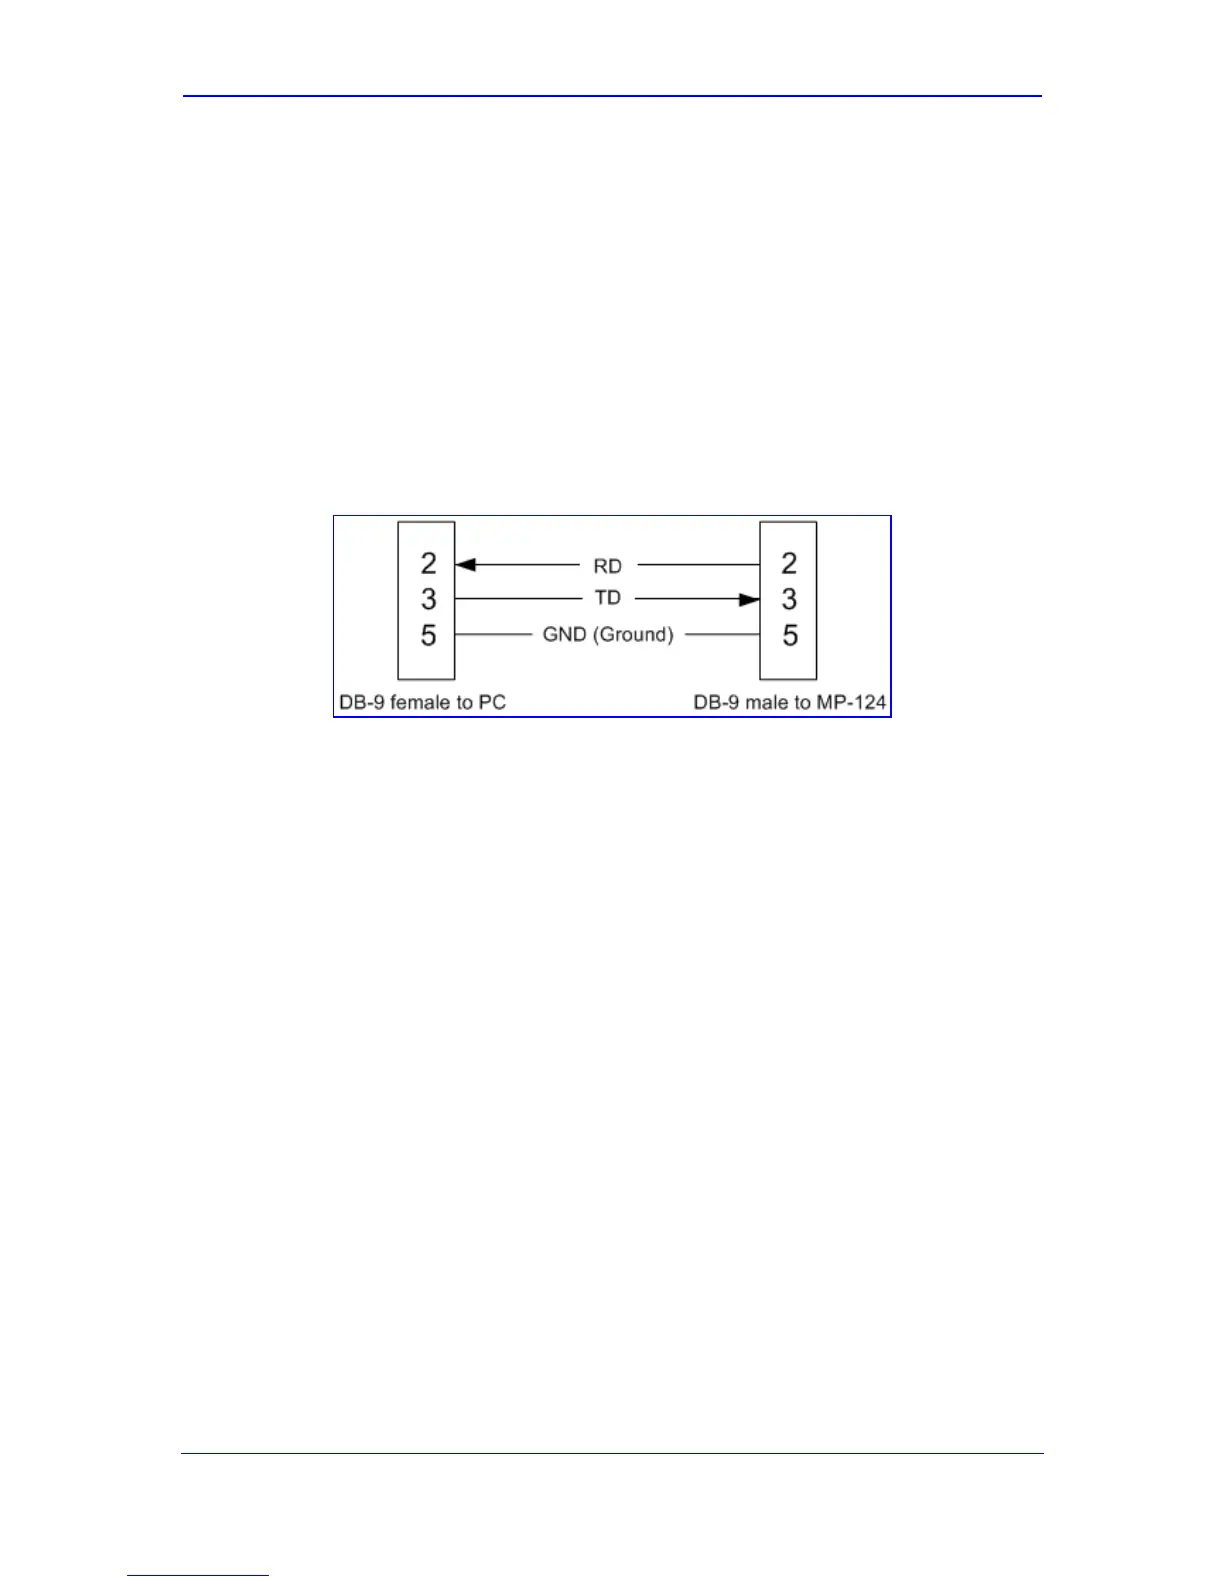
1. Connect the DB-9 connector (refer to the figure below for connector pinouts) on one
end of the cable to the MP-124 RS-232 port (labeled RS-232).
2. Connect the DB-9 connector (refer to the figure below for connector pinouts) at the
other end of the cable to either the COM1 or COM2 RS-232 communication port on
your PC.
Figure 2-20: MP-124 RS-232 Connector Pinouts
For information on establishing a serial communications link with the MP-124, refer to
Accessing the CLI.
2.2.4.5 Connecting MP-124 to Power
The MP-124 can be powered either from a standard AC electrical outlet or a 48-VDC power
supply. The power configuration depends on the ordered MP-124 model.
2.2.4.5.1 AC Power Supply
The cabling of the MP-124 model for AC power is described below.
¾ To connect MP-124 to the AC power supply, take this step:
Connect the MP-124 AC power socket (located on the rear panel) to a standard
electrical wall outlet, using the supplied AC power cord.

 Loading...