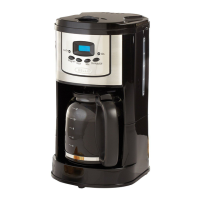
ipe the exterior with a damp cloth to remove super
cial stains. For stubborn stains, use
a ny
. Dry and replace disassembled parts. Turn the removable
lter holder so that the notch on
he front of the lter holder faces the front of the
offee Maker – the lter holder handle
ortably down into recessed areas on each side o
Add the cleaned permanent co
offee Maker is recommended at least once a month, dependin
water used in the unit. I
water in your area is especially hard,
ollowing cleaning procedure should be per
ormed every 2 weeks, since minerals in wate
ee and possibly lengthen brew time.
. Fill carafe with 1 part white vine
ar to three parts cold water. Pour water and vine
ar
solution in to the water reservoir.
2.
FF. When liquid stops drippin
lter holder into the cara
e and allow liquid to cool
offee Maker lid and pour liquid back into the water reservoir
lose the lid. Return carafe to the warmin
N again, allowing all the cleaning solution to empty into
ter dripping has stopped, empty contents o
. Allow Coffee Maker to cool for 10 minutes, rinse by brewin
a carafe full of cold water.
Insert the permanent coffee lter basket into the removable lter holder before brewin
water in the carafe.
Remove used lter and wash carafe and removable lter holder in hot suds
water.
Dry parts thoroughly
offee Maker has cooled, wipe exterior with a dry cloth
. Feed the cord into the cord stora
e area located at the back of the unit
tore in its box or in a cool, dry place.
4.
ever store unit while it is still plu
stico. Desenchufe el cable de alimentaci
n del tomacorriente
cuando no utilice el electrodom
stico para otros nes que no sean para los que fue
diseñado
ueden sufrir quemaduras si retira la tapa durante los ciclos de preparación
ara reducir el riesgo de incendio, no coloque ning
o de incendio, no coloque la unidad sobre o cerca de nin
arte de un aparato de calefacción o para cocinar.
ctrica, no instale el aparat
ara reducir el riesgo de incendio, no coloque nada directamente encima de la
supercie del aparato, cuando el aparato est
DVERTENCIA: Este electrodoméstico
enera calor y libera vapor mientras está en
so. Se deben tomar las medidas adecuadas para evitar el ries
ncendios u otro tipo de lesiones o daños a la propiedad.
odos los usuarios de este electrodom
comprender este manual
antes de ponerlo en
uncionamiento o limpiarlo
. Utilice solamente agua en este electrodom
stico. No coloque otros l
quidos ni
alimentos en este electrodom
stico. No mezcle ni agregue nada al agua que se
coloca en este electrodom
n se indica en las Instrucciones de
manten
intente mover un electrodom
quidos calientes. Deje que el
electrodom
e completamente antes de moverlo.
a el electrodoméstico por lo menos a 4 pul
adas de distancia de paredes
u otros objetos mientras está en funcionamiento. No coloque nin
ún objeto sobre
el electrodoméstico mientras esté en funcionamiento. Coloque el electrodoméstico
sobre una super
stico comienza a funcionar mal mientras est
en uso, desenchufe
el cable de inmediato. No utilice ni intente re
7. Si el electrodoméstico se cae o accidentalmente se sumerge en agua u otro líquido,
desench
felo de inmediato. ¡No introduzca la mano en el a
ua! No utilice el
electrodom

 Loading...


