39 Removing Main Components
NIPPY Clearway 2 Service Manual
2210.2657 Rev 3.0
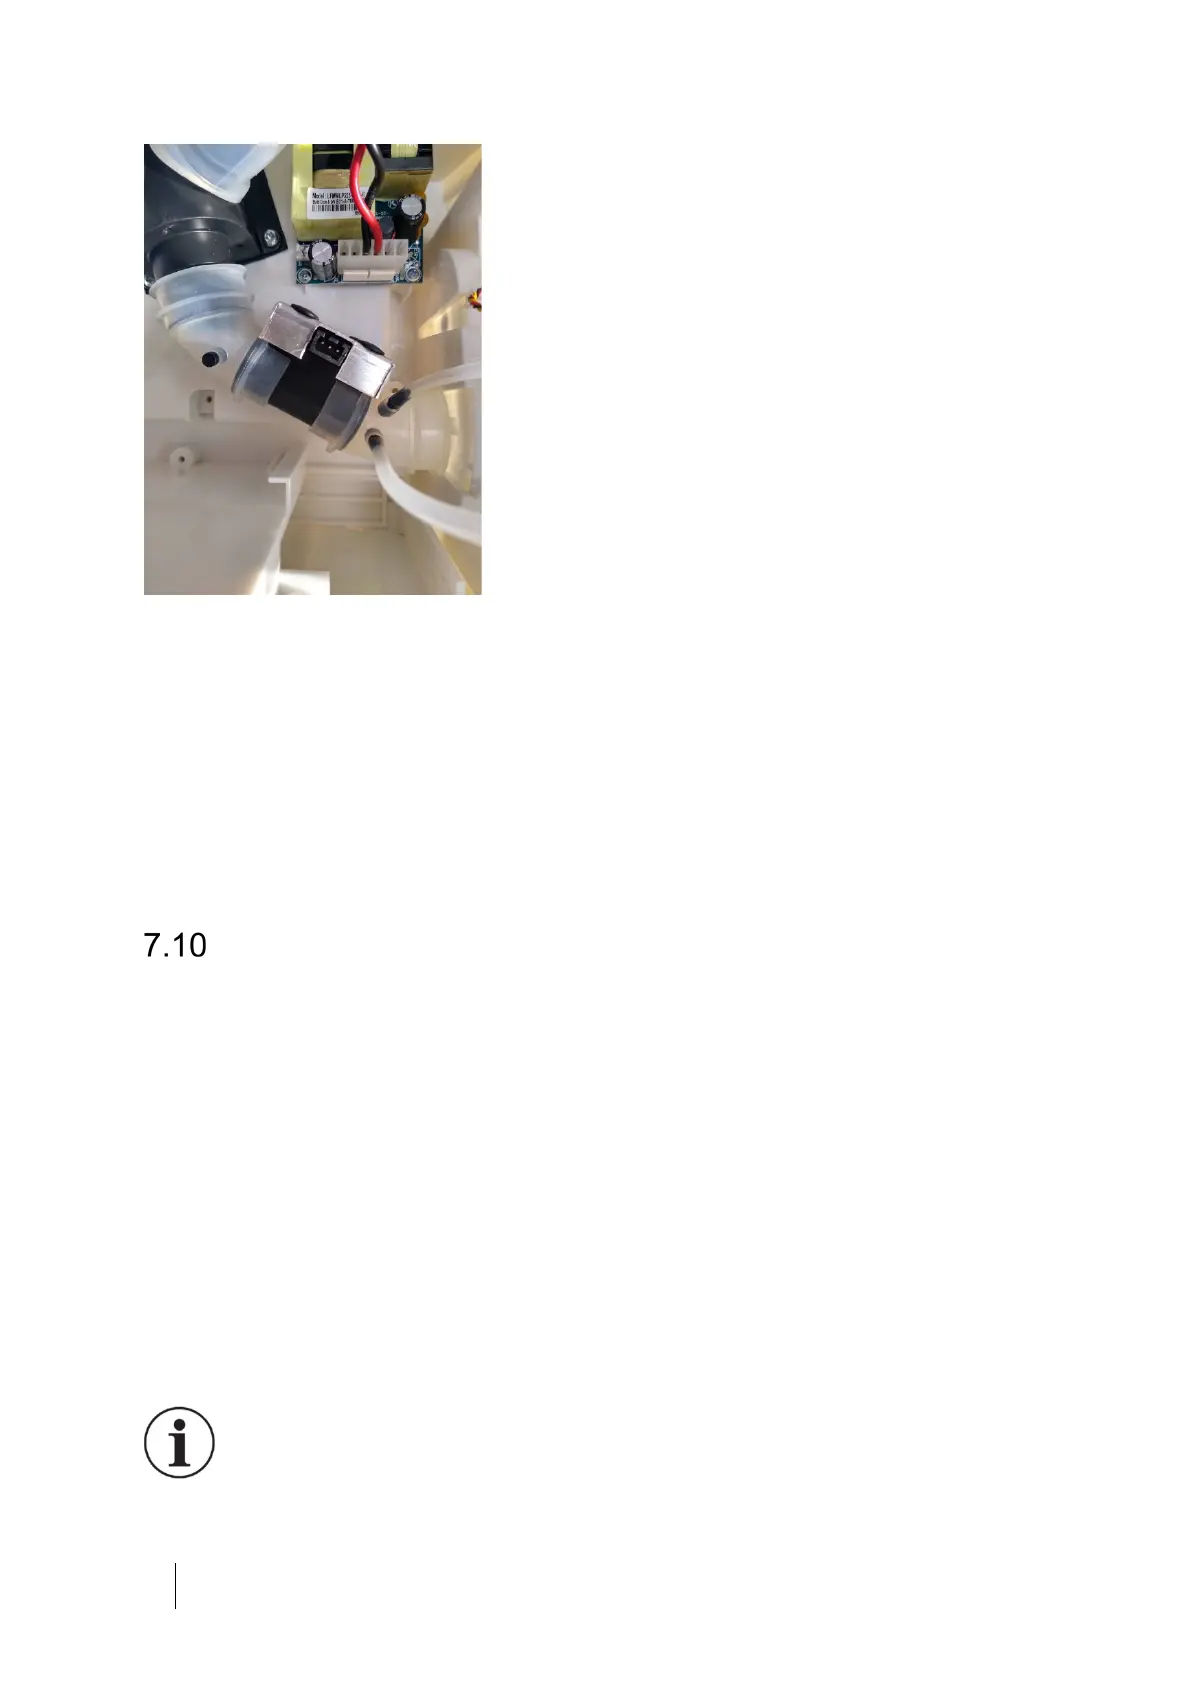
To replace a flow transducer, fit the transducer into the two silicone tubes
as shown in the picture. With the metal cover uppermost and the electrical
connector facing you, the silicone pipe with the two pressure pipes fits on the
right hand side (patient). The silicone pipe with the blanked outlet to the left
(valve). Carefully fit the patient side first, then use the flexible silicone pipes to
fit over the valve. Make the electrical connection and the pressure transducer
connections.
Removing and Replacing the Clock Battery
We recommend that clock battery is replaced every 5 years. The specified
part in this manual must be used.
Switch off the Clearway 2 and disconnect the AC mains supply.
Follow the instructions on how to open the case
The clock battery is located in the holder (BAT 2) on the display PCB.
Carefully remove the battery from the holder. To fit a new battery, insert one
side of the battery into the holder then push the battery straight down.
Do not touch the battery with bare fingers.
The date and time will need to be reset after changing the clock
battery.

 Loading...