III-10
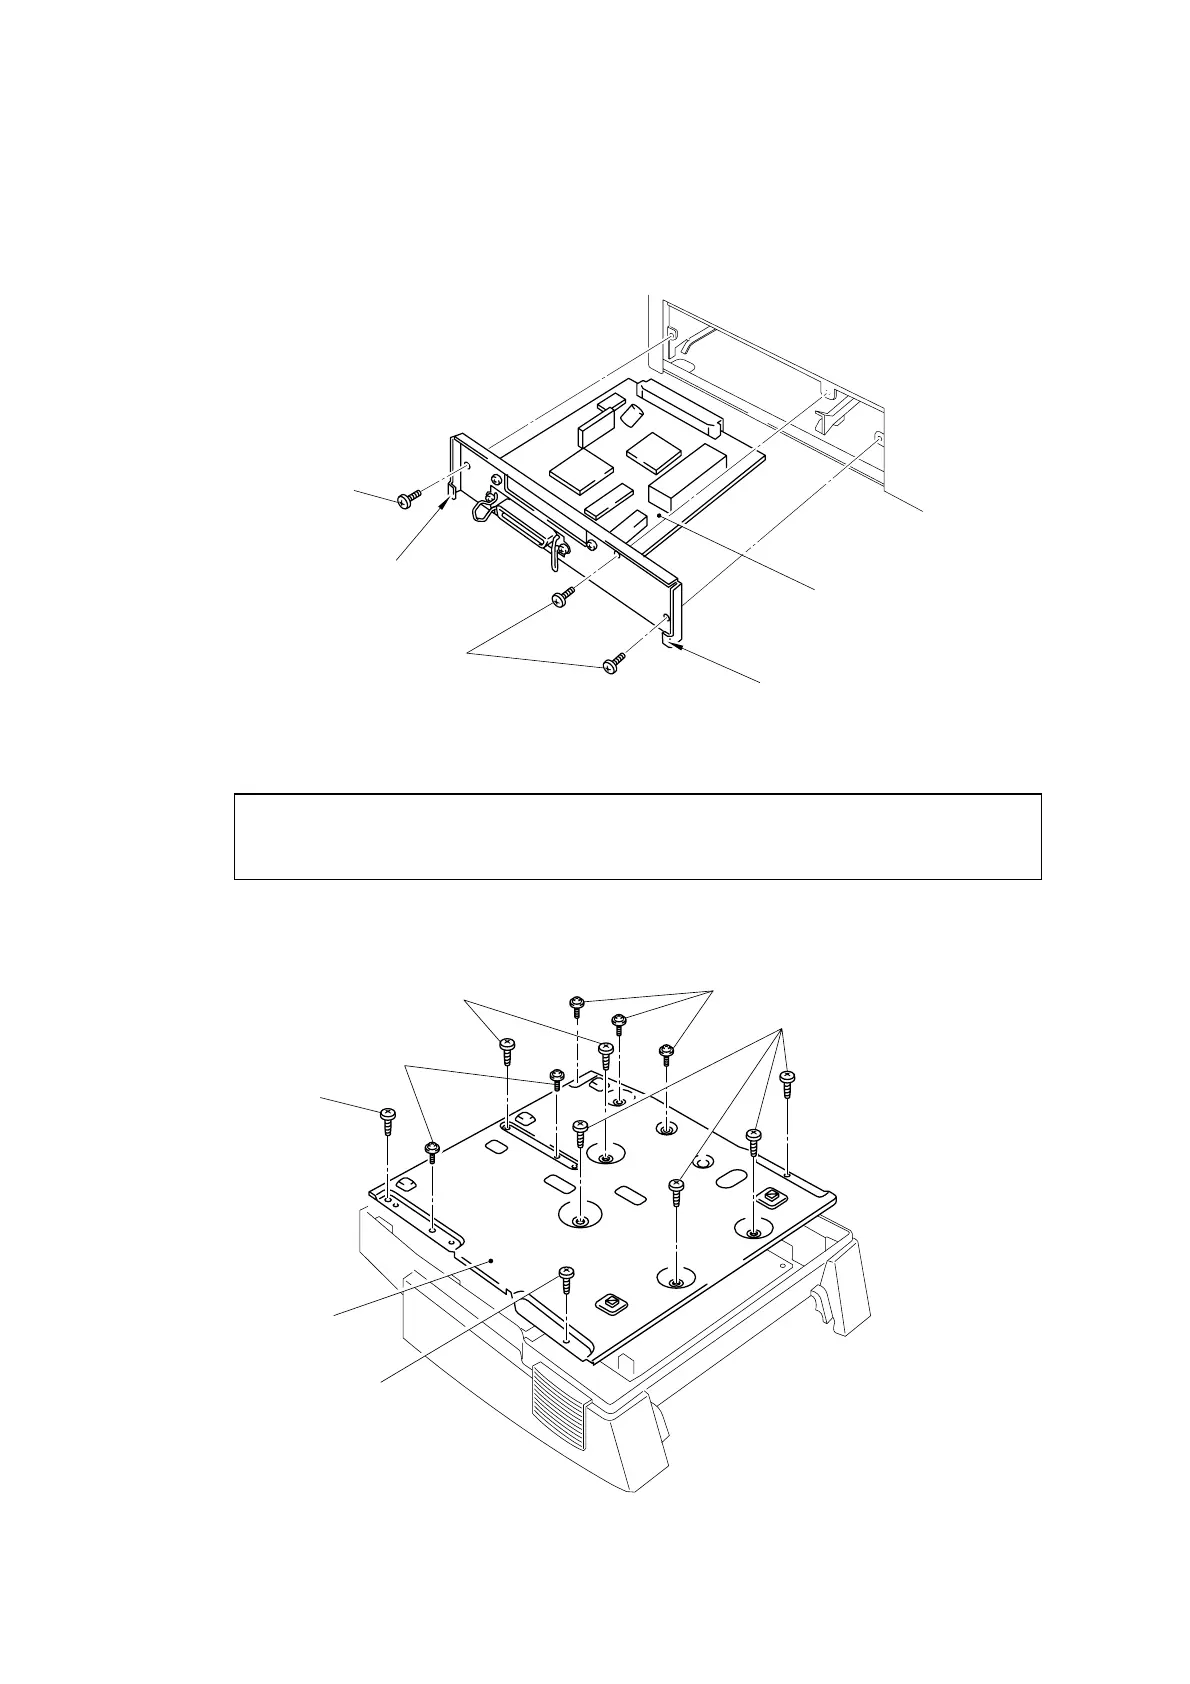
3.8 Main PCB ASSY
(1) Remove the three M4x6 screws.
(2) Hold the hooks at the left and right of the mounting frame to pull out the main PCB
ASSY.
Fig. 3-15
3.9 Base Plate ASSY
Caution:
Prior to turning the printer upside-down, ensure that the drum unit has been removed
from the printer.
(1) Turn the printer upside down.
(2) Remove the eight M4 and five M3 self tapping screws.
Fig. 3-16
Screw, pan M4x6
Hook
Hook
Main PCB ASSY
Taptite, bind M4x12
Taptite, cup M3x6
Taptite
bind M4x12
Taptite, bind M4x12
Taptite
bind M4x12
Screw, pan M4x6
Base plate ASSY
Taptite, cup M3x6
 Loading...