Home > Printer Settings > Change Printer Settings Using the Printer Setting Tool (Windows)
Change Printer Settings Using the Printer Setting Tool (Windows)
• Make sure the AC Adapter is connected to the printer and the AC Power Cord is connected to an AC
power outlet.
• Make sure the printer driver has been installed correctly and you can print.
• Connect the printer to a computer with a USB cable.
• The Printer Setting Tool is installed in addition to the printer driver and other software when using the
installer.
• The Printer Setting Tool is available only with compatible Brother printers.
1. Connect the printer you want to configure to the computer.
2. Start the Printer Setting Tool.
• Windows 10/Windows Server 2016:
Click Start > Brother > Printer Setting Tool.
• Windows 8/Windows 8.1/Windows Server 2012/Windows Server 2012 R2:
Click the Printer Setting Tool icon on the Apps screen.
• Windows 7/Windows Server 2008/Windows Server 2008 R2:
Click Start > All Programs > Brother > Label & Mobile Printer > Printer Setting Tool.
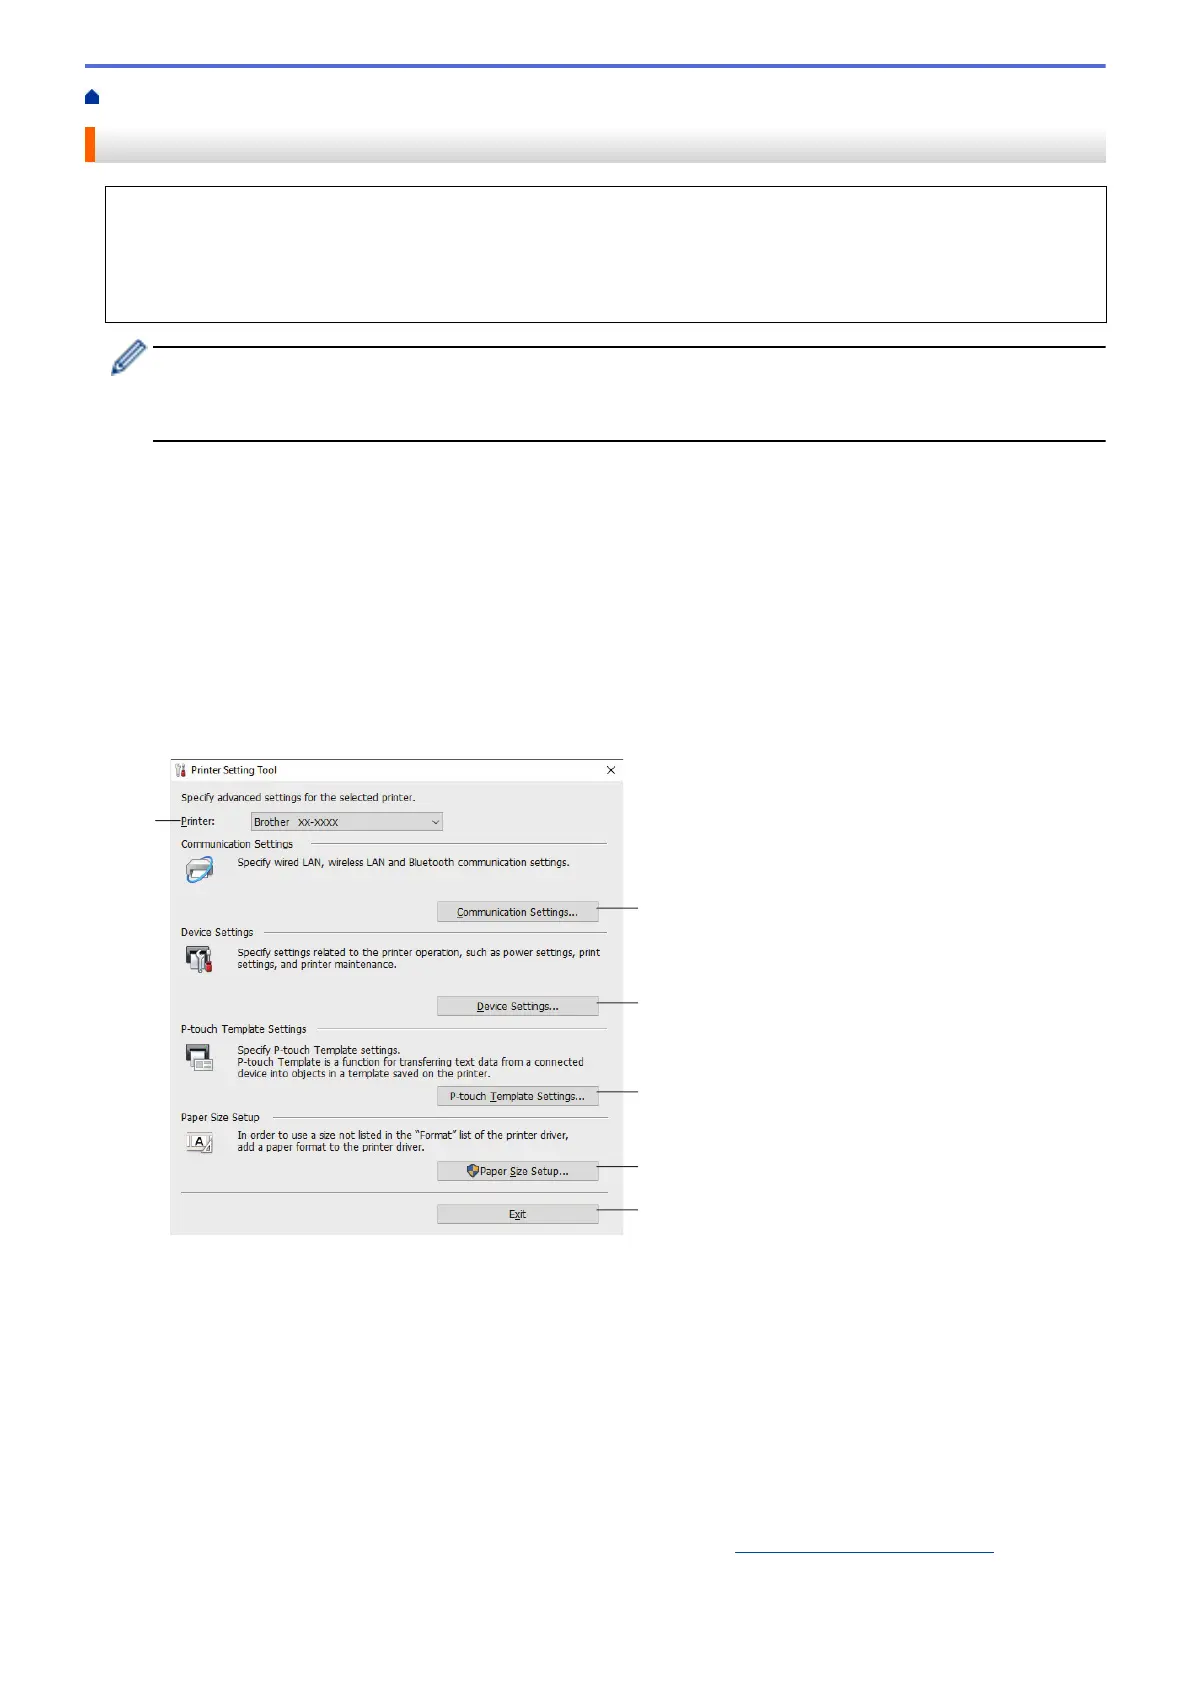
The main window appears.
1. Printer
Lists the connected printers.
2. Communication Settings (TD-4420DN)
(TD-4420DN) Specifies wired LAN communication settings.
3. Device Settings
Specifies device settings. For example, power settings.
4. P-touch Template Settings
Specifies P-touch Template settings.
For more information, see the P-touch Template Manual/ Command Reference (English only). You can
download the latest version from the Brother support website at
support.brother.com/manuals.
70
 Loading...