INSTALLATION STEP 10
Fasten Door Bracket and Plate
Follow instructions which apply to your door
type as illustrated below.
To prevent damage to steel, aluminum,
fiberglass or glass panel doors, always
reinforce the inside of the door both
vertically and horizontally with an
angle iron. Exercise care in removing and
assembling arm conversion kit. Keep
fingers away from the sliding parts.
The horizontal brace should be at least 1.8m long. The vertical brace should cover height of top panel. The
best solution is to check with your garage door manufacturer for a door reinforcement kit for an opener
installation. IIf yours is a canopy or dual-track style garage door, a door arm conversion kit is required. Follow
the installation instructions included with the replacement door arm.
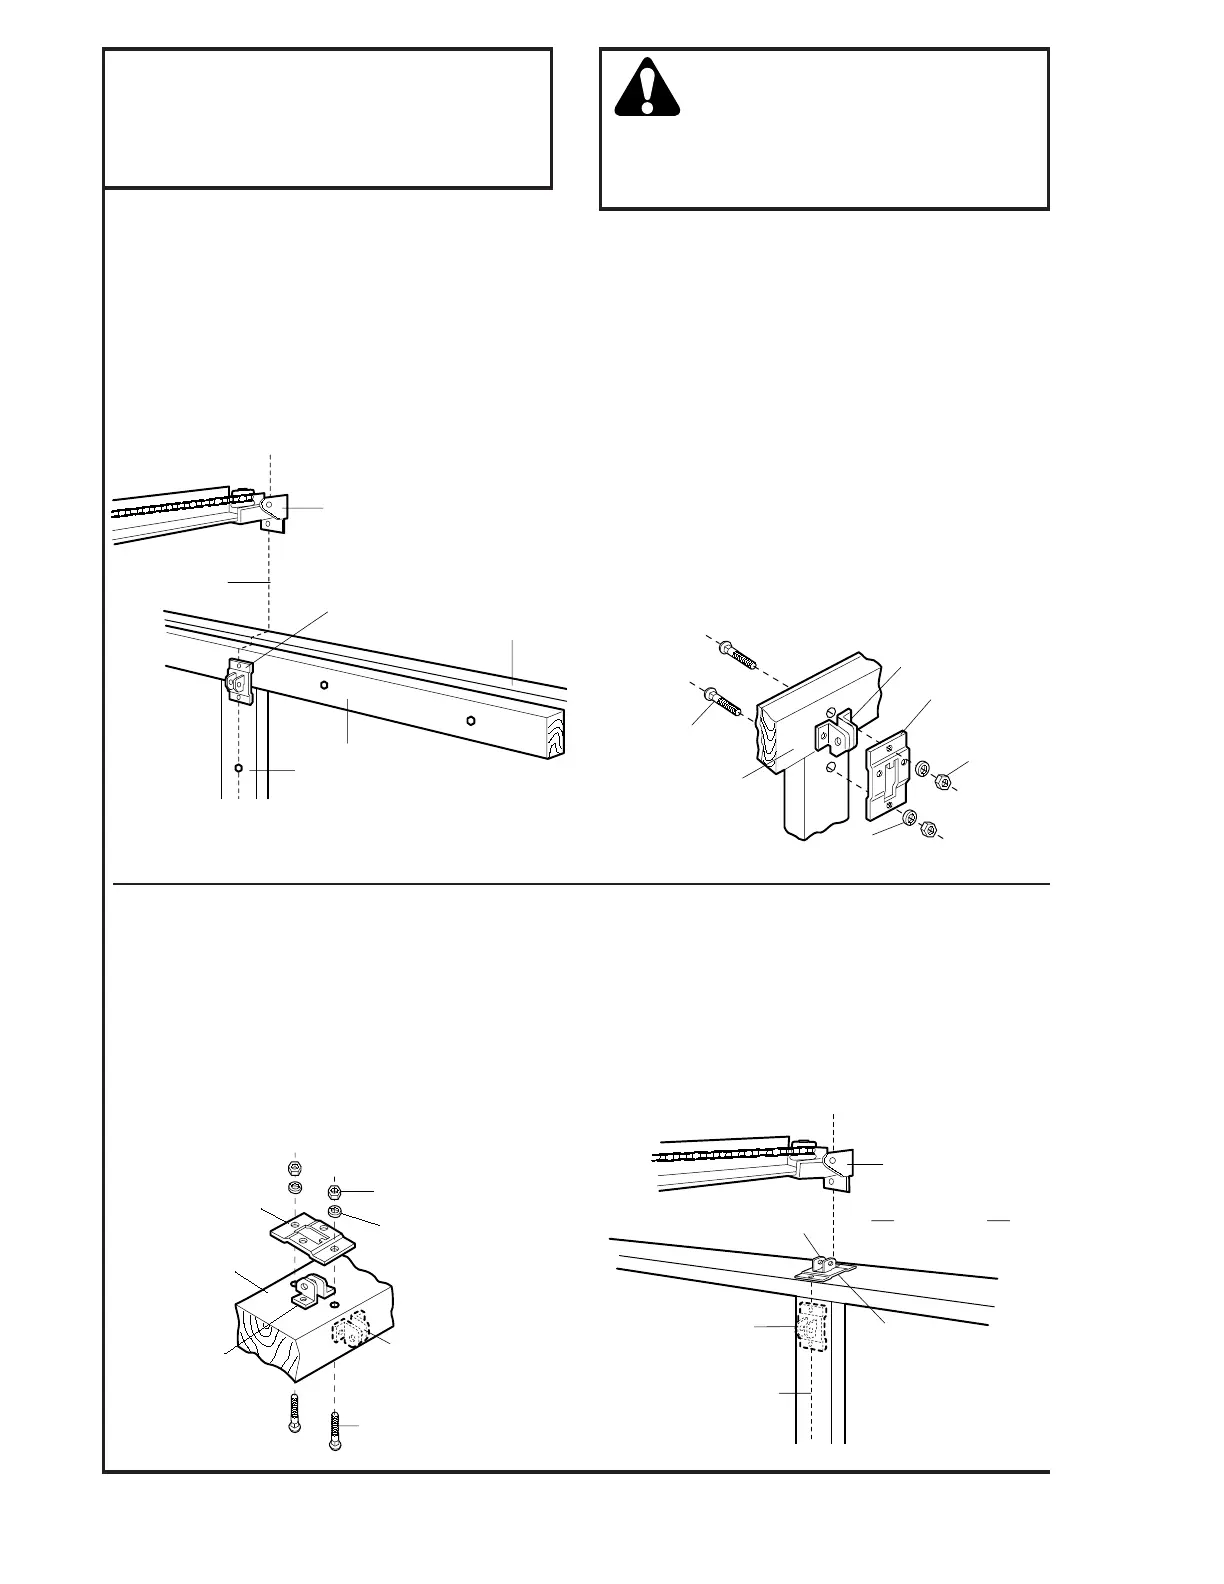
SECTIONAL DOOR
INSTALLATION PROCEDURE
Assemble door bracket and plate as shown. Center
bracket on previously marked vertical guideline used
for header bracket installation. Position the bracket
assembly on the face of the door within the following
limits:
A. The top edge of the bracket 5cm–10cm below
top edge of door.
B. Directly below any structural support across top
of door.
Placement depends on your particular needs.
Mark and drill 8mm top and bottom fastening holes.
Secure bracket as shown.
ONE-PIECE DOOR
INSTALLATION PROCEDURE
(WITHOUT VERTICAL TRACK)
NOTE: Door bracket has left and right side
fastening holes. Use bracket and plate assembly if
you require top and bottom fastening holes.
• Center bracket (with or without plate as required)
on top edge of door as shown. Mark holes.
• Drill 8mm holes and fasten the door bracket with
hardware supplied.
NOTE: If the door has no exposed framing, drill
5mm pilot holes and use 5/16"x1-1/2" lag screws
(not supplied) to fasten bracket to top of door.
NOTE: The door bracket may be installed on face of
door if required for your installation. (Refer to dotted
line drawing.) HOWEVER, drill 5mm pilot holes and
substitute 5/16"x1-1/2" lag screws (not supplied) to
fasten the bracket to the door.
20
Plate Assy.

 Loading...