13
Cisco 2500 Series Wireless Controller Getting Started Guide
Installing the Controller
Warning
Read the wall-mounting carefully before beginning installation. Failure to use the correct hardware
or to follow the correct procedures could result in a hazardous situation to people and damage to the
system.
Statement 378
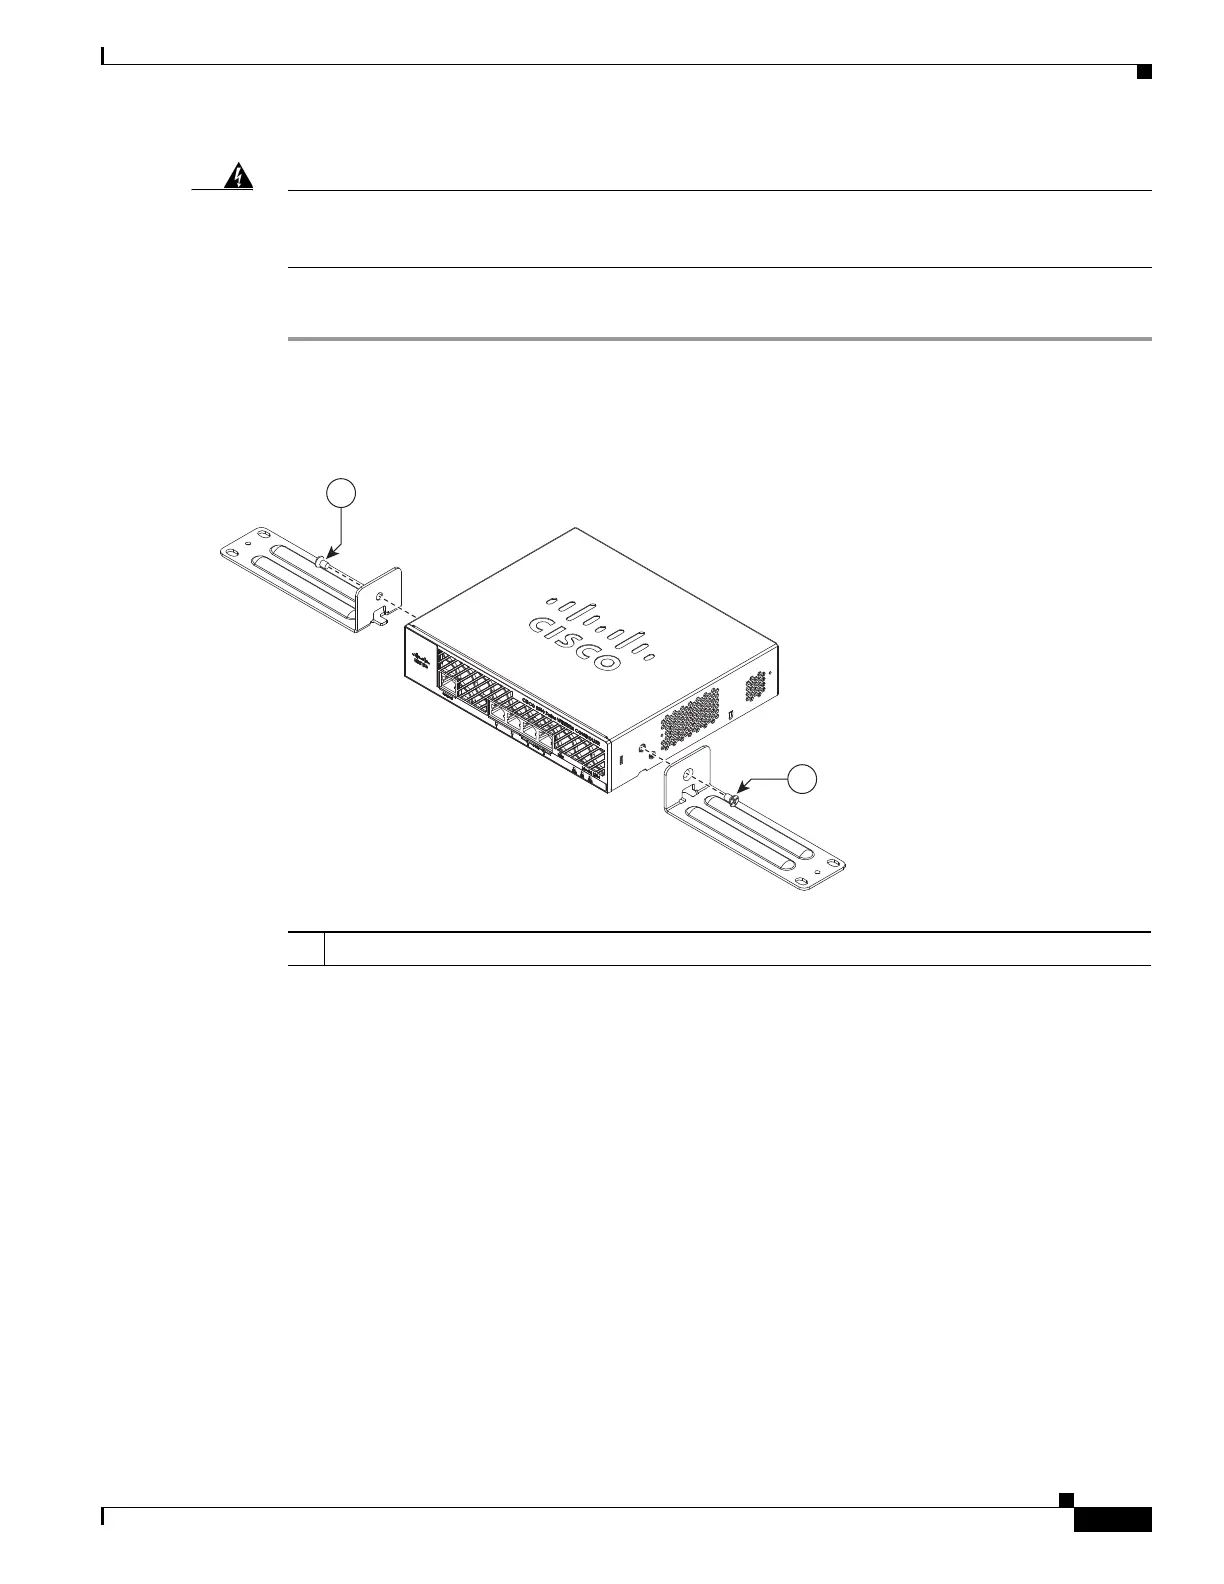
To mount the controller on a wall using rack-mount brackets, follow these steps:
Step 1 Attach the 19-inch brackets to each side of the 2504 controller as shown in Figure 5 with #10-32 flat
head screws provided in the kit.
Figure 5 Installing the Rack-Mount Brackets to the Sides of the Controller
Step 2
Mount the 2504 controller on the wall with the front panel facing down, as shown Figure 6.
For the best support of the controller and cables, make sure the controller is attached securely to wall
studs or to a firmly attached plywood mounting backboard.
1 #10-32 flat head screws (mounting screws for each side of the controller)
282083
BASE MOUNT
1
1

 Loading...