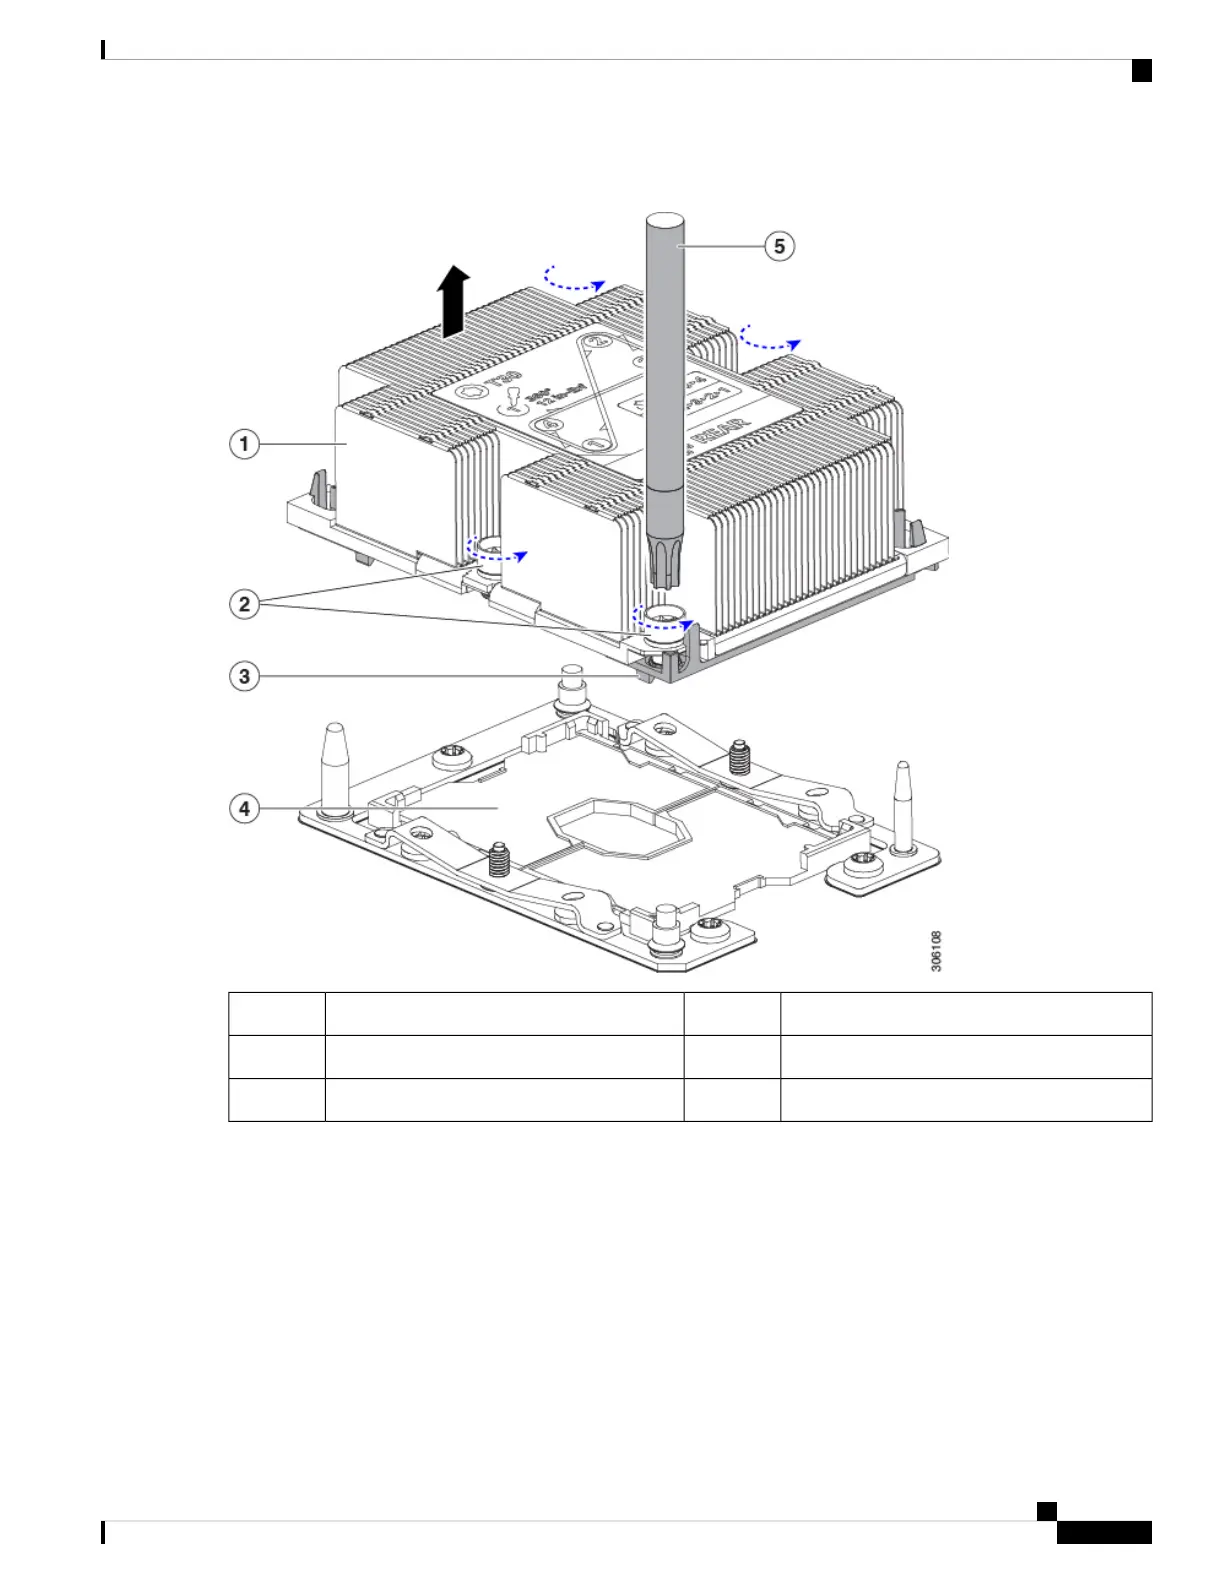
Figure 25: Removing the CPU/Heatsink Assembly
CPU socket on motherboard4Heatsink1
T-30 Torx driver5Heatsink captive nuts (two on each side)2
-CPU carrier (below heatsink in this view)3
Step 2 Transfer the CPU socket covers from the new system to the system that you are returning:
a) Remove the socket covers from the replacement system. Grasp the two recessed finger-grip areas marked "REMOVE"
and lift straight up.
Keep a firm grasp on the finger-grip areas at both ends of the cover. Do not make contact with the CPU
socket pins.
Note
Cisco APIC M3/L3 Server Installation and Service Guide
55
Maintaining the Server
Moving an M5 Generation CPU
 Loading...