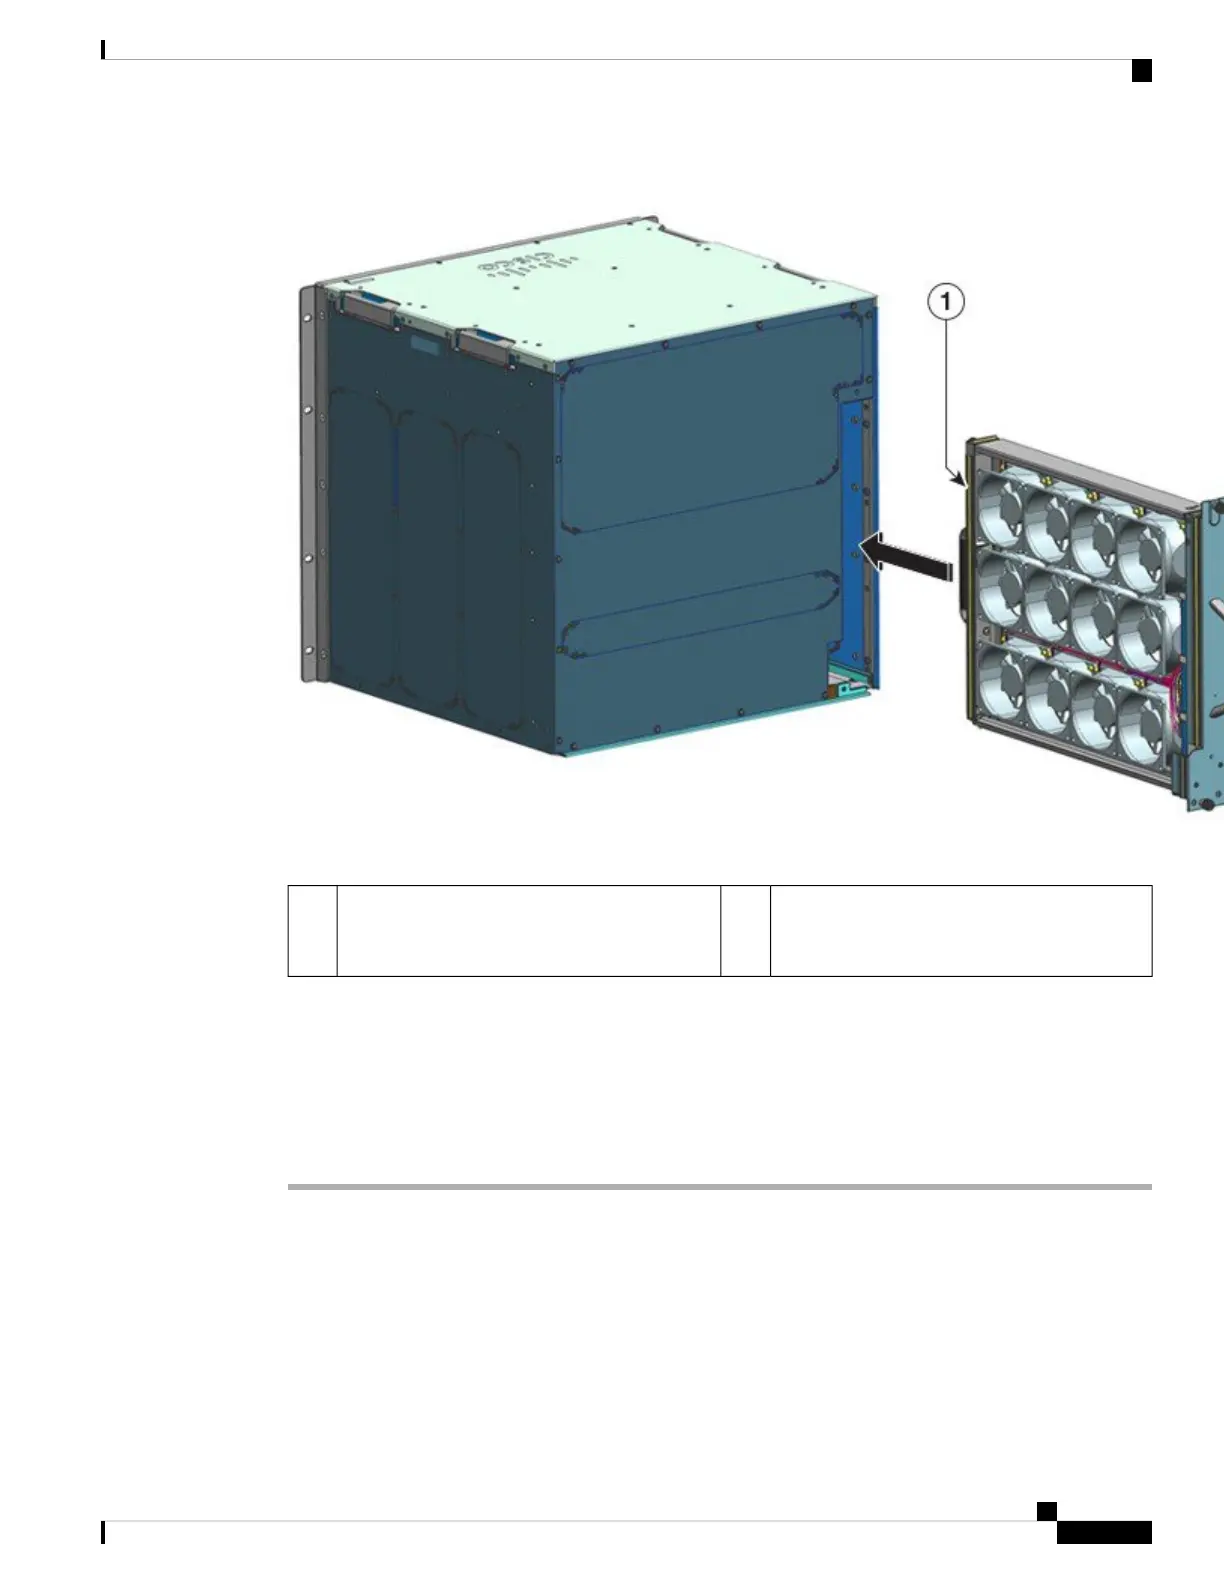
Rear panel of the fan tray. Tighten the captive
installation screws on this side, after sliding the
fan tray in.
2Front of the fan tray. Tighten the captive
installation screws on this side before sliding
the fan tray in.
1
Step 3 Place the fan tray assembly into the fan tray bay so it rests on the chassis. Lift the fan tray up slightly, aligning
the top and bottom guides.
Step 4 Slide the fan tray assembly into the chassis until the two captive installation screws make contact with the
chassis.
Step 5 Tighten the two captive installation screws on the rear to secure the fan tray assembly in the chassis.
Step 6 Verify that you have installed the fan tray correctly. See Verifying Fan Tray Installation, on page 95
Verifying Fan Tray Installation
To verify that the new fan tray is installed correctly and is operating properly, follow these steps:
Before you begin
To check the operation of the fans, you should have powered up the chassis.
Cisco Catalyst 9400 Series Switches Hardware Installation Guide
95
Removing and Replacing FRUs
Verifying Fan Tray Installation
 Loading...