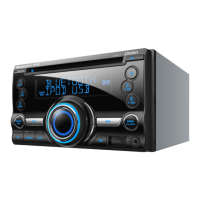
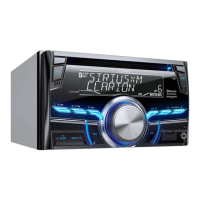
XM
Satellite Radio Operations
This unit can control
the
satellite radio receiver
(XM Mini-Tuner).
Note:
• When the function is differ
depending
to the
connected
receiver, they are distinguished
by
the following notations:
"XM':·
for
an
XM
Satellite Radio
•
XM
and
the
XM
logos are trademarks
of
XM
Satellite Radio Inc.
Selecting
a Satellite
Radio
mode
1.
Press the [SRC] button.
The
system
changes
to the specified
Satellite Radio mode.
Selecting
a
band
1.
Press the
[BND]
button to select a band.
This
changes
the reception band as follows:
XM1
~
XM2
~
XM3
~
XM1 ...
•
Information
displayed
during
reception
The
following information is displayed
when
the
satellite radio
cannot
be received normally.
• When the
antenna
is not be
connected:
"CHECK
ANTENNA"
•
When
the mini
tuner
is not be
connected:
"CHECK
XM
TUNER"
•
When
no signal is received: "NO
SIGNAL"
• When a channel is being tuned in (no signal is
yet received):
"LOADING"
• A channel without a broadcast
has
been
selected:
"OFF
AIR"
• An unviable channel has been selected:
"CH
UNAVL"
- A channel not covered
by
your
contract:
"UNAUTH"
Confirming
your
XM
ID
1. Press
the
[
........
]
or
[~]
button to switch to
channelO.
2.
The
XM ID No. appears in the display.
Displaying
channel
labels
1.
Press the [DISP] button to select
the
desired
channel label.
Channel
~
Category
~
Name
(Title)~
Channel.
..
Channel
input
directly
T his function allows you to input the channel
No. directly.
1. Press and hold the [DISP] button for 1
second or longer to switch to the adjustment
selection display.
2.
Press the [
.........
] or
[~~]
button to select
"CHANNEL".
3. Press the
[:-~~]
button.
4. Press the
[.]
or
[T]
button to input the
channel No.
5.
Press and hold the
[:-~~]
button for 1 second
or
longer to select the channel.
Setting
channel
tuning
This function allows you to tuning a channel
directly
or
indirectly.
* The factory default setting
is
OFF
.
1. Press and hold the DISP button for 1
second
or
longer to switch to the adjustment
selection display.
2. Press the [
........
]
or
[~~]
button to select
"DIRECT"
3.
Press the
[.]
or
[T]
button to select "ON"
or
"OFF".
- GJ:
Press the
[:-NI~]
button to switch to another
channel after tuning operations. Otherwise,
the operation will switch to the other
channel automatically after 2 seconds.
-OFF:
Press the
[:-NI~
] button to switch to another
channel after tuning operations. Otherwise,
the
operation will return to the previous
channel after 5 seconds.
Channel
selection
1.
Channels
are selected with the [
.........
] or
[~~]
button.
For details, see the following operation
descriptions.
Note:
The
audio
output
is
muted
and
other button
operations are
not
accepted
during channel
selection.
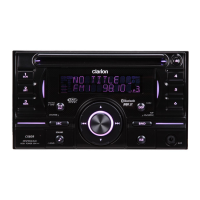
CX400
17
XM
Satellite Radio Operations
This unit can control
the
satellite radio receiver
(XM Mini-Tuner).
Note:
• When the function is differ
depending
to the
connected
receiver, they are distinguished
by
the following notations:
"XM':·
for
an
XM
Satellite Radio
•
XM
and
the
XM
logos are trademarks
of
XM
Satellite Radio Inc.
Selecting
a Satellite
Radio
mode
1.
Press the [SRC] button.
The
system
changes
to the specified
Satellite Radio mode.
Selecting
a
band
1.
Press the
[BND]
button to select a band.
This
changes
the reception band as follows:
XM1
~
XM2
~
XM3
~
XM1 ...
•
Information
displayed
during
reception
The
following information is displayed
when
the
satellite radio
cannot
be received normally.
• When the
antenna
is not be
connected:
"CHECK
ANTENNA"
•
When
the mini
tuner
is not be
connected:
"CHECK
XM
TUNER"
•
When
no signal is received: "NO
SIGNAL"
• When a channel is being tuned in (no signal is
yet received):
"LOADING"
• A channel without a broadcast
has
been
selected:
"OFF
AIR"
• An unviable channel has been selected:
"CH
UNAVL"
- A channel not covered
by
your
contract:
"UNAUTH"
Confirming
your
XM
ID
1. Press
the
[
........
]
or
[~]
button to switch to
channelO.
2.
The
XM ID No. appears in the display.
Displaying
channel
labels
1.
Press the [DISP] button to select
the
desired
channel label.
Channel
~
Category
~
Name
(Title)~
Channel.
..
Channel
input
directly
T his function allows you to input the channel
No. directly.
1. Press and hold the [DISP] button for 1
second or longer to switch to the adjustment
selection display.
2.
Press the [
.........
] or
[~~]
button to select
"CHANNEL".
3. Press the
[:-~~]
button.
4. Press the
[.]
or
[T]
button to input the
channel No.
5.
Press and hold the
[:-~~]
button for 1 second
or
longer to select the channel.
Setting
channel
tuning
This function allows you to tuning a channel
directly
or
indirectly.
* The factory default setting
is
OFF
.
1. Press and hold the DISP button for 1
second
or
longer to switch to the adjustment
selection display.
2. Press the [
........
]
or
[~~]
button to select
"DIRECT"
3.
Press the
[.]
or
[T]
button to select "ON"
or
"OFF".
- GJ:
Press the
[:-NI~]
button to switch to another
channel after tuning operations. Otherwise,
the operation will switch to the other
channel automatically after 2 seconds.
-OFF:
Press the
[:-NI~
] button to switch to another
channel after tuning operations. Otherwise,
the
operation will return to the previous
channel after 5 seconds.
Channel
selection
1.
Channels
are selected with the [
.........
] or
[~~]
button.
For details, see the following operation
descriptions.
Note:
The
audio
output
is
muted
and
other button
operations are
not
accepted
during channel
selection.
CX400
17
 Loading...