Operations Common to Each Mode
or
Erasing the
Personal
Code
2-1. Select "CODE".
3-1. Press the
[~J~]
button.
The ERASE PERSONAL CODE screen
appears.
4-1. Enter the Personal Code currently.
5-1. Press and hold the
[~J~]
button for 2
seconds or longer.
Enter a Personal Code mode is cancelled.
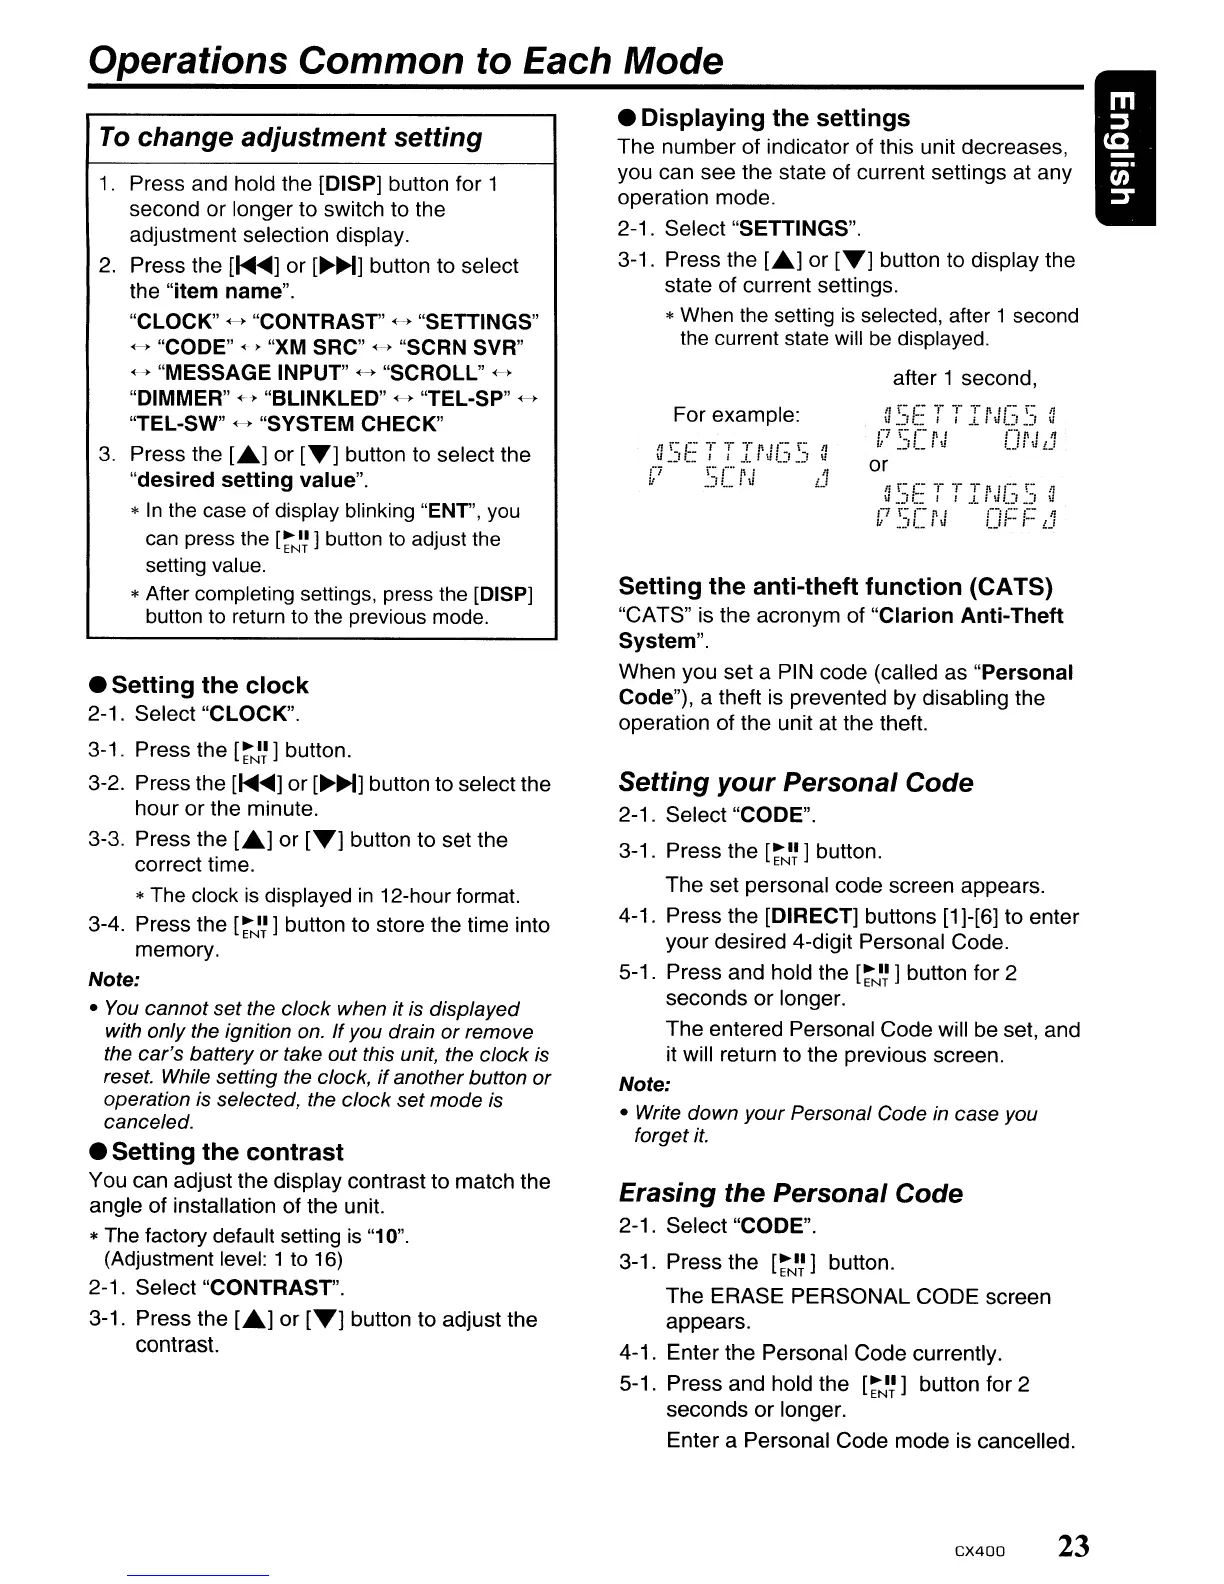
For example:
Setting
the
anti-theft
function
(CATS)
"CATS"
is
the acronym of
"Clarion
Anti-Theft
System".
When you set a PIN code (called as
"Personal
Code"), a theft
is
prevented by disabling the
operation of the unit at the theft.
Setting
your
Personal
Code
2-1. Select "CODE".
3-1. Press the
[~J~]
button.
The set personal code screen appears.
4-1. Press the [DIRECT] buttons
[1
]-[6] to enter
your desired 4-digit Personal Code.
5-1. Press and hold the
[~NI~
] button for 2
seconds or longer.
The entered Personal Code will be set, and
it will return to the previous screen.
Note:
• Write down your Personal Code
in
case you
forget
it.
•
Displaying
the
settings
The number of indicator of this unit decreases,
you can see the state of current settings at any
operation mode.
2-1. Select "SETTINGS".
3-1. Press the
[.6.] or
[T]
button to display the
state of current settings.
* When the setting
is
selected, after 1 second
the current state will
be
displayed.
after 1 second,
1.
Press and hold the [DISP] button for 1
second or longer to switch to the
adjustment selection display.
2.
Press the
[~]
or
[~~]
button to select
the
"item
name".
"CLOCK"
+-+ "CONTRAST" H "SETTINGS"
H "CODE" < • "XM SRC" +-+ "SCRN SVR"
H "MESSAGE INPUT" H "SCROLL" <-.
"DIMMER"
+.
"BLINKLED" H "TEL-SP" +-+
"TEL-SW" H "SYSTEM CHECK"
3.
Press the [.6.]
or
[T]
button to select the
"desired
setting
value".
*
In
the case
of
display blinking "ENT",
you
can
press the
[~NI~
j button
to
adjust the
setting value.
* After completing settings, press the [DISPj
button
to
return
to
the previous mode.
To
change
adjustment
setting
• Setting
the
clock
2-1. Select "CLOCK".
3-1. Press the
[~Jn
button.
3-2. Press the
[1<lIIII
....
]
or
[~~]
button to select the
hour
or
the minute.
3-3. Press the [.6.] or
[T]
button to set the
correct time.
*
The
clock
is
displayed
in
12-hour format.
3-4. Press the
[~J~]
button to store the time into
memory.
Note:
•
You
cannot set the
clock
when it is displayed
with only the ignition
on.
If
you drain
or
remove
the car's battery
or
take out this unit, the clock is
reset. While setting the clock,
if
another button
or
operation is selected, the clock set mode
is
canceled.
•
Setting
the
contrast
You can adjust the display contrast to match the
angle of installation of the unit.
*
The
factory default setting
is
"10".
(Adjustment level: 1 to
16)
2-1. Select "CONTRAST".
3-1. Press the [.6.] or
[T]
button to adjust the
contrast.
CX400
23
Operations Common to Each Mode
or
Erasing the
Personal
Code
2-1. Select "CODE".
3-1. Press the
[~J~]
button.
The ERASE PERSONAL CODE screen
appears.
4-1. Enter the Personal Code currently.
5-1. Press and hold the
[~J~]
button for 2
seconds or longer.
Enter a Personal Code mode is cancelled.
For example:
Setting
the
anti-theft
function
(CATS)
"CATS"
is
the acronym of
"Clarion
Anti-Theft
System".
When you set a PIN code (called as
"Personal
Code"), a theft
is
prevented by disabling the
operation of the unit at the theft.
Setting
your
Personal
Code
2-1. Select "CODE".
3-1. Press the
[~J~]
button.
The set personal code screen appears.
4-1. Press the [DIRECT] buttons
[1
]-[6] to enter
your desired 4-digit Personal Code.
5-1. Press and hold the
[~NI~
] button for 2
seconds or longer.
The entered Personal Code will be set, and
it will return to the previous screen.
Note:
• Write down your Personal Code
in
case you
forget
it.
•
Displaying
the
settings
The number of indicator of this unit decreases,
you can see the state of current settings at any
operation mode.
2-1. Select "SETTINGS".
3-1. Press the
[.6.] or
[T]
button to display the
state of current settings.
* When the setting
is
selected, after 1 second
the current state will
be
displayed.
after 1 second,
1.
Press and hold the [DISP] button for 1
second or longer to switch to the
adjustment selection display.
2.
Press the
[~]
or
[~~]
button to select
the
"item
name".
"CLOCK"
+-+ "CONTRAST" H "SETTINGS"
H "CODE" < • "XM SRC" +-+ "SCRN SVR"
H "MESSAGE INPUT" H "SCROLL" <-.
"DIMMER"
+.
"BLINKLED" H "TEL-SP" +-+
"TEL-SW" H "SYSTEM CHECK"
3.
Press the [.6.]
or
[T]
button to select the
"desired
setting
value".
*
In
the case
of
display blinking "ENT",
you
can
press the
[~NI~
j button
to
adjust the
setting value.
* After completing settings, press the [DISPj
button
to
return
to
the previous mode.
To
change
adjustment
setting
• Setting
the
clock
2-1. Select "CLOCK".
3-1. Press the
[~Jn
button.
3-2. Press the
[1<lIIII
....
]
or
[~~]
button to select the
hour
or
the minute.
3-3. Press the [.6.] or
[T]
button to set the
correct time.
*
The
clock
is
displayed
in
12-hour format.
3-4. Press the
[~J~]
button to store the time into
memory.
Note:
•
You
cannot set the
clock
when it is displayed
with only the ignition
on.
If
you drain
or
remove
the car's battery
or
take out this unit, the clock is
reset. While setting the clock,
if
another button
or
operation is selected, the clock set mode
is
canceled.
•
Setting
the
contrast
You can adjust the display contrast to match the
angle of installation of the unit.
*
The
factory default setting
is
"10".
(Adjustment level: 1 to
16)
2-1. Select "CONTRAST".
3-1. Press the [.6.] or
[T]
button to adjust the
contrast.
CX400
23
 Loading...