Important:Always read and follow the on-screen operating instructions. • 21
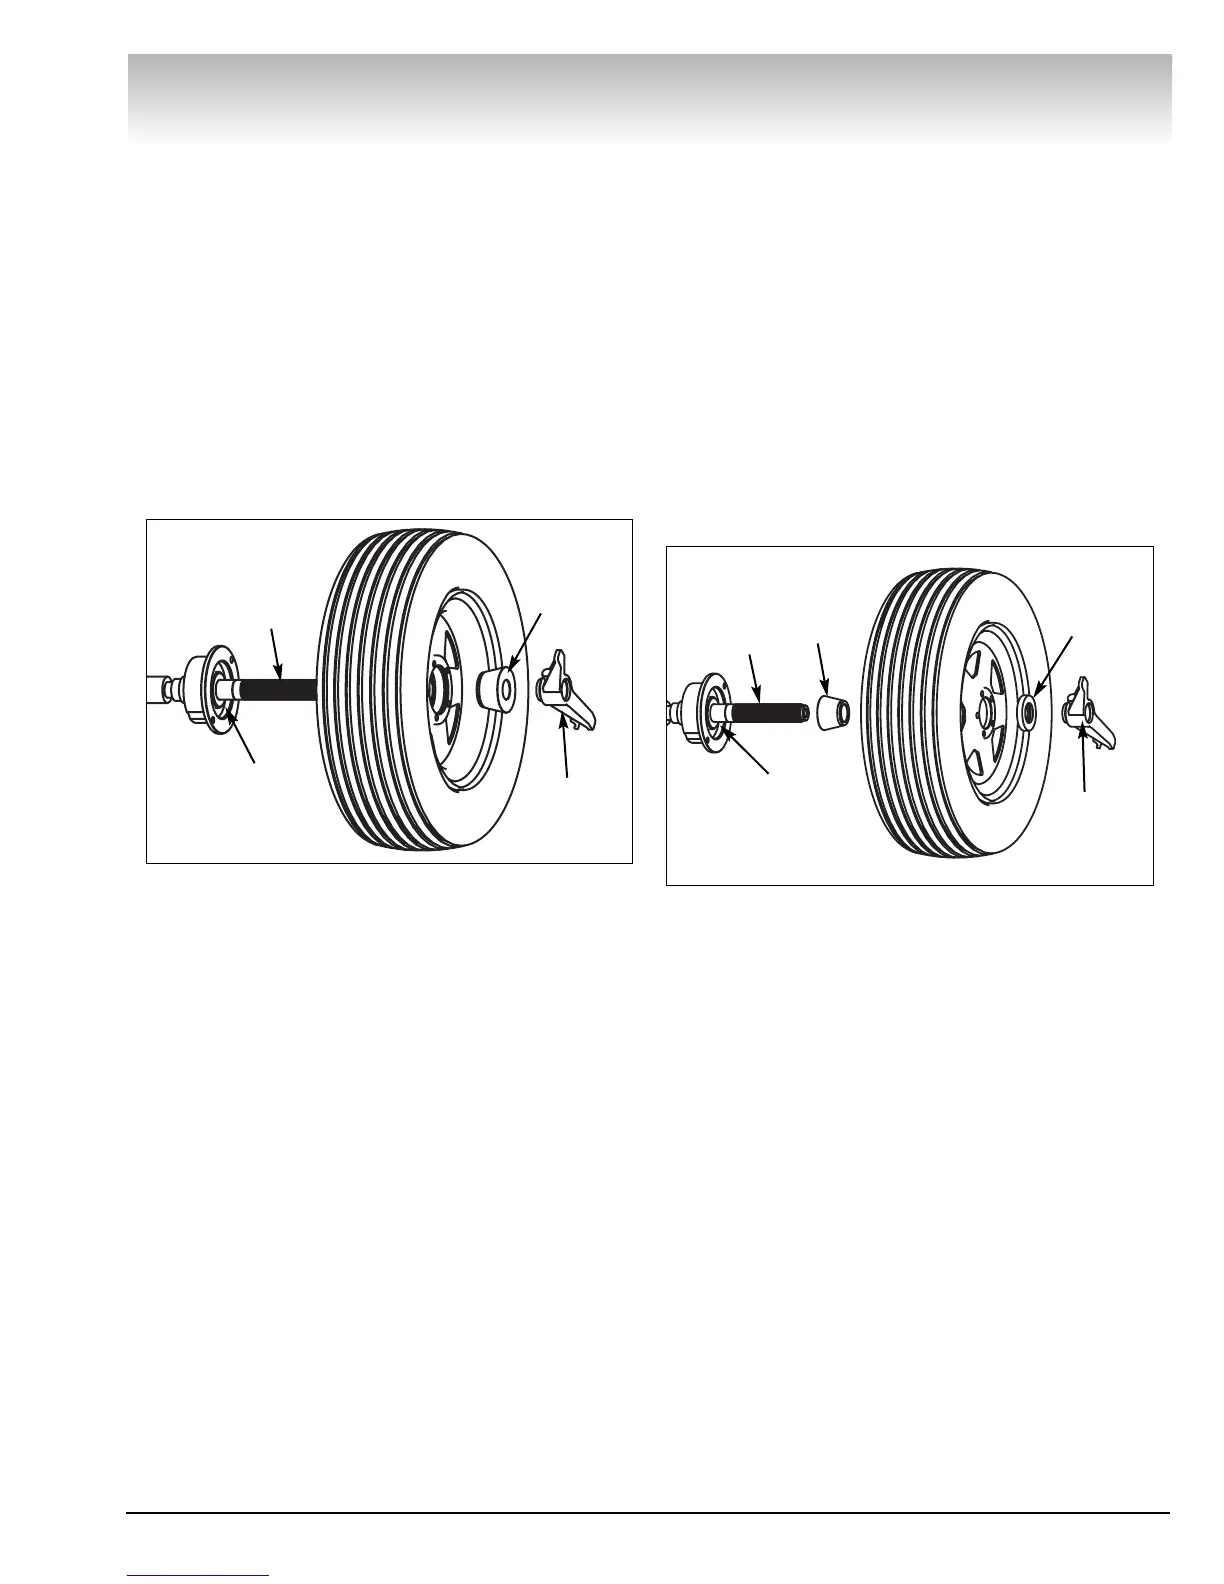
Standard Front Cone Mounting
A wheel should be centered by the outer side of the
hub only when the inner surface will not provide an
accurate surface to center on.
1. Select the cone that best fits the center hole in
the wheel.
2. Lift the wheel onto the shaft and slide it back
against the shaft faceplate.
3. Slide the cone onto the shaft and into the center
of the wheel. You will need to lift the tire to seat the
cone in the center hole.
4. Install the hub nut (without pressure cup) onto the
shaft. Tighten it securely against the cone.
Figure 34 - Front Cone Mounting
Alternate Mounting
If the wheel has a protruding outer hub which will not
permit the use of the pressure cup, or the cup will not
permit the hub nut to engage at least four turns of the
shaft, this alternate method should be used.
1. Select the cone that best fits the center hole in
the wheel. Slide the cone onto the shaft with the large
end towards the faceplate.
2. Lift the wheel onto the shaft and center it on the
cone.
3. Use the small nylon spacer (no-mar ring) or a cen-
tering cone to press against the outer wheel hub.
4. Install the hub nut (without the pressure cup) onto
the shaft. Tighten securely.
Figure 35 - Alternate Mounting
VViiddeeoo BBaallaanncceerr
Captured
Cone
Spring
Quick Lock
Hub Nut
Cone
Shaft
Captured
Cone
Spring
Quick Lock
Hub Nut
Cone
No-Mar
Ring
Shaft

 Loading...