KNIGHT2
18
Maintenance
Cleaning
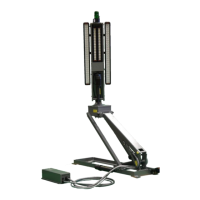
The KNIGHT2 is constructed with corrosion resistant aluminum and stainless steel
fasteners. To further enhance corrosion resistance all exposed surfaces receive a powder
coated paint finish. To ensure years of trouble free service periodically clean all external
surfaces with a mild detergent solution and a gentle spray of water. DO NOT USE A
HIGH-PRESSURE WASHER, which will force water into sensitive electric circuitry.
Lamp lenses may be cleaned with any commercially available glass cleaner.
Upper and lower stage actuators are sealed units and do not require adjustment or
lubrication. The actuators have slip-clutches to compensate for minor stroke tolerances at
the limits of its travel as well as internal limit switches. The actuator may produce a
ratcheting sound at each end of the stroke which is normal. The actuators should not be
made to ratchet excessively, this can lead to premature actuator clutch failure.
All pivot points on the KNIGHT2 are self-lubricating thermal polymer. Periodic cleaning
with a moisture displacing cleaner and soft bristle brush, without disassembly, to remove
accumulated dirt and debris will minimize wear.
Center Switch Adjustment
Caution: For best results, angle of vehicle should be less than 15 degrees.
1. Raise lower section high enough to comfortably work on, and above the set safety limit
(i.e. Lights will turn on), then raise lamp tree to a 45 degree angle.
2. Visually verify the centering cam on the rotation spindle is contacting the roller of the
center switch arm.
3. Ensure that when the point of the centering cam is aligned with the roller of the center
switch arm, there is some play in the center switch arm. Without this play, the switch
could be crushed or damaged during rotation.
4. Rotate off center, then press the auto park button and let light tower proceed through
sequence until the lamp tree is a couple inches above the nested position, hit emergency
stop.
5. Visually determine which side the lamp tree will be hitting the lift arm, then lower lamp
tree completely using the motion switch on the handheld controller.
6. Raise lower section above safety limit and to comfortable working height.
7. Loosen screw on center switch cam slightly.
8. Tap centering cam toward the side that the lamp tree is hitting the lift arm.
9. Fully tighten the screw holding the center switch cam.
10. Raise lamp tree to a 45 degree angle, rotate off center.
11. Repeat steps 4-9 until satisfied with centering of the lamp tree.
12. If it looks like center is now adjusted properly, raise lamp tree to a 45 degree angle, and
lower stage all the way up, press autopark and let it go through the entire sequence.
13. If it is still hitting off center, repeat previous steps.
14. If problems adjusting center still persist you may need to adjust the center switch bracket,
or call Command Light at 1-800-797-7974 for further assistance.
 Loading...