assembly
INSTALLING SAWDUST ELBOW
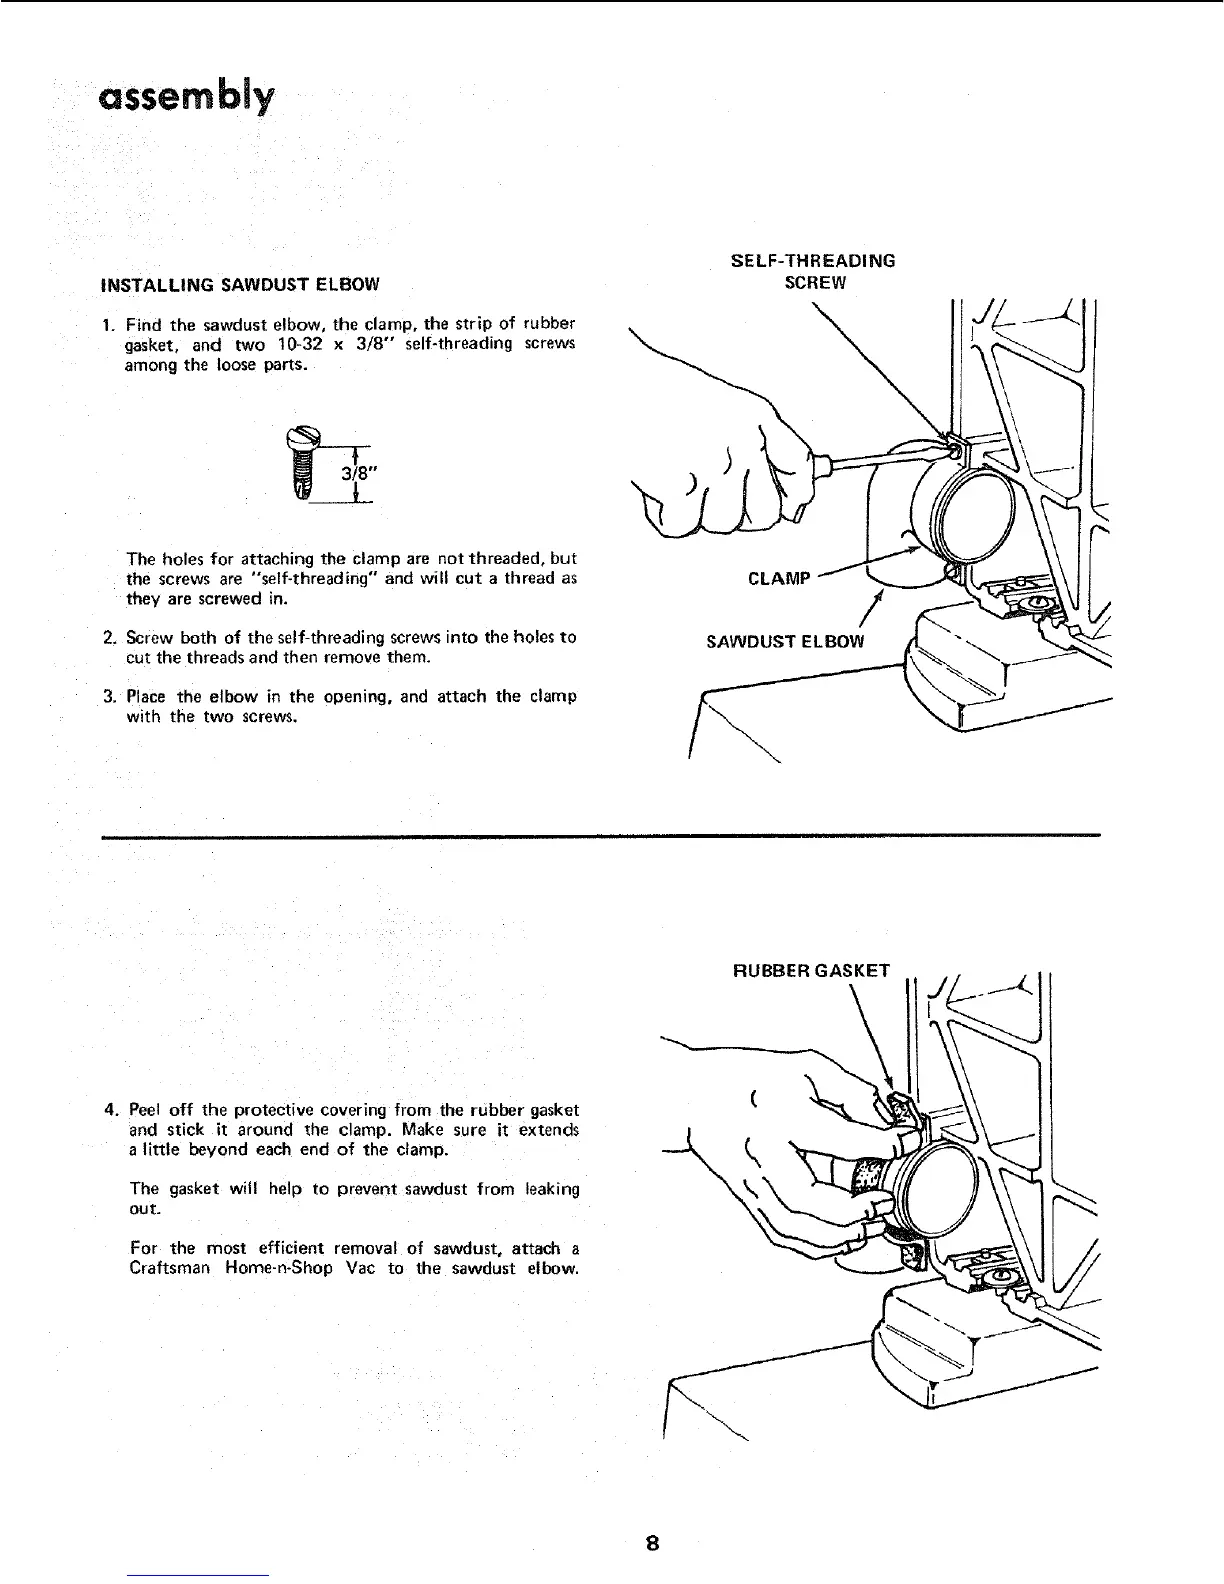
1. Find the sawdust elbow, the clamp, the strip of rubber
gasket, and two 10-32 x 3/8" self-threading screws
among the loose parts.
SELF-THREADING
SCREW
The holes for attaching the clamp are not threaded, but
the screws are "self-threading" and will cut a thread as
they are screwed in.
2. Screw both of the self-threading screws into the holes to
cut the threads and then remove them.
3. Place the elbow in the opening, and attach the clamp
with the two screws.
CLAMP
/
SAWDUST ELBOW
RUBBER GASKET
4. Peel off the protective covering from the rubber gasket
and stick it around the clamp. Make sure it extends
a little beyond each end of the clamp.
The gasket will help to prevent sawdust from leaking
out.
For the most efficient removal of sawdust, attach a
Craftsman Home-n-Shop Vac to the sawdust elbow.
\
\
8
 Loading...