EasyManua.ls Logo

Craftsman 113.24201 User Manual

Craftsman 113.24201
32 pages
To Next Page IconTo Next Page
To Previous Page IconTo Previous Page
Page #9 background imageLoading...
Page #9 background image
TABLE TRUNNION
INSTALLING TABLE
Remove the protective oil that is applied to the table.
Use any ordinary household type grease and spot remover.
CAUTION: Never use gasoline, naptha or similar highly
volatile solvents.
Apply a coat of automobile wax to the table.
\
\
NION PiN
TABLE LOCK BOLT
1. Place the table on the band saw so that the two trunnion
pins and the table lock bolt go through the slot in the
trunnion.
2. Find the 1-I/8" dia. flat washer, a sleeve 11/16" long,
the trunnion lock nut and the table lock handle from
among the loose parts,
3, Hold the head of the table lock bolt inside the band saw
with your left hand and put the 1-1/8" dia. flat washer,
the sleeve, and the handle on the bolt.
4. Screw the nut on the bolt and tighten it with the handle
while the table is in a horizontal position.
_NUT
lllJ,;/
TABLE LOCK BOLT TABLE LOCK HANDLE
Question and Answer IconNeed help?

Do you have a question about the Craftsman 113.24201 and is the answer not in the manual?

Craftsman 113.24201 Specifications

General IconGeneral
BrandCraftsman
Model113.24201
CategorySaw
LanguageEnglish

Summary

General Safety Instructions

Know Your Power Tool

Read manual, learn applications, limitations, and specific potential hazards peculiar to this tool.

Ground All Tools

Use 3-conductor cord and grounding type receptacle. Never connect green wire to live terminal.

Keep Guards in Place

Ensure guards are in place and in working order.

Remove Adjusting Keys and Wrenches

Check for and remove all keys and wrenches before turning on.

Wear Proper Apparel

Avoid loose clothing, jewelry. Wear rubber-soled footwear.

Use Safety Goggles

Comply with ANS Z87.1-1968. Use face/dust mask if dusty.

Secure Work

Use clamps or a vise for safer operation and free hands.

Avoid Accidental Starting

Ensure switch is "OFF" before plugging in.

Check Damaged Parts

Check for proper operation and alignment of damaged parts.

Additional Safety Instructions

Warning: Read and Understand Manual

Warning to completely assemble, install, read and understand instructions before operating.

Protection: Eyes, Hands, Face, Ears, Body

Specific advice on protective gear and avoiding hazardous hand positions.

Damaged Parts Handling

Shut off power and replace damaged/failed parts before resuming operation.

Danger: For Your Own Safety

Critical safety warnings including reading manual, wearing goggles, blade installation, and guide adjustment.

Motor Specifications and Electrical Requirements

Connecting to Power Source Outlet

Instructions for proper grounding and outlet connection to prevent shock.

Assembly

Mounting Band Saw/Sander on Recommended Craftsman Floor Base

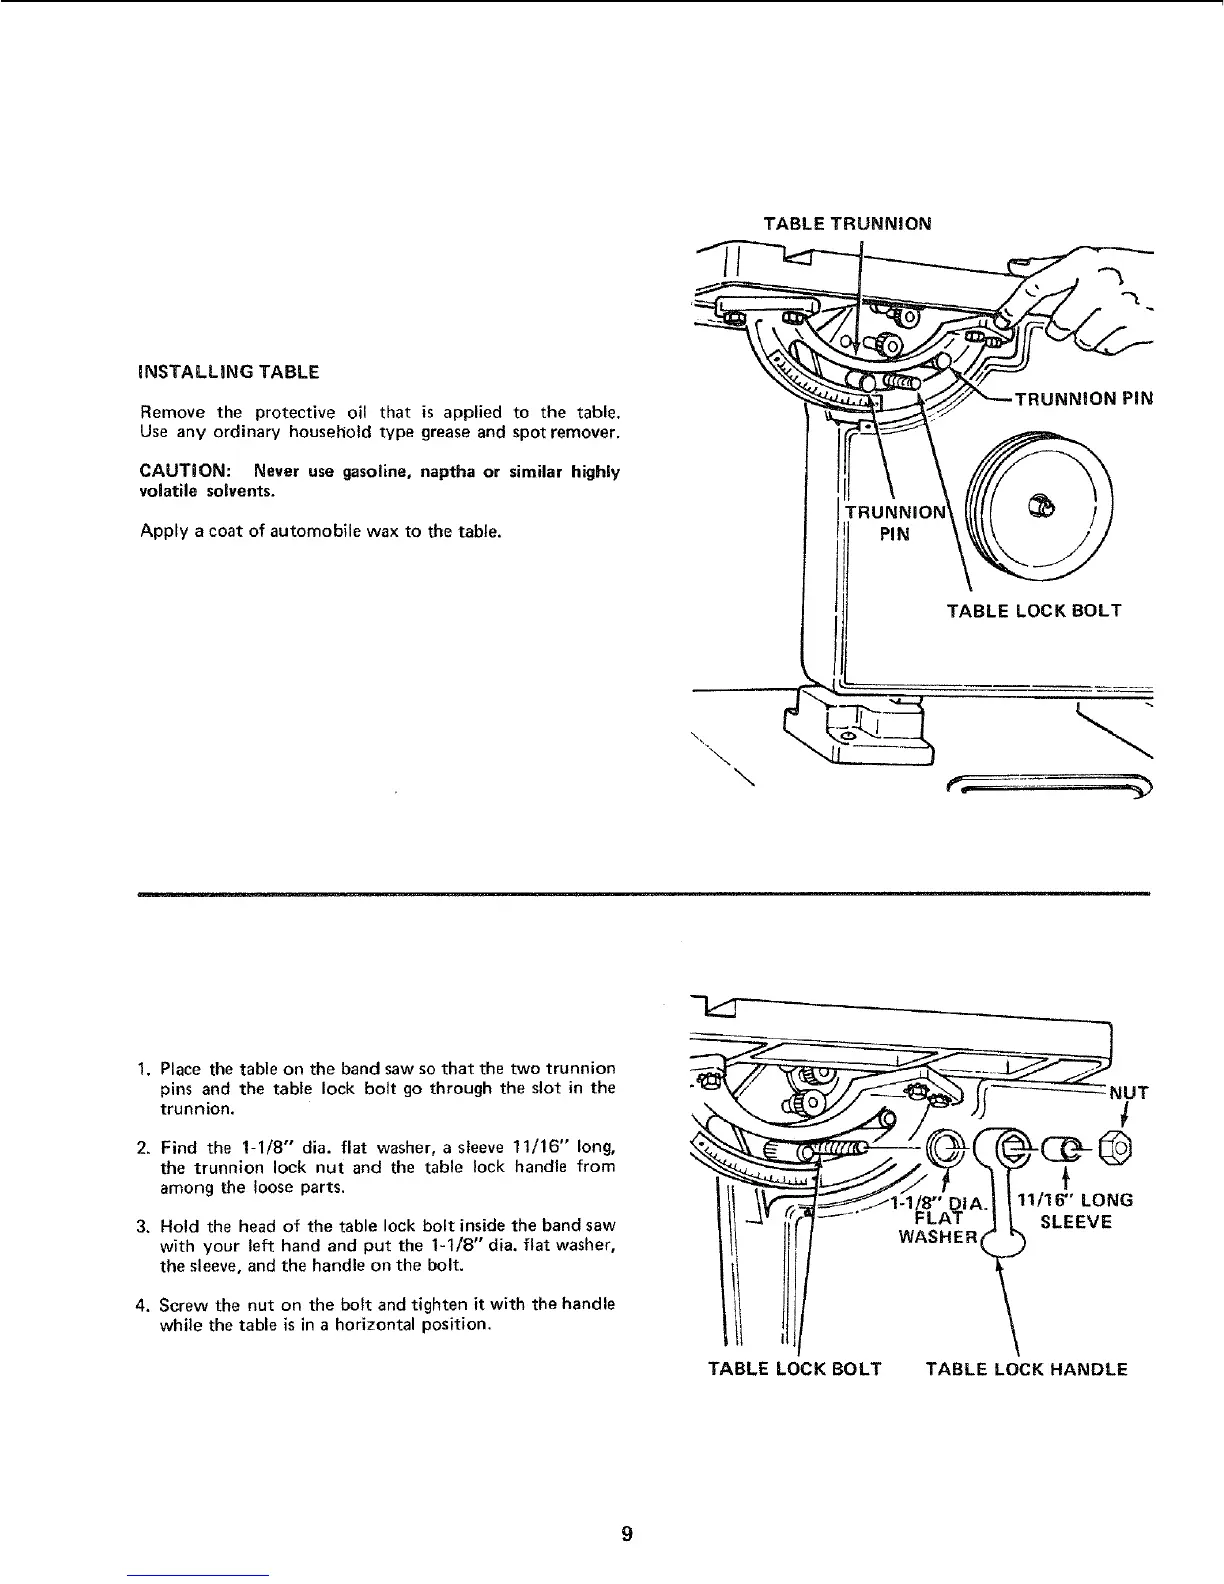
Step-by-step guide to securely attach the band saw to a floor base.

Motor Pulley Belt Guard and Motor Installation

Steps for mounting the belt guard support bracket to the motor.

Check Motor Rotation

Verifying the correct counterclockwise motor rotation before power connection.

Installing the Blade

Steps for fitting the blade tension knob, removing the guard, and preparing for blade installation.

Installing Sanding Attachment

Basic Band Saw/Sander Operation

Trouble Shooting

Related product manuals