EasyManua.ls Logo

D-Link DGS-3130-54TS User Manual

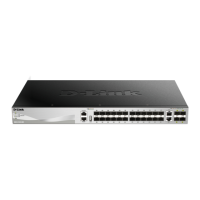
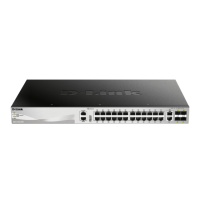
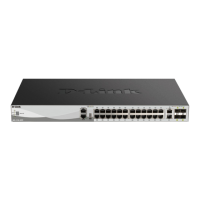
D-Link DGS-3130-54TS
83 pages
To Next Page IconTo Next Page
To Previous Page IconTo Previous Page
Page #51 background imageLoading...
Page #51 background image
DGS-3130 Series Layer 3 Stackable Managed Switch Hardware Installation Guide
51
Connecting to the Switch for the First Time
The Switch supports user-based security that can prevent unauthorized users from accessing the Switch or changing
its configuration. This section will explain how to log into the Switch’s Command Line Interface via the out-of-band
console connection.
Upon initial connection to the Switch, the login screen appears (see example below).
DGS-3130-30TS Gigabit Ethernet Switch
Command Line Interface
Firmware: Build 1.00.001
Copyright(C) 2017 D-Link Corporation. All rights reserved.
Switch>
By default, there is no Username and Password configured in the account settings of this switch. This will allow the
user to simply connect to this Switch for the first time by pressing the ‘Enter’ key. After pressing Enter, access will be
given to enter commands after the command prompt (Switch>) appears.
NOTE: The first user automatically gets Administrator level privileges. At least one
Administrator-level user account must be created for the Switch.
NOTE: It is highly recommended to create a user account containing a username and a
password on the Switch to prevent unauthorized access to the management interface.
Creating a User Account
One of the first and most important tasks will be to create user accounts. Logging in using a predefined administrator-
level username will give the user privileged access to the Switch's management software. Also this will prevent
unauthorized access to the Switch and record the passwords for future reference.
An example to create an administrator-level account for the Switch called ‘NewUser’:
Switch>enable
Switch#configure terminal
Switch(config)#username NewUser password 12345
Switch(config)#username NewUser privilege 15
Switch(config)#line console
Switch(config-line)#login local
Switch(config-line)#end
Switch#
In the example above:
1. At the CLI command prompt, enter the enable command to enter the Privileged EXEC Mode. Press Enter.
2. Enter the configure terminal command to enter the Global Configuration Mode. Press Enter.
3. Enter the username NewUser password 12345 command. Press Enter. This will create a user account with
the username of NewUser and a password of 12345.
4. Enter the username NewUser privilege 15 command. Press Enter. This will configure this user account to
have Administrative (15) privileges.
5. Enter the line console command to enter the Line Configuration Mode. Press Enter.
6. Enter the login local command. Press Enter. This specifies that the local line requires login credentials.
7. Enter the end command to exit back to the Privileged EXEC Mode.
Table of Contents

Other manuals for D-Link DGS-3130-54TS

Question and Answer IconNeed help?

Do you have a question about the D-Link DGS-3130-54TS and is the answer not in the manual?

D-Link DGS-3130-54TS Specifications

General IconGeneral
Power over Ethernet (PoE)No
Switching Capacity176 Gbps
MAC Address Table Size32K
RAM512 MB
Flash Memory32 MB
Power SupplyInternal
Rack MountableYes
Device TypeManaged
Primary TypeLayer 3
Port Type10/100/1000 Mbps
Jumbo Frame9KB
Operating Temperature0 to 50 °C
Storage Temperature-40°C to 70°C
Humidity5% to 95% (non-condensing)

Summary

Introduction to D-Link DGS-3130 Series

Switch Description

Details the D-Link DGS-3130 Series as a high performance Layer 3 switch.

Hardware Components Overview

DGS-3130-30TS Switch Components

Describes front, rear, and side panel components for the DGS-3130-30TS model.

Front Panel Components

Details the ports and LED indicators found on the front panel of the switch.

Rear Panel Components

Identifies the security lock, GND, AC power connector, and RPS port on the rear panel.

Switch Installation Procedures

Installation Guidelines

Provides essential hardware installation guidelines for safe and proper switch setup.

Installing the Switch in a Standard 19" Rack

Guide to mounting the switch securely into a standard 19-inch rack.

Installing Redundant Power Supply (RPS)

Information on connecting an optional Redundant Power Supply for reliability.

Switch Connections and Cabling

Switch Stacking

Details on how to stack multiple switches for unified management and scalability.

Switch Management Options

Connecting to the Console Port

Procedure for establishing a console connection for switch configuration.

Configuring the IP Address

Steps to assign an IP address for network management of the switch.

Connecting to the MGMT Port

How to use the dedicated MGMT port for out-of-band network management.

Web-based Switch Configuration

Logging into the Web UI

Step-by-step guide to access the switch's web management interface.

Appendix A: Technical Specifications

LED Indicators

Comprehensive explanation of all switch LEDs, their colors, and statuses.

Limited Warranty Information (USA)

Limited Warranty Terms

Defines the terms, conditions, and duration of the hardware and software warranty.

Related product manuals