2-8
※2-5 ASC, Automatic set point change (Option)
This function can change the set temperature automatically over
time (for details, refer to paragraph 1.5.1).
Step 1. Press or key to select "ON" or "OFF".
ON : To enable automatic set point change
OFF : To disable automatic set point change
Step 2. Select "ON" and press
key to determine, then the
previous setting screen appears (Fig. 1).
1) The temperature can be set up to 9 times.
2) Setting temperature range SP: -30.0 ℃ to +30.0 ℃
3) DHU setting: "ON" when a dehumidification operation is
executed, "OFF" when a dehumidification operation is not
executed.
4) Setting humidity range SHU: 50% to 95% RH when DHU
setting is "OFF" , "--" appears.
5) Range of operating time: Last, 1 to 999 Hr
Select "Last" for the last operation so that it will be a
continuous operation.
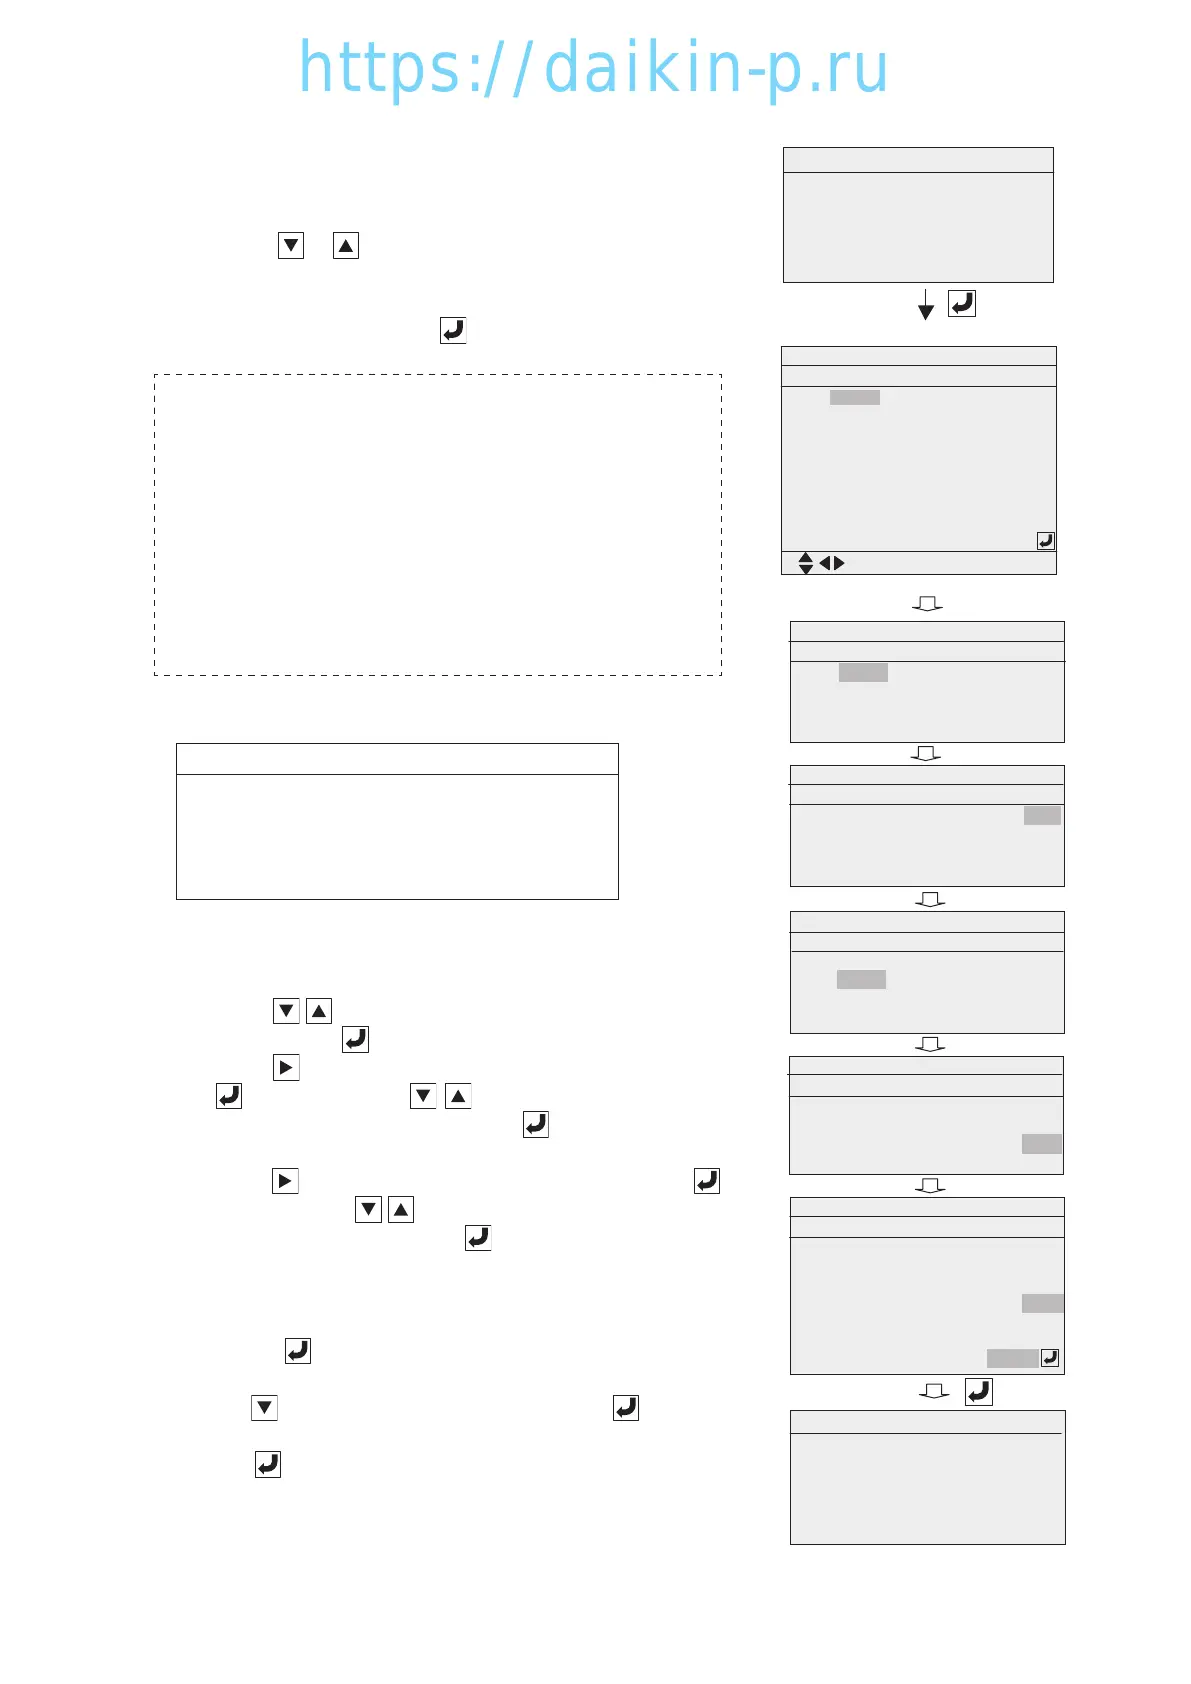
Step 3. ASC Setting Procedure: See the case example below.
No SP℃ DHU SHU (%) Hr
1 15.0 ON 80 48
2 10.0 ON 75 72
3 0.0 OFF -- 240
4 10.0 ON 75 LAST
3-1. Set SP, DHU, SHU or Hr for the first settings in the following
ways.
1) Press
key to change setting to "15.0 ℃ ", the first
SP, and press key to determine. (Fig. 2)
2) Press key to move next setting item, SHU, and press
key, then press key to change setting to
"80%", the first SHU, and press key to determine.
(Fig. 3)
3) Press key to move next setting item, Hr, and press
key, then press
key to change setting to "48", the
first operating Hr, and press key to determine. (Fig. 3)
3-2. Similarly, set the second and the third settings for SP, DHU,
SHU or Hr (Figs. 4 and 5).
3-3. To set the fourth setting, select "LAST" for operation time
and press
key (Fig. 6).
3-4. Press key to move to "START", and press key. The
next screen (Fig.7) will be appeared. (Fig. 6 ⇒ Fig. 7)
3-5. Press key to start an ASC operation (Fig 7).
Automatic Setpoint Change
No SP ℃ DHU SHU(%) Hr
1ON81901
2 22.0 ON 82 902
3 23.0 ON 83 903
15.0
Automatic Setpoint Change
No SP ℃ DHU SHU(%) Hr
1ON80
2 22.0 ON 82 902
3 23.0 ON 83 903
15.0
48
First time
Second time
Automatic Setpoint Change
No SP ℃ DHU SHU(%) Hr
1ON80
2 10.0 ON 75
30.0OFF--
15.0
48
72
240
Third time
Fourth time
Auto Setpoint Change
No SP ℃ DHU SHU(%) Hr
1ON80
2ON82902
3 23.0 ON 83 903
15.0
48
10.0
Automatic Setpoint Change
Automatic Setpoint Change
Press
Enter to Start
ESC to Cancel
Automatic Setpoint Change
No SP ℃ DHU SHU(%) Hr
1ON81901
2 22.0 ON 82 902
3 23.0 ON 83 903
424.0 ON 84
904
5 25.0 ON 85 905
626.0 ON 86
906
7 27.0 ON 87 907
8 28.0 ON 88 908
929.0 ON 89
:Select Enter :Chg Set
START
21.0
Automatic Setpoint Change
No SP ℃ DHU SHU(%) Hr
1ON80
2 10.0 ON 75
3 0.0 OFF --
15.0
48
72
240
4 10.0 ON 75
5
:
START
9
Fig. 1 (Previous setting screen)
Fig. 2
Fig. 3
Fig. 4
Fig. 5
Fig. 6
Fig. 7
Automatic Setpoint Change
▲▼:Change
ENTER:Confirm
ON
LAST
02章01-18LX10F11B3TR16-02En.indd2-802章01-18LX10F11B3TR16-02En.indd2-8 2016/02/0316:14:302016/02/0316:14:30
 Loading...