54 Installing the PPD File on Macintosh Computers
2.
Select
Dell
from
Printer Model
, and confirm
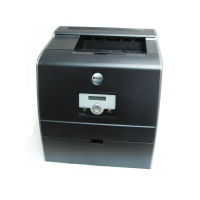
Dell Laser Printer 3110cn
is selected for
the
Model Name
. If it is not selected, select it.
NOTE:
When printing is set up using IP printing, the queue name is displayed as blank. You do not need to
specify it.
3.
Click
Add
.
When Using Rendezvous
NOTE: A multi protocol card must be installed and the IP addresses for the Macintosh computer and the
printer must have the same segment to use Rendezvous.
1.
Turn on the printer.
2.
Connect the LAN cable between the printer and the network.
NOTE: The Macintosh computer must be connected to the network in advance.
3.
Start the
Print Center
(or
Printer Setup Utility
), and click
Add
from the
Printer List
dialog
box.
4.
Click
Default Browser
on the
Printer Browser
dialog box and select the printer that is
connected via the Rendezvous connection. Then, click
Add
.
NOTE: When using Mac OS X 10.2.8, you can find Print Center in the Utilities folder in Applications.
5.
Specify the options to have been installed to the printer, and then click
Continue
.
6.
Confirm that the printer is displayed on the
Printer List
dialog box.
Configure Settings
All the optional accessories are verified as installed.
Mac OS X 10.3 or Later Version(s)
1.
Start the
Printer Setup Utility
.
2.
On the
Printer List
dialog box, select the printer to be configured.
3.
Click
Show Info
.
4.
Select
Installable Options
, and select the options that have been installed on the printer,
then click
Apply
Changes
.
NOTE: When using a USB cable and AppleTalk, the installable options settings are automatically set up.
You do not have to change the settings. However, you must configure the settings if you are using Mac
OS 10.3 and a USB cable.
NOTE: You must configure the print queue that was automatically created on a non-English version of
Mac OS X 10.3 when a USB cable is connected to your computer.

 Loading...