1. Install the display panel.
2. Install the hinges.
3. Install the display bezel.
4. Install the hinge cap
5. Install the display assembly
6. Install the battery.
7. Install the base cover.
8. Follow the procedure after working inside your computer.
System board
Removing the system board
1. Follow the procedure in before working inside your computer.
2. Remove the base cover.
3. Remove the battery.
4. Remove the memory.
5. Remove the SSD.
6. Remove the WLAN card.
7. Remove the heatsink-fan assembly.
8. Remove the power adapter port.
9. Remove the display assembly.
NOTE:
System board can be removed with heatsink assembly installed, this simplifies the procedure in an event of power
button, keyboard and palmrest assembly replacements.
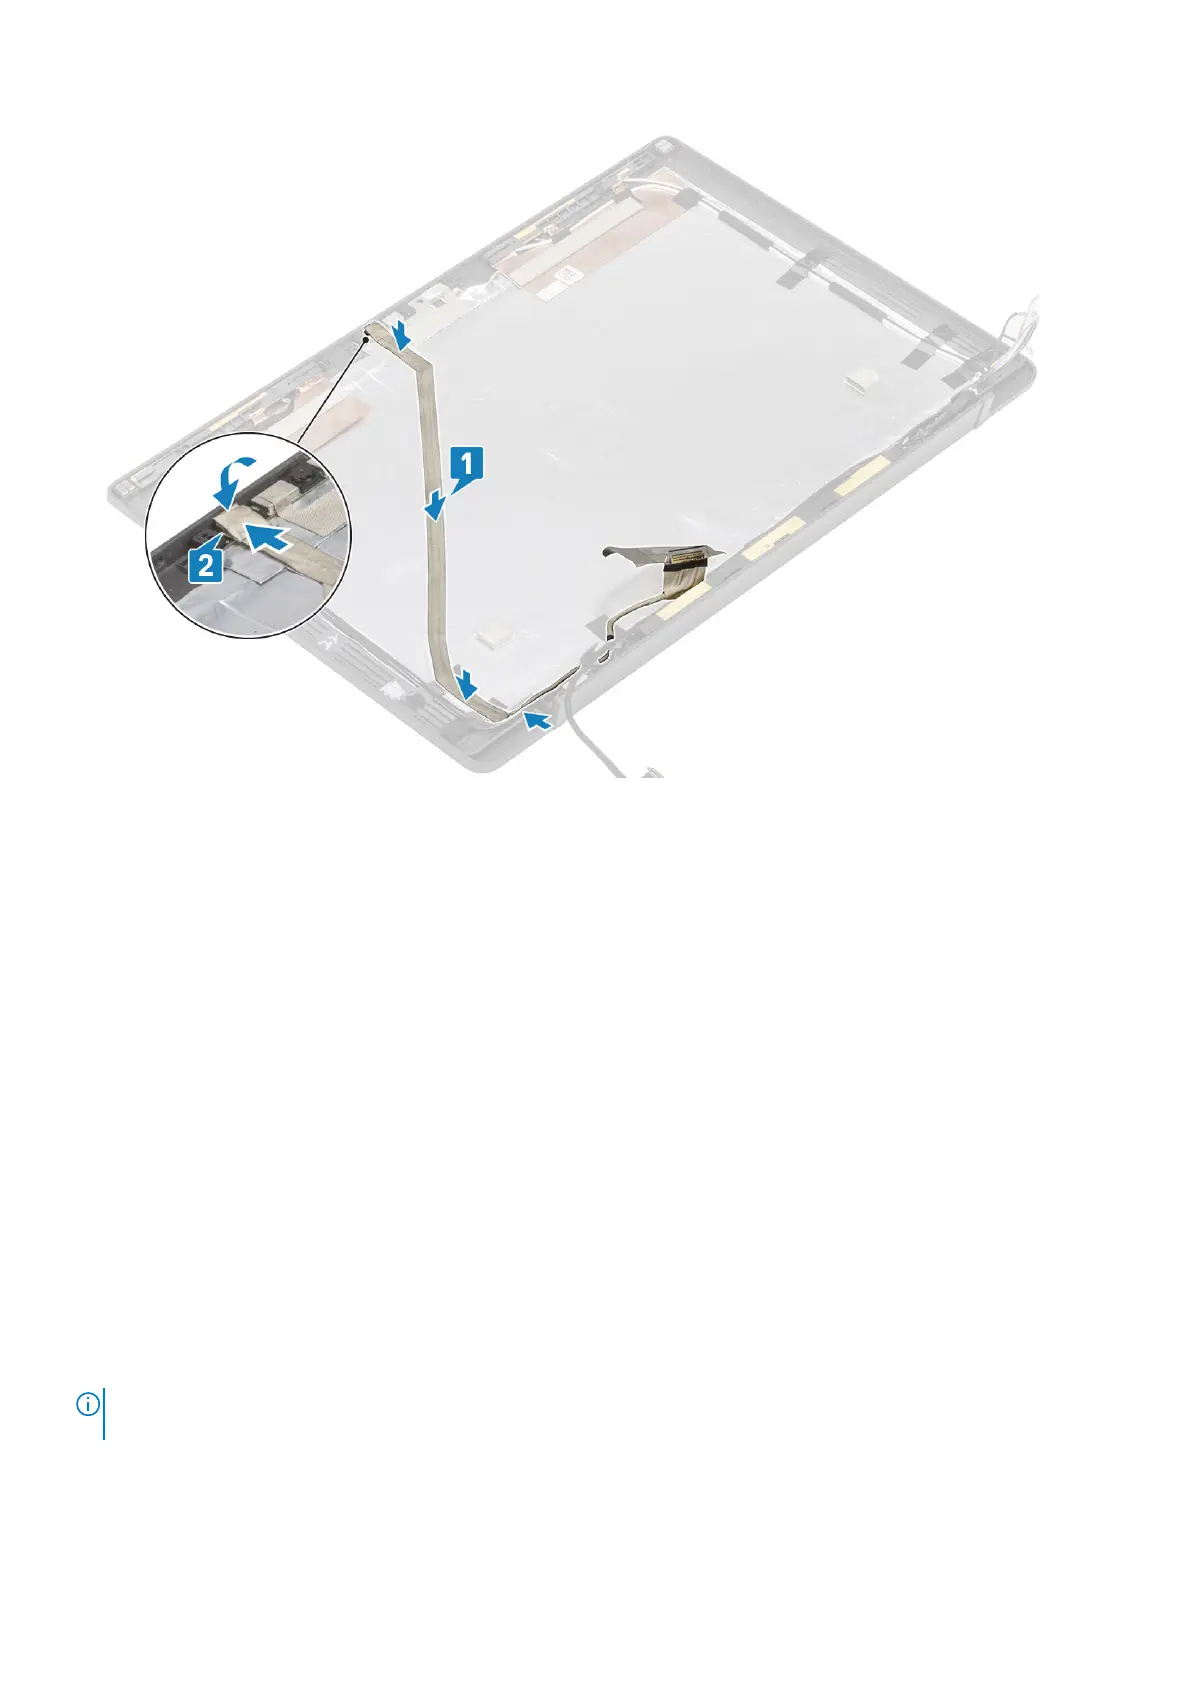
1. Remove the single (M2x4) screw on the metal bracket over the display cable connector on the system board [1]
2. Lift and remove the metal bracket [2] to disconnect the display cable from the system board [3].
Removing and installing components
69
 Loading...