Installing System Components 91
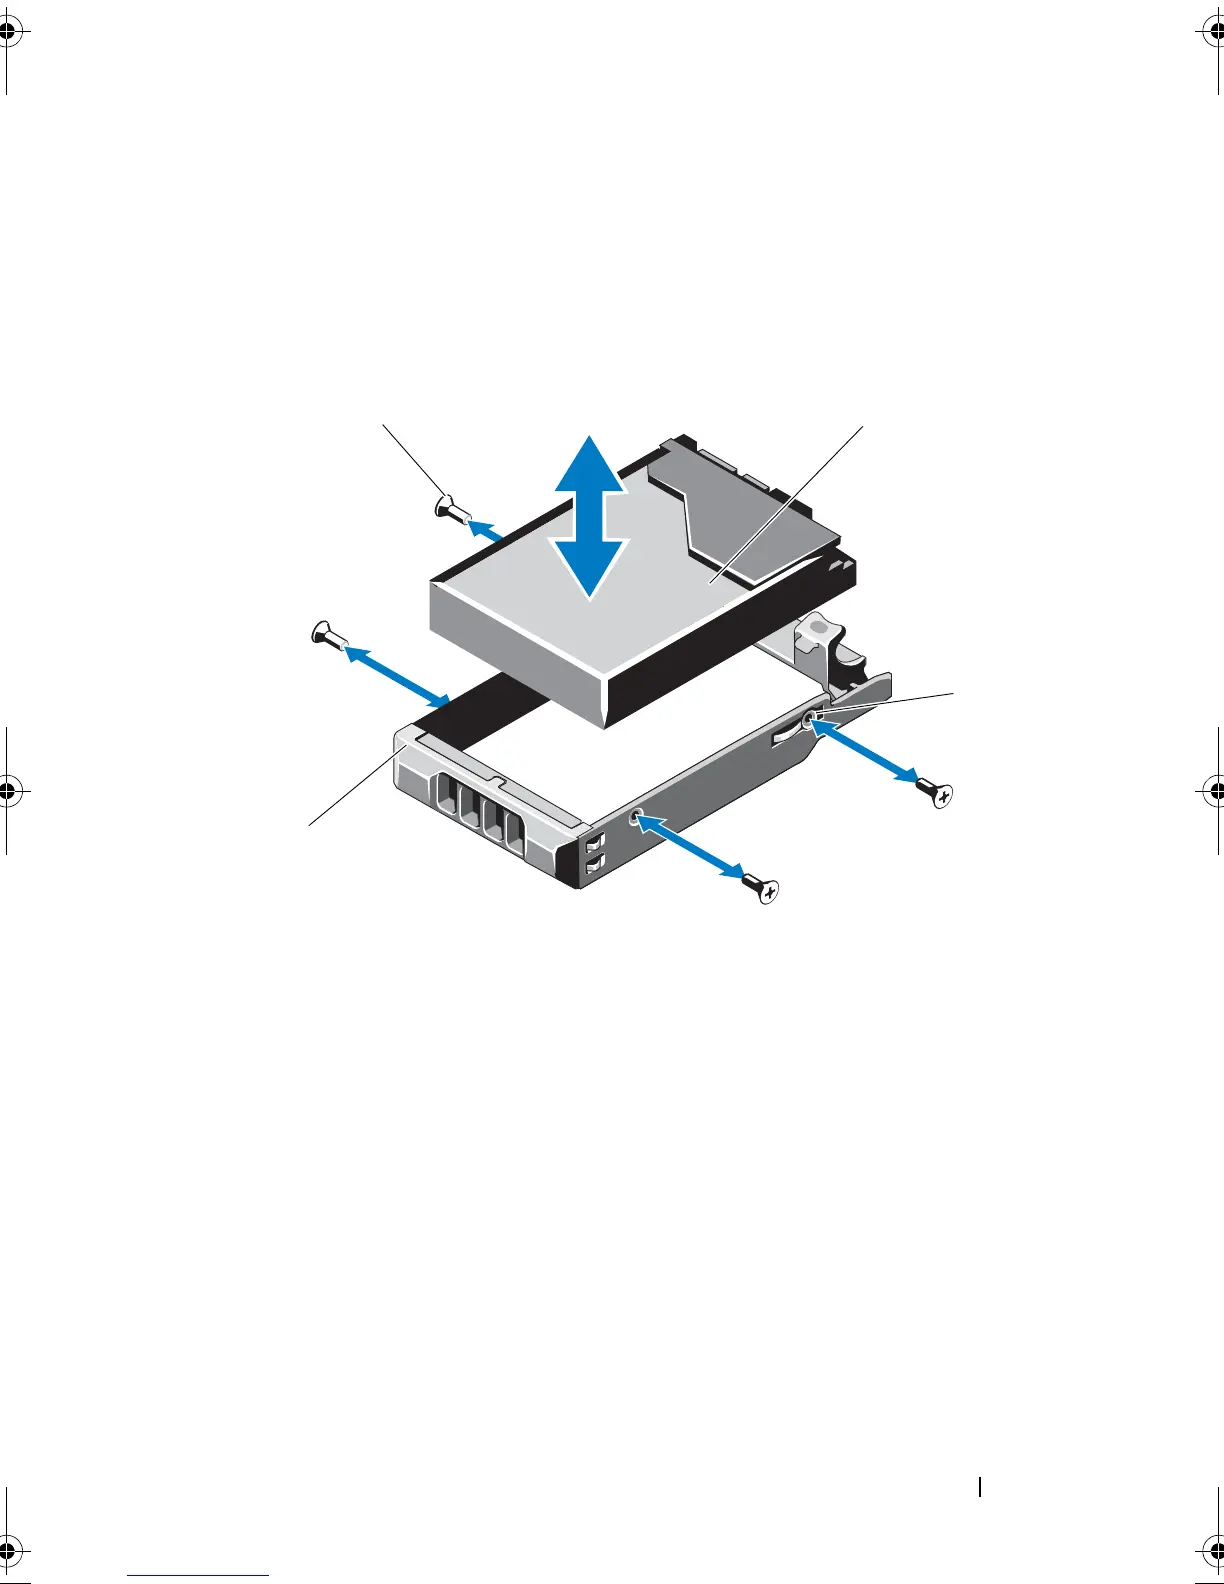
Removing a Hard Drive From a Hard-Drive Bracket
Remove the screws from the slide rails on the hard-drive bracket and separate
the hard drive from the bracket. See Figure 3-9.
Figure 3-9. Removing and Installing a Hard Drive From a Hard-Drive Bracket
*Screws are supplied along with the hard drives ordered from Dell.
Installing a Hard Drive Into a Hard-Drive Bracket
1
Insert the hard drive into the hard-drive bracket with the connector end of
the drive at the back. See Figure 3-9.
2
Align the screw holes on the hard drive with the back set of holes on the
hard-drive bracket.
When aligned correctly, the back of the hard drive will be flush with the
back of the hard-drive bracket.
3
Attach the four screws to secure the hard drive to the hard-drive bracket.
1 screws (4)* 2 hard drive
3 SAS/SATA screw holes (4) 4 hard-drive bracket
R310HOM.book Page 91 Thursday, March 4, 2010 1:03 AM
 Loading...