EasyManua.ls Logo

Denon AVR-2311CI User Manual

Denon AVR-2311CI
95 pages
To Next Page IconTo Next Page
To Previous Page IconTo Previous Page
Page #19 background image
16
ENGLISH
Connecting a DVD player
You can enjoy video and audio from a DVD.
Select the connector to use and connect the device.
For instructions on HDMI connections, see “Connecting an HDMI-compatible device” (vpage14).
Cables used for connections
Video cable (sold separately)
Video cable
(Yellow)
Component
video cable
(Green)
(Blue)
(Red)
Audio cables (sold separately)
Audio cable
(White)
(Red)
R
L
R
L
Coaxial
digital cable
(Orange)
R
L
R
L
7*%&0 "6%*0
"6%*0
3-
065
065
7*%&0
$0.10/&/57*%&0
:1
# 13
065
065
$0"9*"-
DVD player
Set this to change the digital input connector or component video input connector to which the input
source is assigned.
“Input Assign” (vpage48)
in Set as Necessary
Connecting a set-top box (Satellite tuner/cable TV)
You can watch satellite or cable TV.
Select the connector to use and connect the device.
For instructions on HDMI connections, see “Connecting an HDMI-compatible device” (vpage14).
Cables used for connections
Video cable (sold separately)
Video cable
(Yellow)
Component
video cable
(Green)
(Blue)
(Red)
Audio cables (sold separately)
Audio cable
(White)
(Red)
R
L
R
L
Coaxial
digital cable
(Orange)
R
L
R
L
7*%&0
"6%*0
"6%*0
3-
065
065
7*%&0
$0.10/&/57*%&0
:1
# 13
065
065
$0"9*"-
Satellite tuner/Cable TV
Set this to change the digital input connector or component video input connector to which the input
source is assigned.
“Input Assign” (vpage48)
in Set as Necessary

Table of Contents

Other manuals for Denon AVR-2311CI

Question and Answer IconNeed help?

Do you have a question about the Denon AVR-2311CI and is the answer not in the manual?

Denon AVR-2311CI Specifications

General IconGeneral
Channels7.2
HDMI Inputs6
HDMI Outputs1
Audio Formats SupportedDolby TrueHD, DTS-HD Master Audio
Network ConnectivityYes
Wi-FiNo
Multi-Room CapabilityYes
Response Bandwidth10 Hz - 100 kHz
Signal-To-Noise Ratio100 dB
Input Impedance47 kOhms
Input Sensitivity200 mV
THD0.08 %
Audio D/A Converter192kHz/24-bit
HD RadioYes
HDMI SwitchingYes
Frequency Response10 Hz - 100 kHz
Total Harmonic Distortion0.08 %
Input Sensitivity/Impedance200 mV / 47 kOhms
Phono InputYes
USB PortYes
BluetoothNo
Amplifier Output Details7 channels
Video InputsComposite video x 4
Video OutputsComposite video x 1
Digital Audio InputsOptical x 2, Coaxial x 2
Dimensions (W x H x D)434 x 151 x 380 mm

Summary

Safety Precautions

General Safety Instructions

Provides essential safety guidelines for operating the apparatus and precautions.

Product Features

Amplifier and HDMI Features

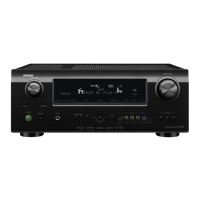
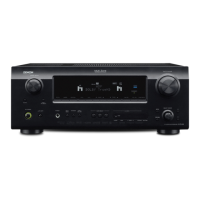
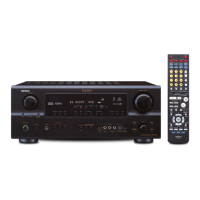
Details on 7-channel amplifier, HDMI 1.4 support, and HDMI connectivity.

Simple Setup Guide Steps

Steps 1-5: Install, Connect, Power, Setup, Playback

Provides sequential steps for initial setup and playback.

Audyssey® Auto Setup Steps

Steps 1-3: Preparation, Detection, Measurement

Details the initial steps of Audyssey setup: preparation, detection, and measurement.

Steps 4-6 and Finish

Covers calculation, check, store, and finalization of Audyssey setup.

Speaker Installation and Connection

1. Install Unit

Details the initial installation procedure for the unit.

2. Connect Speakers

Guides on connecting speakers, cables, and using banana plugs.

Connection Guide

Connecting Blu-ray Disc Player and TV

Instructions for connecting a Blu-ray Disc player and TV via HDMI.

Power On and Speaker Setup

3. Turn On Power

Steps for powering on the unit, TV, and subwoofer.

4. Set Up Speakers (Audyssey® Auto Setup)

Performing automatic speaker setup using Audyssey.

Audyssey® Auto Setup: Microphone and Subwoofer

Microphone Placement and Listening Position

Guidelines for microphone placement and identifying the main listening position.

Subwoofer Setup

Adjusting subwoofer settings for optimal performance.

Audyssey® Auto Setup: Measurement Steps

STEP 1 Preparation

Initial preparation for the Audyssey auto setup process.

STEP 2 Speaker Detection

Automatic detection of connected speakers and their configuration.

STEP 3 Measurement

Performing acoustic measurements at multiple listening positions.

Audyssey® Auto Setup: Calculation and Storage

STEP 4 Calculation

Analysis of measurement data for speaker settings calculation.

STEP 5 Check

Verifying measurement results and speaker configuration.

STEP 6 Store

Saving the calculated speaker settings to memory.

Finish

Completing the Audyssey Auto Setup process.

Error Messages and Parameter Check

Basic Playback Operations

Disc Playback Steps

Guides on selecting source, adjusting volume, muting, and setting listening modes.

Selecting Input Source, Volume, and Mute

Covers selecting input sources, adjusting volume, and muting audio.

Using the Source Select Menu

Navigating the menu to select input sources.

Adjusting Master Volume and Muting

Adjusting master volume and temporarily muting audio.

Connecting HDMI Devices

HDMI Features and Functions

Covers HDMI features like 3D, ARC, Deep Color, cables, control, and 3D support.

Connecting HDMI and TV Sources

Connecting HDMI-Compatible Devices

Details on connecting various devices via HDMI.

Connecting a TV

Instructions for connecting a TV, including audio and video.

Connecting DVD Players and Set-Top Boxes

Connecting a DVD Player

Steps and cable diagrams for connecting a DVD player.

Connecting a Set-Top Box

Steps and cable diagrams for connecting a set-top box.

Connecting Video Recorders and Camcorders

Connecting a Digital Video Recorder

Steps and cable diagrams for connecting a digital video recorder.

Connecting a Digital Camcorder

Steps and cable diagrams for connecting a digital camcorder.

Connecting iPod and USB Devices

Connecting iPod Control Dock

Instructions for connecting a DENON control dock for iPod.

Connecting iPod/USB Directly to Port

Instructions for connecting iPod or USB devices directly to the unit's port.

Connecting CD Players and Antennas

Connecting a CD Player

Steps and cable diagrams for connecting a CD player.

Playing Discs and iPod Content

Playing Blu-ray/DVD Player

Steps for playback, including preparation, power, source selection, and component setup.

Playing CD Player

Steps for CD playback: preparation, power, source selection, and component setup.

Playing iPod Content

Methods for playing iPod content via control dock or USB.

iPod Operation and Media Playback

iPod USB Playback and Operation

Connecting iPod Directly to USB Port

Steps for connecting an iPod directly to the unit's USB port.

iPod Operation Details

Details on iPod operation buttons and functions.

iPod Playback and Radio Tuning

iPod Play Function

How to initiate iPod playback.

Tuning Radio Stations

Information and steps for tuning into HD Radio stations.

Radio Tuning Procedures

Manual Station Presets

Steps for manually tuning and storing favorite radio stations.

Tuning Preset Stations

Selecting and listening to preset radio stations.

Special Playback Modes

Advanced Version Features Overview

Speaker Installation/Connection (Other than 5.1)

Installing and connecting speakers for non-5.1 channel setups.

Speaker Installation and Connection (Other than 5.1)

Speaker Setting Procedures Overview

Overview of speaker setup procedures: Install, Connect, Set Up.

Speaker Placement Configurations

Guides for speaker placement in 7.1ch, 6.1ch, and Front A/B setups.

Speaker Connection Details

7.1ch (Front Height) Connection

Connecting front height speakers for 7.1 channel setup.

7.1ch/6.1ch (Surround Back) Connection

Connecting surround back speakers for 7.1/6.1 channel setup.

6.1ch Connection

Connecting a single surround back speaker for 6.1 channel setup.

Advanced Speaker Connection Methods

Front A/B Connection

Connecting a second set of front speakers for A/B configurations.

2.1/2-Channel Connection

Connecting speakers for 2.1 and 2-channel audio setups.

Special Speaker Connection Methods

Bi-amp Connection

Connecting separate amplifiers to tweeters and woofers.

5.1ch + 2.1ch Connection

Connecting speakers for simultaneous 5.1 and 2.1 channel playback.

Speaker Setup Procedures

Remote Control Unit Setup

Setting the zone mode and operation mode on the remote control.

Connecting Setup Microphone

Connecting the setup microphone to the unit.

Amp Assign Configuration

Configuring amplifier assignments for different speaker terminals.

Speaker Configuration Selection

Selecting speaker configuration (Normal, ZONE2, Height, Bi-Amp, Front B, 2CH).

Speaker Setup: Channel Selection

5. Set Up "Channel Select"

Selecting channels to be used for speaker setup.

6. Select a Channel

Selecting speaker channels (Front, Subwoofer, Surround Back).

7. Front Speaker Selection

Selecting front speakers (A, B, or A+B) for use.

8. Subwoofer Setup

Configuring subwoofer measurement or skip settings.

9. Surround Back Speaker Setup

Configuring surround back speaker measurement or skip settings.

Playback Control and Volume

ZONE2 Playback Control

Switching input sources and controlling ZONE2 power.

Volume Adjustment

Adjusting volume for ZONE2 and the main unit.

Temporary Muting

Temporarily muting audio output.

Audio/Video Adjustments: Audyssey and Manual EQ

Audyssey Settings

Setting MultEQ, Dynamic EQ, and Reference Level Offset.

Audio/Video Adjustments: Volume and EQ Details

Dynamic Volume® Settings

Adjusting volume variations between content types.

Manual Setup: Speaker and HDMI Configuration

Manual Setup: Speaker Configuration Details

Manual Setup: Distance, Channel Level, Crossover

Manual Setup: HDMI and Audio Configuration

Manual Setup: 2ch, Auto Surround, and ZONE2 Settings

Manual Setup: EQ, Option, and Volume Settings

Troubleshooting Audio and Video Issues

Resetting Unit and Technical Specifications

Related product manuals