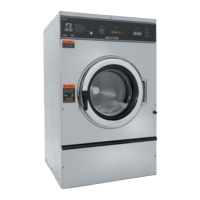
The prewash or wash LED will illuminate at this time, powered through the white wires from the P-3 con-
nection of the main control PCB to the LED printed circuit board. Using the factory preset cycle as an
example: The washer lls the tub through the back of the machine with either one or both the C1 cold and
H1 hot water valves. From the P19 connection of main relay PCB, 120VAC is sent out on the white/brown
wire to the C1 cold water ll valve and the red/yellow wire to the H1 hot water ll valve depending on the
temperature selected. After a 90 second delay from the beginning of the wash cycle bath only, the deter-
gent dispenser ushes the detergent into the tub for 20 seconds. This is accomplished when 120VAC trav-
els through the red/orange wire to the H2 hot water valve solenoid. During the machine ll, a 5VDC signal
is sent on the red wire from the P5 connection of the main control PCB to the pressure switch contact and
returns on the yellow and orange wires to the P5 connection of the main control PCB. When the water
level in the basket reaches the preset level pressure, the switch moves the switch contacts to the full or
open position. This causes the main control PCB to signal the relay PCB to shut o the water valve coils.
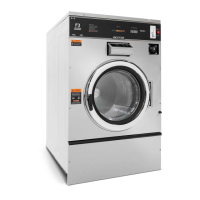
Wash Circuit
Once the machine has achieved it’s water level, the wash basket will continue to tumble one direction for
12 seconds, pause, and then reverse direction for 12 seconds. The time on the front display will count
down as the bath progresses. The time of the bath is programmable up 15 minutes per bath. Note: When
programming cycles, the wash bath must be programmed for 3 minutes or more.
Drain
When the program bath time ends the main control PCB signals the relay PCB to remove 120 VAC power
from brown/yellow wire at P17 going to the drain valve. The normally-open, spring-loaded drain valve
opens allowing water to exit the machine. This resets the pressure switch back to an empty level and
restores the 5VDC connection through the pressure switch from the red wires to the orange and yellow
wires.
Rinse 1 & 2
For Rinse 1 & 2, the rinse LED will illuminate, the drain valve will receive 120VAC and close. The basket will
ll and tumble the same as the wash bath for the programmed time. The rinse water temperatures are
programmable and factory default is cold.
Final Rinse Circuit
The nal rinse LED will illuminate, the drain valve will receive 120VAC and close. The basket will ll and
tumble the same as the previous baths for the programmed time. The nal rinse water temperatures are
programmable. Note: When programming cycles, the nal rinse bath must be programmed and cannot
be set for less than 3 minutes. Also at the beginning of the nal rinse bath, the main control PCB will sig-
nal the relay PCB to send 120V to the P-19 connector on the white/blue wire to the C2 cold water valve for
20 seconds to ush the fabric softener dispenser.
Spin Circuit
The spin LED will illuminate and the main control PCB sends a signal to the variable frequency drive via
the data cable at P6 to VFD RJ-11. The rotation as viewed from front during spin will be counter-clockwise.
(The 18lb washers will extract in a clockwise direction) The time of the spin cycle can be programmed.
Note: The nal spin must be programmed into the nal rinse bath and must be programmed for 1 minute
or more.
91
Part # 8533-081-001 1/18
 Loading...