DVM-250/DVM-250Plus Installation Guide 860-00129-00 Rev C
Copyright © 2010-2015 Digital Ally, Inc. 3-8
1. Attach the mounting bracket to the back of the BTR (base
transceiver cradle); the assembly can then be mounted at your
preferred location, such as the side of the center console. Do not
mount the cradle in close proximity of a cup holder or other area
which may be exposed to moisture. Damage caused by a liquid
spill is not covered under warranty.
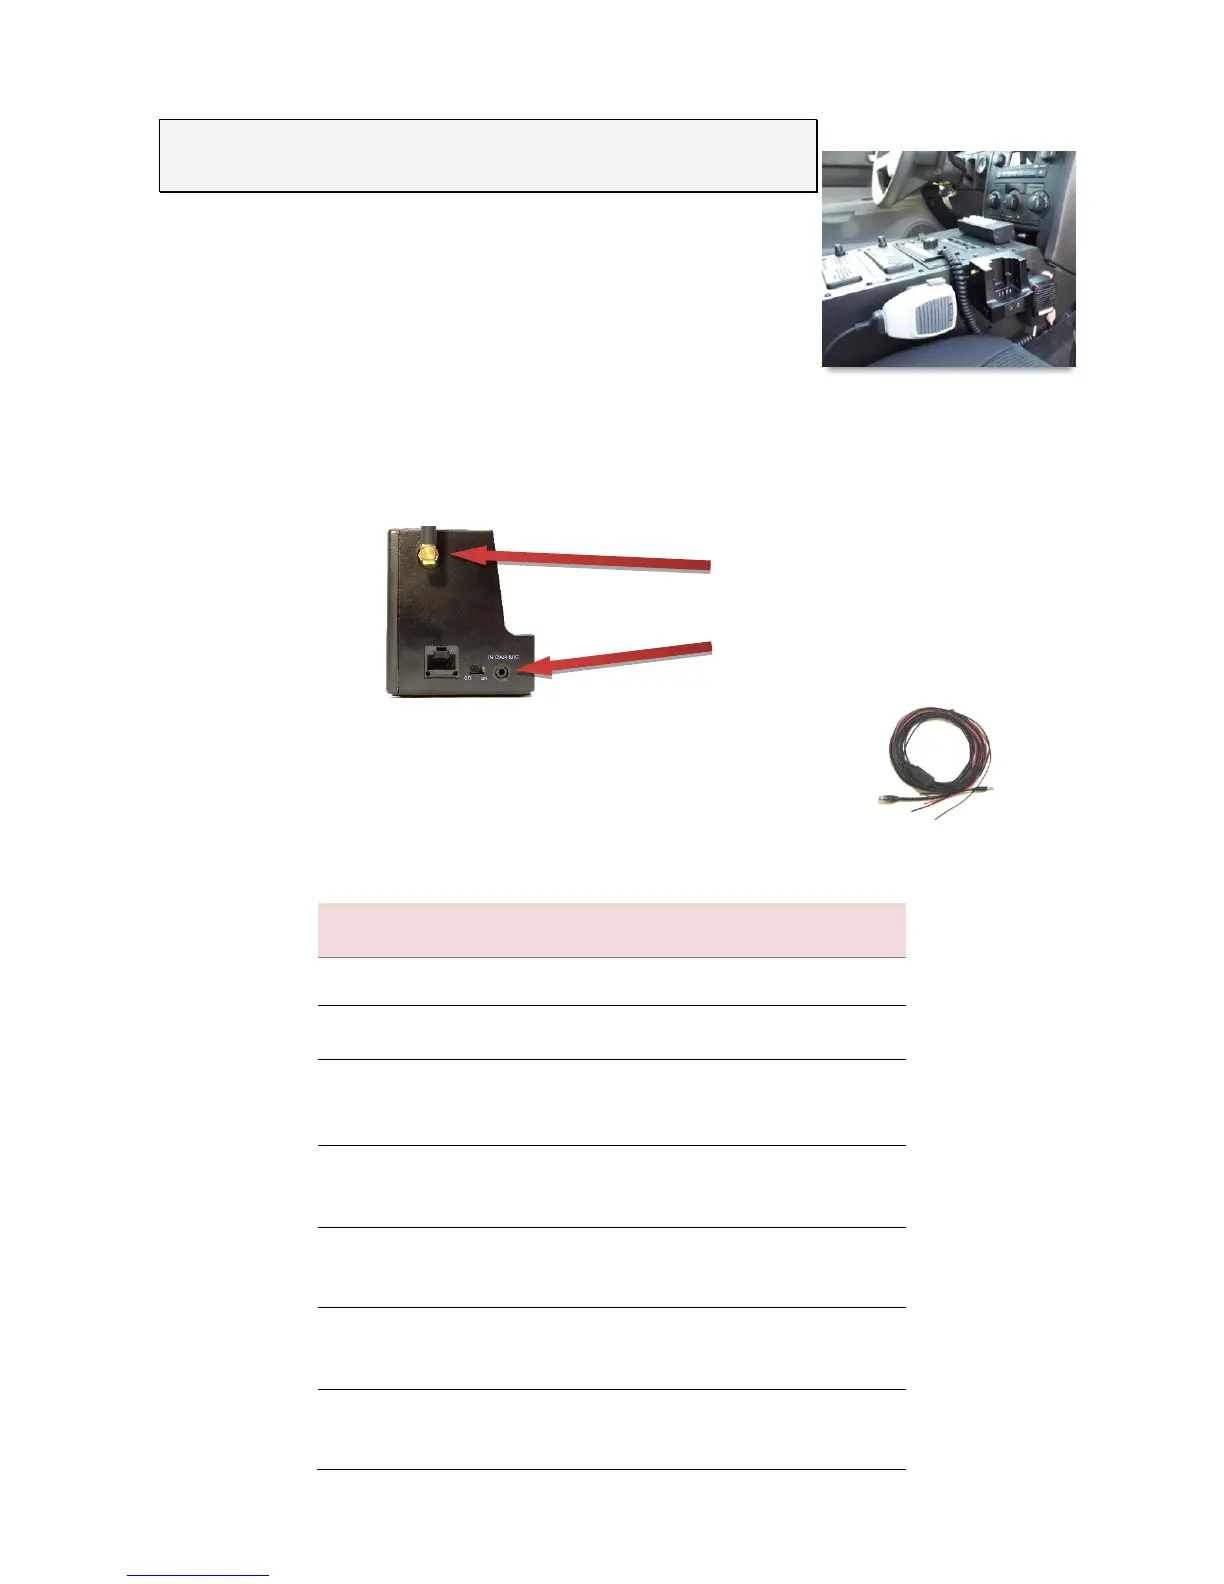
2. Attach the antenna. If you are using the external In-Car Microphone, connect it to the BTR In-Car
Microphone jack and route the microphone to your preferred location in the vehicle. The typical
mounting location for the external in-car microphone is in the rear seat area along the headliner
& below the weather strip.
DWM-800 Wireless Microphone Cable Installation
Carefully route the BTR-800 cable to the back of the DVM. Make the following
connections listed in figure 3-8.
Step 5: Wireless Microphone Installation (Optional)
For use with 001-00042-32 only
Connect to +12vdc battery terminal
Connect to vehicle chassis
Connect to auxiliary equipment
(optional connection, see next page)
Connect to GREEN wire of IF Sensor
Cable (see figure 3-6)
Connect to BROWN wire of IF Sensor
Cable (see figure 3-6)
Connect to RJ45 input jack on the
BTR800 microphone charger
Connect to 3.5mm audio jack on the
back of the DVM
Figure 3-8: BTR800 Cable Input Connections
Antenna Connection
In-Car Microphone Connection
 Loading...