DVM-250/DVM-250Plus Installation Guide 860-00129-00 Rev C
Copyright © 2010-2015 Digital Ally, Inc. 3-9
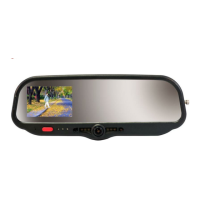
Connect the 3.5mm Audio Plug to the audio input jack on the back of the DVM. Be sure to leave
enough slack in the cable to allow for movement of the mirror.
Route the Camera Cable
1. Plug the connector on the DVM end of the Backup Camera cable into the back of the DVM. This
cable will connect to the short cable attached to the Backup Camera.
2. Leave slack in the cable as a service loop and for DVM adjustment; then begin routing the cable
to the rear of the vehicle.
3. If possible, route the camera cable to the opposite direction of other cables connected to the
DVM under the front edge of the headliner.
4. Depending on your vehicle you may be able to route the cable down the side of the headliner to
a rear compartment of the vehicle. Otherwise find a suitable route on the floorboard of the
vehicle.
5. To conceal the cable it may be necessary to loosen interior trim and other components within
the vehicle.
6. Secure the cable using Velcro or standard tie wraps as required.
7. The cable connector for the Backup Camera should be routed to a rear compartment of the
vehicle such as the trunk of a car, to a location within 3 feet of the rear license plate.
Mount the Backup Camera
LICENSE PLATE BACKUP CAMERA
1. Remove the top two screws holding the rear license plate to the vehicle.
2. Position the backup camera bracket along the top edge of the license plate.
3. Replace the license plate mounting screws to complete the bracket installation.
It may be illegal in your local area or state to cover up the State, County, Year, etc. on the vehicle license
plate. Depending on the design of the license plate for your particular state, you may need to use the Mini Backup
Camera in order to ensure compliance with your local and state laws.
Step 6: Backup Camera Installation (DVM-250Plus only)
License Plate Backup Camera
Do not route wiring and cabling over sharp metal edges. When possible, avoid running the cable parallel to other wiring and/or
antenna coax from other equipment in the vehicle. To prevent electrical shorts or breakage in the wiring and cabling, do not
allow wiring and cabling to be pinched behind trim pieces, panels, or other physical objects.
 Loading...