A3/A3Pro
User Manual
©
2016 DJI. All Rights Reserved.
7
1
2
IMU Pro Module
Includes built-in inertial sensors for the measurement of aircraft attitude and a built-in pressure
sensor for detecting aircraft altitude. The IMU Pro has been calibrated before delivery and
should be used under the specied temperature range. Using the IMU Pro outside the specied
temperature range may have a negative eect on the IMU’s performance.
1
3
2
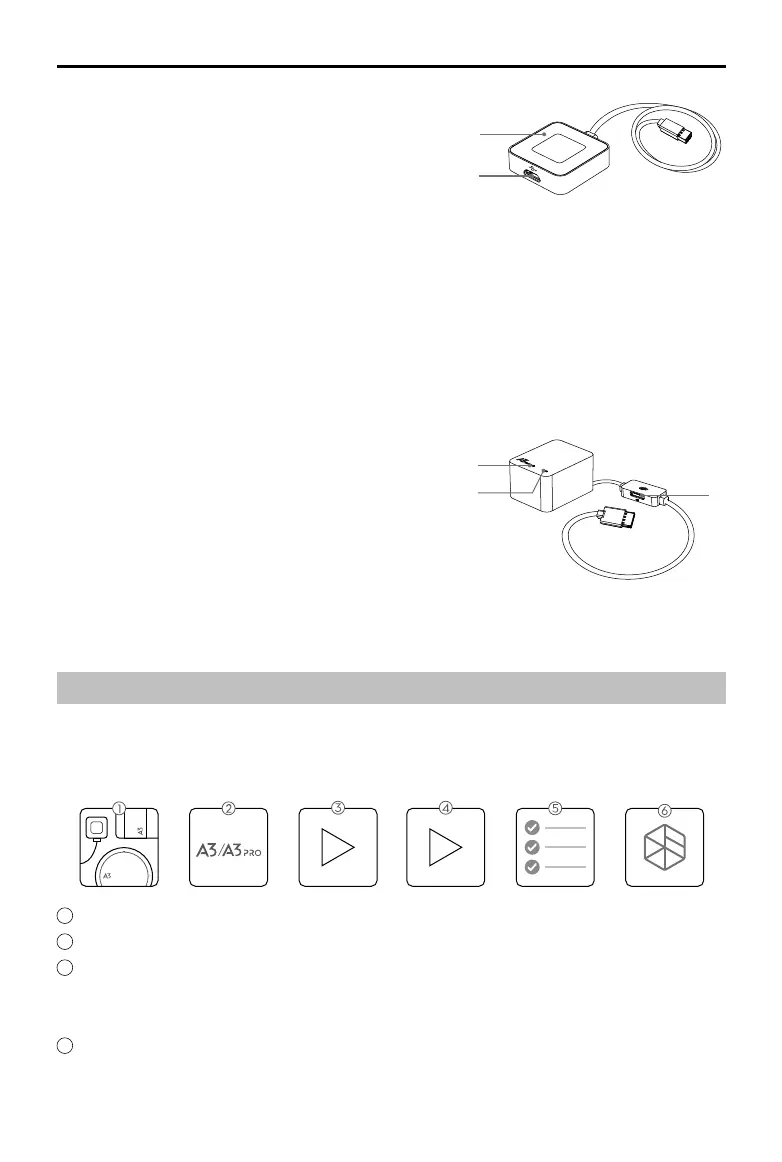
1. Flight Status Indicator
Indicates the status of the ight control system.
2. Micro USB Port
Used to congure and upgrade the A3 or A3 Pro via
DJI Assistant 2.
1. Orientation Arrow
The IMU Pro module should be mounted with the arrow pointing to the specied orientation
(Orientation can be set in the DJI Assistant 2).
2. Status Indicator
Indicates the status of the IMU Pro module and triple
modular redundancy system.
3. CAN1 GPS Port
Communicates with the GPS-Compass Pro module.
1
Ensure all parts are in good condition.
2
Select the A3 or A3 Pro connection.
3
Watch the “Installation Demo” and “Connecting the Modules” video tutorials for an overview of
the installation process. Then mount the parts to your airframe and connect them properly.
http://www.dji.com/product/a3/video
4
Watch the “How to use DJI Assistant 2” video tutorial for a brief introduction on how to
congure the parameters. Then launch the DJI Assistant 2 and congure the parameters.
http://www.dji.com/product/a3/video
Installation
Overview
Installation Procedure
Read this section carefully and follow the procedures below to install your ight control system,
otherwise the ight control system may not normally work.

 Loading...