10
This document cannot be reproduced or passed to third parties without authorization of Electrolux do Brasil S.A.
2.9 Disassembling of the Evaporator (bimetal, thermal fuse and defrost resistance replacement)
Evaporator Replacement (procedure for products outside the warranty period)
2.9.1 Follow the procedure described in item 2.1, Access to the Freezer Components.
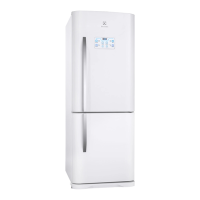
2.9.2 Loosen the two Phillips screws that fix the evaporator to the internal box.
Attention:
Be careful not to drop the screws in the gutter bellow the evaporator or in the damper duct.
If anything falls into one of these two components, it should be necessarily removed so as to preclude any
operation failures with the product.
2.9.3 Collect the cooling gas (in case there is any in the unit).
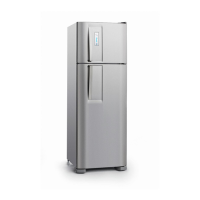
2.9.4 Remove the rubber shock absorber form the suction line and, with the help of a LRSZ pliers, cut the pipes of
the suction and the capillary lines next to the lockring ring.
2.9.5 Put the anaerobic Lokprep sealant in the suction/capillary lines pipes and in the entry and exit accesses of
the evaporator.
2.9.6 Use the lockring joint to connect the evaporator pipe to the suction/capillary line. Uphold the evaporator to
assure a pre-assembling with the joints.
2.9.7 With the help of a lockring pliers, close the lockring joints.
2.9.8 Pressurize the system with 120 lbf/pol
2
so as to check if there are any leaks in the joints or in the accessible
parts of the sealed unit.
2.9.9 No leaks being observed, re-operate the sealed unit.
 Loading...